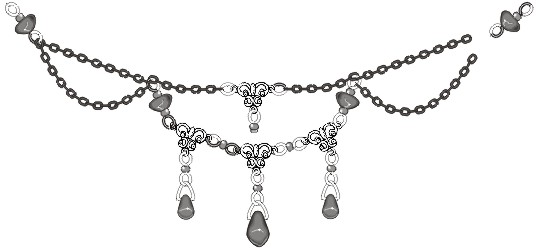
Faux Turquoise Necklace — Project Sheet #68-002-40
Parts: |
||
| 1 | 40-228 | 18" Finished Cable Chain |
| 1 | 37-421 | 7/8" Standard Head Pin |
| 11 | 37-721 | 7/8" Standard Eye Pins |
| 2 | 37-123 | Small Oval Jump Rings |
| 3 | 37-024 | Small Triangle Bail |
| 4 | 44-675 | Filigree with 3 loops |
| 1 | 23-319-571 | Faux Turquoise Lg. Teardrop Bead |
| 2 | 23-316-571 | Faux Turquoise Sm. Teardrop Bead |
| 4 | 23-296-571 | Faux Turquoise Triangle Nugget Bead |
| 14 | 23-941 | Glass White Heart Bead - Red |
Instructions: |
||
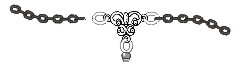
- Cut Chain:
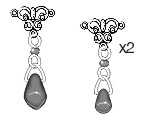
Remove ends of the clasp from the chain. Keep pieces! They will be reattached later. - Make Teardrop drops.
- String a Red White Heart Bead on an eye pin. Trim extra and make a loop.
***See Head & Eye Pin Directions*** - Using Cutters, trim each end of the Triangle Bail approx. in half. Each side should be the same length. Gently pinch into each hole of the Lg. Teardrop Bead.
- Connect one end loop of the White Heart Bd. to the Triangle Bail of the Teardrop and the other end of the White Heart to the bottom loop of a Filigree Finding.
***See Jump Ring Directions on how to open & close the eye pins*** - Continue the above steps 2 more times using the Sm. Teardrop Bd.
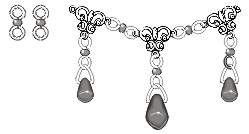
- Connect the 3 above pieces.
- Follow step 2a. two more times.
- Making sure the large Teardrop drop is in the middle, attach all 3 together by connecting them with the White Heart pieces. Be sure also that all 3 filigree findings are facing in the same direction.
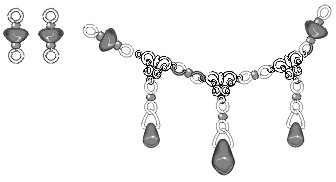
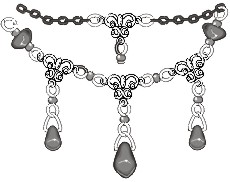
- With another 2 eye pins, string a White Heart, a Nugget Bead, and another White Heart. Make a loop.
Repeat (total of 2 pieces). - Now attach these pieces to the outside ends of the group of three.
- String a White Heart on the Head Pin. Trim and make a loop.
- Attach this to the bottom loop of the final filigree finding.
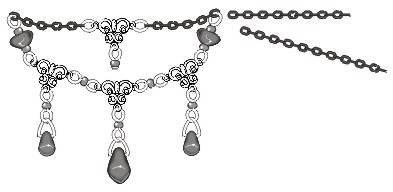
- Using the oval jump ring,
connect the 10-link pieces of chain to each side of the final filigree. - Connect the far ends of this chain to the far loops of step 3c. (Section 4 will sit above section 3d.)
- Connect Chain pieces.
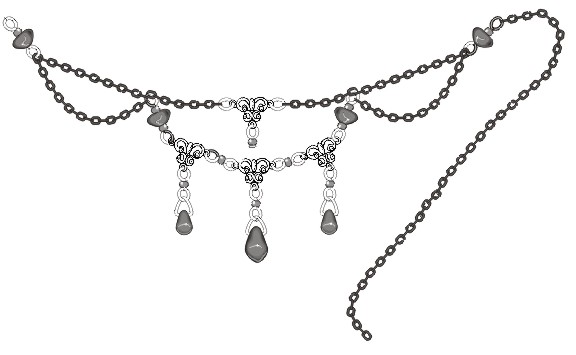
- With the project laying flat in front of you, front side up, attach a 16-link piece of chain and then a 20-link piece (in that order) to the right side end loop of step 3c. There should now be 3 pieces of chain attached to this link. The 10-link piece should be attached first, the 16-link piece should be in the middle and the 20-link piece on the outside. (Having the chain pieces in this order makes the necklace hang properly.)
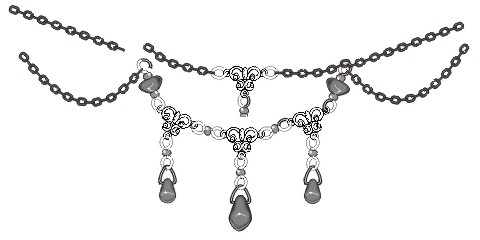
- Using an eye pin, string a nugget and a White Heart, and make a loop. Repeat with the final nugget and White Heart.
- On each side of the necklace, connect the 16 and 20 link piece to the base of this faux nugget piece. The 20-link should hang loosely down under the 16-link piece on both sides.
- Now attach the last 2 long pieces of chain, one to each side of the far loops of the above piece. (The White Heart should be on top.)
- With the last 2 eye pins, string 1 each White Heart and make a loop. Attach one of these on each end of the chain.
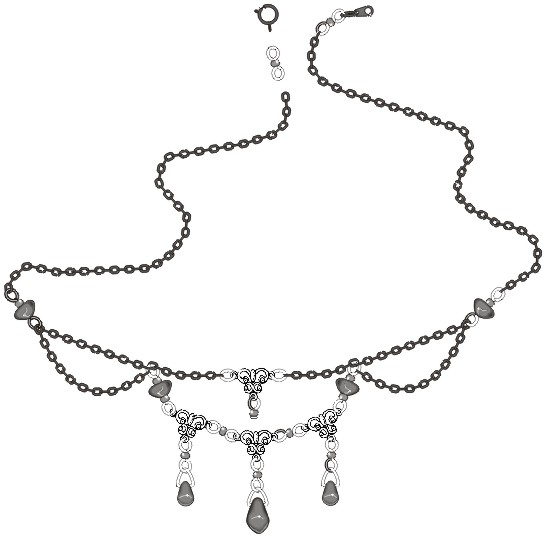
- Reattach the clasp.
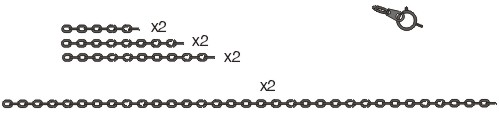
-
cut 2 pieces, each 10 links long
cut 2 pieces, each 16 links long
cut 2 pieces, each 20 links long
cut the remaining long piece in 2 equal parts.


-
***Notes:
- Necklace is now approx. 16-17" in length. To make longer, just add more White Hearts to the end (Step 5f.)
- We did not specify metal colors in the Parts list. All pieces come in White, Yellow, or Gunmetal. If using Gunmetal, substitute Small Rd. Jump Rings for the Triangle Bails (these do not come in the Gunmetal color). They are a slightly trickier to fit into the Teardrops but they WILL work. Carefully insert them and gently close them - being careful not to force closed; they will not close all the way, or bead will chip!
© Rings & Things,
Tips and Hints: |
To make nice round loops on head or eye pins:
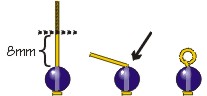
- String selected beads on the head or eye pin.
- Keep about 8mm (1/3") of wire. Cut off any extra.
- Use round nose pliers to grasp the wire just above the bead, at the arrow, and bend sharply away from you.
- Now use small round nose pliers to grasp the tip of the wire, and bend it smoothly around the pliers down close to the beads.
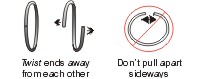
Jump Ring Hint: |
When you open and close jump rings, twist sideways instead of "ovalling" them. This keeps their shape better, which makes them easier to close all the way.
Return/Go to Main Project Page
Designer Tip Sheets