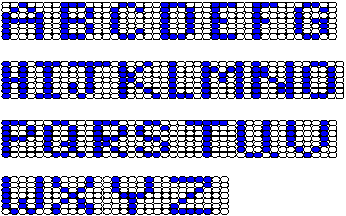
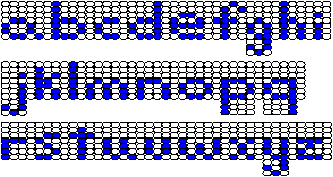
Lettering Chart 1 for Loom Beading


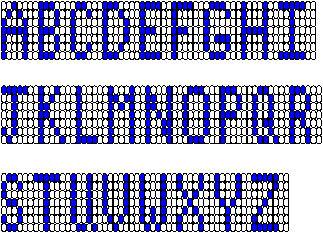
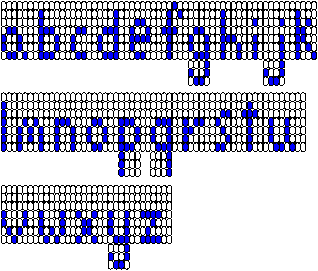
Lettering Chart 2 for Loom Beading


NEW Jewelry Design Gallery
Lettering Chart 1 for Loom Beading |
|
In this first lettering chart, the working threads go through the beads from top to bottom. To work them into your pattern, simply turn the chart so that the beads go the way the beads in your pattern go. If that makes the letters face the wrong way for you, then use the second lettering chart, where the working threads go left-right through the beads, instead of top-bottom.
|
Lettering Chart 2 for Loom Beading |
|
In this lettering chart, the working threads go left-right through the beads.
NEW Jewelry Design Gallery |