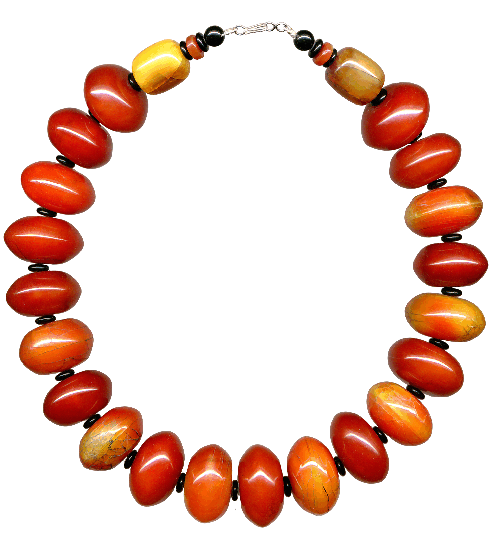
Heat-Treating (Faux Amber) Resin Beads — Project Sheet #68-002-39d
This necklace was strung with the following parts: |
||
| 20 |
Red/Brown Saucer Shape Amber Look Beads (discontinued) Other Resin Amber Look Beads |
|
| 25 | 23-238-021 | 8mm Black Glass Rondelle Beads |
| 2 | 23-228-021 | 8mm Black Round Glass Beads |
| 2 | Carnelian Beads | |
| 4 | 41-258-3 | Crimp Beads |
| 61-72_ | .018" 49-strand Beadalon® | |
| 1 | 39-596 | Sterling Hook & Eye Clasp |
Some Ideas
On this necklace, every other bead was heat-treated, and the beads in between were left the way they were created.We experimented with several Heat Treating methods including:
an electric heat gun (paint stripper), oxy-propane jeweler's torch, microwave, toaster oven, and being coated in mud before wrapping in aluminum foil and being placed in a wood stove.
The wood stove had the least effect. The microwaved beads were cooked on high for 2 minutes before much effect was noticed. The heat gun was the most controllable heat source. We could see the bead change color as we applied the heat. The heat gun cooked off some of the red outer layer, and some of the red outer layer was also buffed off of some of the beads using a standard buffer with a muslin wheel charged with Zam.
The heat gun produced the most controllable results. Some large crazing appeared while heating with the heat gun. The fine crackle lines were added by promptly dunking the beads in cold water after being heated. (Most of the "dunked" beads were heated using a the heat gun, jeweler's torch or toaster oven). To make the cracks stand out better, black shoe polish was applied and then wiped off.
Our favorite effects were obtained when we put the bead on a wire so we could rotate it while heating it with the heat gun.
The amber colored bead in the upper right corner was heated with the heat gun applied to one spot for quite a while. It made an attractively-colored translucent spot, with some opalescent cracks inside.

Instructions & Drawings by Polly Nobbs-LaRue
Scans by Valorie Nygaard
© Rings & Things,
Resin Bead Projects and Ideas - Crystal-Embellished Resin Bead - Embellished Resin Oval - Rubber-stamped Resin Beads
Return/Go to Main Project Page
Designer Tip Sheets