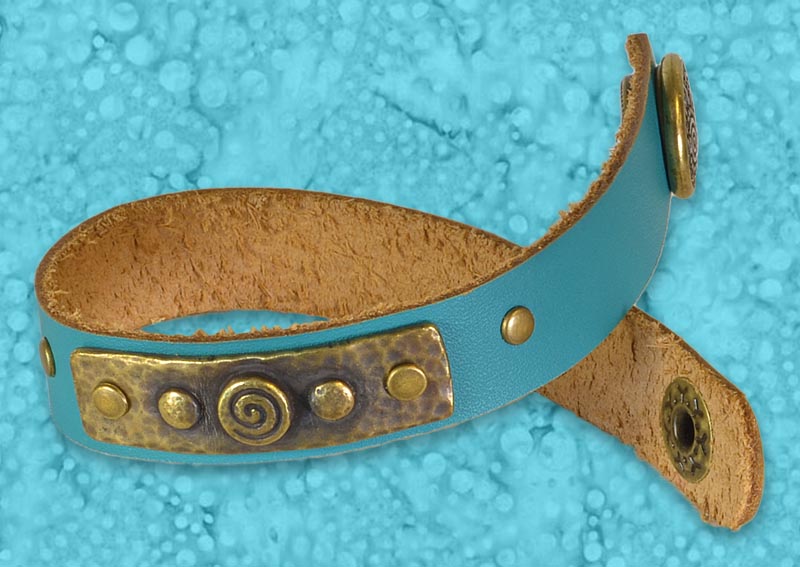
Spiral Lagoon Bracelet Tutorial
Created by: Polly Nobbs-LaRue
Designer Tips
- Place the TierraCast® link on the bracelet in desired location, and use a fine-point Sharpie® (or other extra black permanent marker) to mark where to punch the holes.
- Turn the rotary leather hole punch to 2.5mm, and punch holes in marked spots.
- Place the rivet post through the bottom of the bracelet, and set it on the steel block. Place the cap through the link, and push this onto the post. Place the rivet setter over the cap, and tap firmly with brass hammer. If it's still loose, then tap again until the rivet is set. See the Rivet Setter Illustration for details.
- Add other rivets as decorative elements if desired.
Free Technique Sheets & How-Tos

Suggested Supplies
- 1 each #51-810-05-17 Bracelet, Genuine Leather, 1/2", Cuff, Lagoon
- 1 pkg of 10 [use 1] #69-982-01-6 Link, Spirals & Rivets, Antiqued Brass Plated
- 1 pkg of 10 [use 4] #69-981-05-6 Rivet Set, Antiqued Brass Plated
Tools
- #69-345 Tool, Hammer, Brass, 2lb
- #69-125 Tool, Steel 4" Square Block
- #69-361 Tool, Rivet Setter
- #69-104 Tool, Rotary Leather Hole Punch
- #69-306-P Tool, Pliers, Bracelet Bending, Nylon Jaw
Jan 1st 2021
Our Bead Blog
-
Simply Springy 2-Hole Bracelet
Apr 28th 2025Designed by: Guest Designer Deb Floros Suggested Supplies 1 #61-840-50-01 Beadalon Cord, WildFire,
-
Exotic Statement Necklace
Apr 28th 2025Designed by: Guest Designer Deb Floros Suggested Supplies 1 #88-400-003-5 58x50mm Pewter Connector,
-
Rubber Tubing Necklace and Memory Wire Bracelet Set
Mar 21st 2025Designed by: Guest Designer Deb Floros Suggested Supplies 1 #61-622-02 2mm Rubber Cord, Bulk, for J


