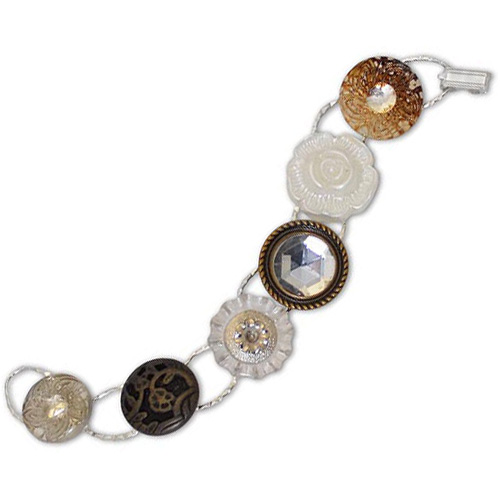
Cute as a Button Bracelet Tutorial

Created by: Claudia Crosby
Designer Tips
- Stretch and secure the bracelet ends to cardboard with tape. This prevents it from moving when gluing on the buttons.
- Use heavy duty hardware store cutters to remove the button shanks. This will keep your jewelry cutters from becoming marred.
- Sand or file smooth the backs of the buttons.
- Rough up the surface of the bracelet pads with a file or sandpaper before applying glue.
- Clean surfaces with alcohol before applying glue with a toothpick.
- Add charms or dangles if desired.
Suggested Supplies
- 1 each #60-260 Adhesive, E-6000, 3.7oz -or- Two-Part Epoxy
- 1 each #40-337-3 Bracelet, 7.2", Disk and Loop, Hammered Oval
- 1 pkg [use 6] #55-000-34 Tim Holyz idea-ology®, Accoutrements-Fanciful
Tools
- #69-257-0001 Sanding Sponges, 120-180 Grit
- Cardboard (from recycle bin)
- Heavy duty cutters (from hardware store)
- Heavy file (from hardware store)
- Masking tape
- Rubbing alcohol
- Toothpicks (from grocery store)
- Misc. buttons or found objects.
Jan 1st 2021
Our Bead Blog
-

Simply Springy 2-Hole Bracelet
Apr 28th 2025Designed by: Guest Designer Deb Floros Suggested Supplies 1 #61-840-50-01 Beadalon Cord, WildFire,
-

Exotic Statement Necklace
Apr 28th 2025Designed by: Guest Designer Deb Floros Suggested Supplies 1 #88-400-003-5 58x50mm Pewter Connector,
-

Rubber Tubing Necklace and Memory Wire Bracelet Set
Mar 21st 2025Designed by: Guest Designer Deb Floros Suggested Supplies 1 #61-622-02 2mm Rubber Cord, Bulk, for J