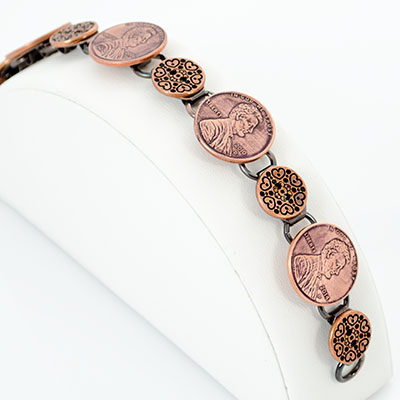
Lucky Penny Bracelet Tutorial

Created by: Tiffany White
Designer Tips
- Find pennies in the years of your choice.
- Clean the pennies with Penny Brite®.
- Using a permanent marker or Stamp Enamel, cover the surface of each penny in permanent ink. Allow them to dry.
- Using a sanding pad or steel wool, remove the the permanent ink, leaving some in the indents, so the design really pops.
- Attach the pennies and copper buttons to the disk on the bracelets with E-6000 or 2-part epoxy. Allow the bracelet to dry overnight before wearing.
- For secure gluing tips, also see: Gluing Metal Findings 101 (PDF)
Suggested Supplies
- 1 each #40-397-7 Antiqued Copper Plated Bracelet, 7-1/2", Oval Disk and Loop
- 1 each #86-220-07 Penny Brite® Copper Cleaner
- 1 each #60-260 Adhesive, E-6000 or (for best durability) 2-part epoxy
- 1 each #69-257-0004 3M Sanding Sponges, 800-1000 Grit
Additional Supplies
- 4 pennies
- 5 flat copper buttons
- Permanent marker or Stamp Enamel
Jan 1st 2021
Our Bead Blog
-

Simply Springy 2-Hole Bracelet
Apr 28th 2025Designed by: Guest Designer Deb Floros Suggested Supplies 1 #61-840-50-01 Beadalon Cord, WildFire,
-

Exotic Statement Necklace
Apr 28th 2025Designed by: Guest Designer Deb Floros Suggested Supplies 1 #88-400-003-5 58x50mm Pewter Connector,
-

Rubber Tubing Necklace and Memory Wire Bracelet Set
Mar 21st 2025Designed by: Guest Designer Deb Floros Suggested Supplies 1 #61-622-02 2mm Rubber Cord, Bulk, for J