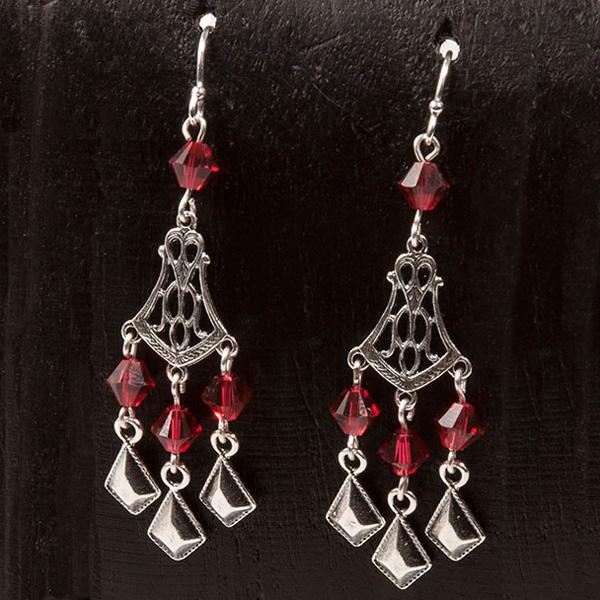
Red Kite Earrings Tutorial

Created by: Rita Hutchinson
Designer Tips
- Use fine tip round nose pliers in order to make loops that match the small loops on the eyepins. For looping instructions, see Jewelry Basics 101 (PDF)
- As you make the beaded connectors, pay careful attention to the angle of the loops you're making:
- Make each of the beaded connectors below the filigree, with parallel loops.
- The bead connectors at the top (connecting the earwires to the filigree) needs perpendicular loops for the earring to hang correctly.
- The 1-1/2" eyepins are long enough to each make two bead connectors (if you are comfortable with making your own eyepin from the left-over wire).
- This shape of earwire is very open, so wire keepers are strongly suggested to keep the earrings on the ear, or the earring card.
- 1 dozen [use 2] #34-599 Sterling Silver Earring Hook Findings, Ball End
- 2 each #44-199-11 Sterling Silver Flared Filigree - 3 Loops
- 6 each #44-048-15 Sterling Silver Kite Shaped Charm Dangle
- 1 dozen [use 8] #05-328-05-462 Swarovski 5328 Faceted XILION Bicone Beads, 5mm - Scarlet
- 1 ten [use 8]* #37-815 Sterling Silver Eye Pin, 1-1/2"
- 1 gross [use 2] #33-961 Clear Rubber Earring Back, Wire Keeper
Tools
- #69-056 EURO TOOL Side Flush Cutter
- #69-269-02 EURO TOOL German Round-Nose Jewelry Pliers, 4.5"
- #69-269-03 EURO TOOL German Chain-Nose Jewelry Pliers, 4.5"
- #66-214-18 Beading Mat (optional-keep beads from rolling away from you while you work)
Jan 1st 2021
Our Bead Blog
-

Simply Springy 2-Hole Bracelet
Apr 28th 2025Designed by: Guest Designer Deb Floros Suggested Supplies 1 #61-840-50-01 Beadalon Cord, WildFire,
-

Exotic Statement Necklace
Apr 28th 2025Designed by: Guest Designer Deb Floros Suggested Supplies 1 #88-400-003-5 58x50mm Pewter Connector,
-

Rubber Tubing Necklace and Memory Wire Bracelet Set
Mar 21st 2025Designed by: Guest Designer Deb Floros Suggested Supplies 1 #61-622-02 2mm Rubber Cord, Bulk, for J