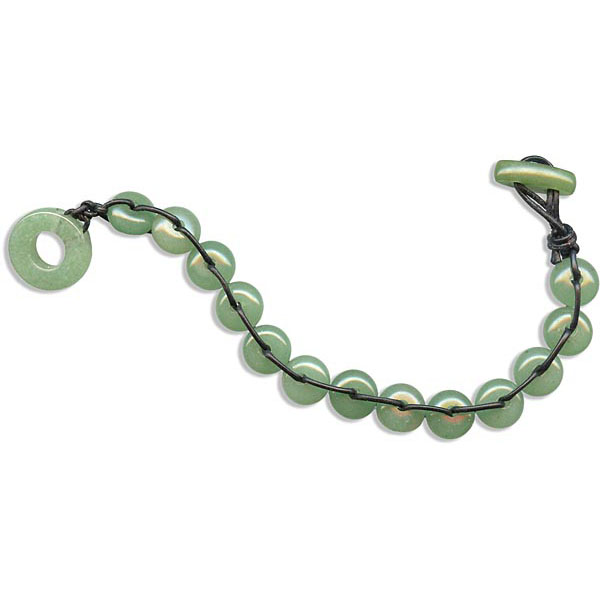
Tranquil Spangle Bracelet Tutorial
Created by: Polly Nobbs-LaRue
Designer Tips
- Determine desired bracelet length; add one inch. Cut a piece of cord 4 times this length. (7" bracelet + 1" = 8". 8" x 4 = 32")
- String the cord through the loop portion of the clasp. Center the clasp on the cord. Tie two overhand knots and check to see if your rondelles will face the right direction.
- String one cord through the left side of a rondelle, and the other cord through the right side. Pull tight (but not too tight). Does your bead face the way you want it to? If so, keep stringing back and forth through additional beads! If not, then take this bead off and tie one more overhand knot. Each overhand knot you add will switch the rondelles by 90 degrees.
- As you string each rondelle, keep the cord just tight enough to line up all the beads. Don't let them overlap.
- String 13 beads for a small wrist, 15 for an average wrist, 17 for a large wrist, and at least 20 for an anklet.
- After the last bead, tie 2-3 overhand knots, and add the toggle end of the clasp by stringing both cords out one hole and back through the other. Do NOT pull tight!! Leave a loop with 1/2 - 3/4" of slack, and gently make an overhand knot over your existing knots.
- See if you can close the toggle clasp. If you can't, then you didn't leave enough slack. Gently untie that final knot, and try again, leaving more slack this time.
- When everything works, gently tighten the final knot. Trim excess, and add a dab of flexible white glue if desired.

Suggested Supplies
- 1 each #60-280 Adhesive, Crafter's Pick™ The Ultimate (Optional)
- 1 strand [use 13-17] #21-001-011-03 Bead, Aventurine, 12mm Rondelle with Large Hole
- 1 each #21-009-51-011 Clasp, Toggle, Aventurine
- 1 ball [use 32"] #61-551-02 Leather, Cord, 1mm, 25yd
Tools
- #69-043 Tool, Scissors, Extra-Large Loop
Jan 1st 2022
Our Bead Blog
-
Simply Springy 2-Hole Bracelet
Apr 28th 2025Designed by: Guest Designer Deb Floros Suggested Supplies 1 #61-840-50-01 Beadalon Cord, WildFire,
-
Exotic Statement Necklace
Apr 28th 2025Designed by: Guest Designer Deb Floros Suggested Supplies 1 #88-400-003-5 58x50mm Pewter Connector,
-
Rubber Tubing Necklace and Memory Wire Bracelet Set
Mar 21st 2025Designed by: Guest Designer Deb Floros Suggested Supplies 1 #61-622-02 2mm Rubber Cord, Bulk, for J


