")
")
")
")
")
Description
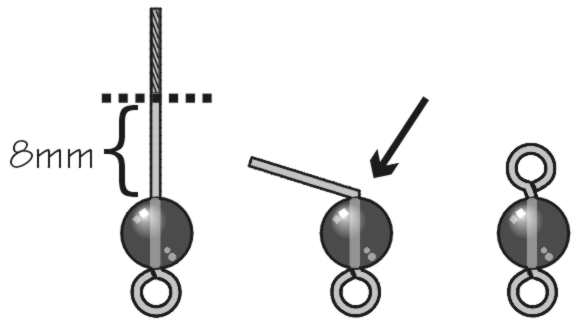
Basic Loops
- The loop size will depend on how much wire you leave past the end of your beads, and around which part of your pliers you bend the loop. A good loop size is usually about 1/3 of the way from the tip of your pliers, with about 8mm of wire.
- Use round needle-nose pliers.
- If using an eye pin, decide which way you want the loop to go - the same direction as the premade loop on the other end, or 90º off. Keep this direction in mind as you bend the rest of the wire.
- Cut off any excess wire (we suggest retaining 8mm above the top of your beads).
- Grip the pin just above the top bead (at the arrow above), and bend the wire sharply toward you.
- Grasp the tip of the wire with pliers, and bend smoothly away from you, around the pliers.
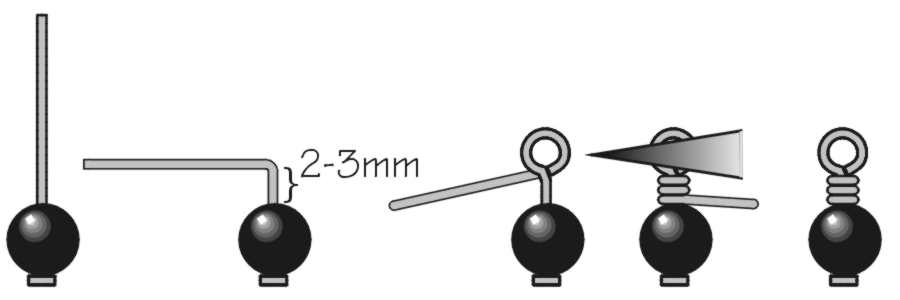
Wrapped Loops
- Use chain-nose pliers to grasp the wire just above the top of the bead.
- Use your fingers to bend the wire sharply over the top of the pliers, at a 90° angle. You should have 2-3mm of straight wire between the bead and the bend.
- Use round-nose pliers to grasp a spot just above the bend, and use your fingers to smoothly bend the wire all the way around the tip of the pliers.
- Now use pliers to grasp the wire firmly across the loop. Use your fingers or chain-nose pliers to carefully wrap the wire around the stem. For best control, experts recommend you break this step into a series of half wraps.
- Trim excess with flush cutters.
See Related Products links (below) for similar items and additional jewelry-making supplies that are often used with this item.
Details
Sold by: |
ten |
Length: |
2 inch |
Size: |
Approx. 2 |
Additional Info: |
10 per pack |
Thickness: |
24 ga (0.51mm) |
Country of Origin: |
India |
Style: |
Ball End |
")
")
")
")
")
")
")
")