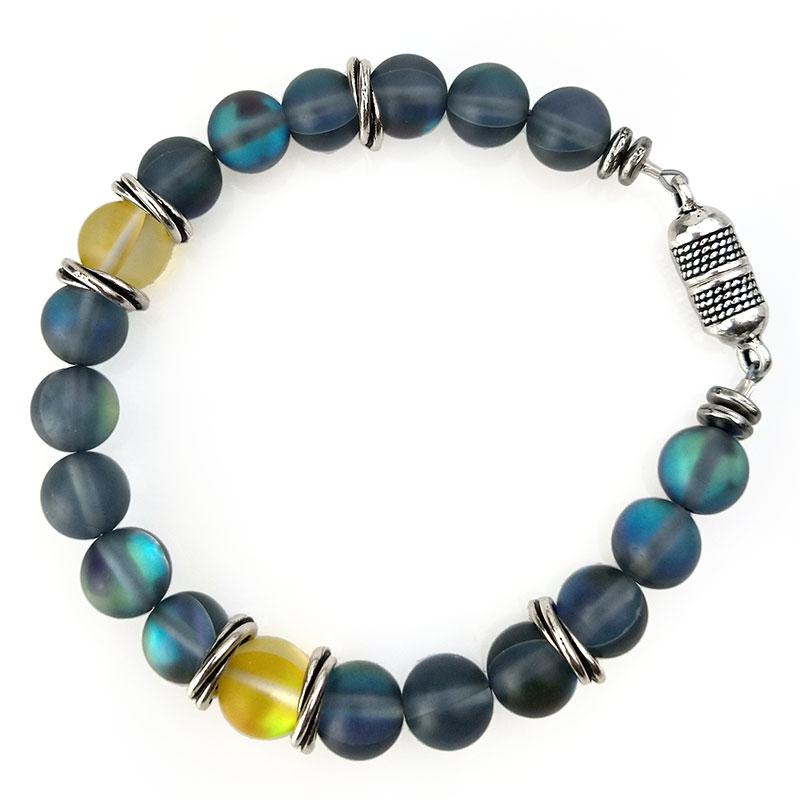
Optimistic Hope Bracelet Tutorial

The pictured design is a 9" bracelet, a good size for most men. These colors are inspired by Pantone's colors of the year for 2021, and pair nicely with the After Glow bracelet and earrings.
Created by: Janet Boyington
Designer Tips
- Lay out beads on a stringing board to check your length and pattern.
- Cut approximately 12" of stringing cable (3" more than the finished length of the bead section).
- Add a crimp tube, add clasp, and go back through crimp tube, making a small loop. Crimp securely, leaving a short tail. For more crimping instructions, see crimp plier packaging, or Jewelry Basics 101 (PDF).
- Your first 1 to 3 beads should have holes large enough to go over both the main wire and the "tail". This helps keep the stray end from scratching the person who will be wearing the bracelet.
- String all beads and pull tight -- but not too tight! Add final crimp other half of clasp, and before crimping final loop, make sure that you can shape the bracelet into a smooth circle.
Suggested Supplies
- 1 strand (use 17 beads) #28-010-10-025 Fused Glass 10mm Rounds in Matte Smoke AB
- 1 strand (use 2 beads) #28-010-10-325 Fused Glass 10mm Rounds in Translucent Yellow AB
- 1 10-pack (use 6 beads) #49-959-52-AS TierraCast Antiqued Silver Plated Beads, Twist Spacers
- 1 10-pack (use 4 beads) #49-955-07-AP TierraCast 7mm Nugget Heishi Beads, Antique Pewter
- 1 spool (use about 12") #61-783-49-87 Soft Flex Stainless Steel Beading Wire .024", 49 strand, 30 ft
- 1 pkg (use 2 pieces) #41-256-03-3 Beadalon Silver Plated Crimp Tubes, Size 3
- 1 each #39-470-03-AS TierraCast Magnetic Clasp Set, Rope Pattern
Tools
- Crimp Pliers
- Nippers
- Optional: stringing board
Jan 1st 2021
Our Bead Blog
-

Simply Springy 2-Hole Bracelet
Apr 28th 2025Designed by: Guest Designer Deb Floros Suggested Supplies 1 #61-840-50-01 Beadalon Cord, WildFire,
-

Exotic Statement Necklace
Apr 28th 2025Designed by: Guest Designer Deb Floros Suggested Supplies 1 #88-400-003-5 58x50mm Pewter Connector,
-

Rubber Tubing Necklace and Memory Wire Bracelet Set
Mar 21st 2025Designed by: Guest Designer Deb Floros Suggested Supplies 1 #61-622-02 2mm Rubber Cord, Bulk, for J