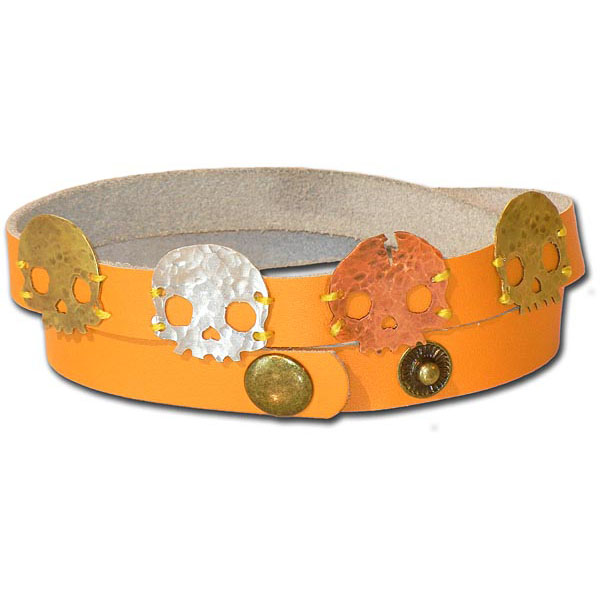
Skull Kid Leather Wrapped Bracelet Tutorial

Created by: Jaci Boston
Designer Tips
- Create a template from a copyright-free image.
- Glue your image pattern to the metal with rubber cement, and cut along the pattern with a jeweler's saw.
- Keep the saw blade well lubricated to create ease while sawing.
- To avoid breaking your blades, keep the saw upright, without tilting, while you're sawing.
- Punch holes prior to texturizing the skulls.
- You can use any sort of hammer to give your metal a unique texture.
- Use a nylon or a rawhide mallet to flatten out your metal when you're done texturing.
- Use a heavy duty sewing needle to pierce the leather and double the thread.
- For more information on piercing and sawing and other metalworking technques, check out
The Complete Metalsmith by Tim McCreight (#62-011>62-011) or The Workbench Guide to Jewelry Techniques (#62-920>62-920). - Also, consider taking a jewelry-making class through a local college or art school.
Suggested Supplies
- 1 ea #51-811-24-42 Bracelet, Genuine Leather, 1/2", Wrap
- 1 ea #69-189 Cut Lube, 2oz
- 1 ea #64-970-24 Sheet, 24 Gauge, 6x6"
- 1 ea #64-980-24 Sheet, 24 Gauge, 6x6"
- 1 ea #64-990-24 Sheet, 24 Gauge, 6x6"
- 1 tube [use 12-24" yellow] #61-719-03 SuperLon, D, Summer Flowers
- 1 ea #86-343 Win-Ox™, 3 oz.
Tools
- #62-011>62-011 Book, The Complete Metalsmith: An Illustrated Handbook
- #62-920>62-920 Book, The Workbench Guide to Jewelry Techniques
- #69-169-52 Knew Saw Frame, Cam-Lever, 5"
- #69-339-20 Saw Blade, #2/0
- #69-135 Tool, Hammer, Ball Pein, 4oz
- #69-122 Tool, Mallet, Rawhide
- #69-235 Tool, Metal Punch, Two Hole
- #69-125 Tool, Steel 4" Square Block
- 0000 Steel wool
- Copyright-free image
- Cotton swabs
- Heavy duty sewing needle
- Rubber cement
- Scissors
Feb 1st 2021
Our Bead Blog
-

Simply Springy 2-Hole Bracelet
Apr 28th 2025Designed by: Guest Designer Deb Floros Suggested Supplies 1 #61-840-50-01 Beadalon Cord, WildFire,
-

Exotic Statement Necklace
Apr 28th 2025Designed by: Guest Designer Deb Floros Suggested Supplies 1 #88-400-003-5 58x50mm Pewter Connector,
-

Rubber Tubing Necklace and Memory Wire Bracelet Set
Mar 21st 2025Designed by: Guest Designer Deb Floros Suggested Supplies 1 #61-622-02 2mm Rubber Cord, Bulk, for J