null

425 results for '69-182'

News & Information (421)

    Night Reflections Enamel Earrings Tutorial(Post)

    Created by: Summer MelaasDesigner TipsUse the smaller end of the 2-hole metal punch to punch a 1/16" hole near the top of the blanks. Be sure to center it, so the earrings hang properly.Clean the bla ...

    Bead Curtain Earrings Tutorial(Post)

    Learn to make unusual chain fringe earrings with a dash of crystal. FREE Jewelry Tutorials. No blinkin ads. No login required. Created by: Rita Hutchinson Designer TipsThe bead pod just bar ...

    Red Light / Green Light Enamel Earrings(Post)

    Your Choice: They're balloons, streetlights or lollipops!  Created by: Summer Melaas and Polly Nobbs-LaRue   Designer TipsPunch a 1/16" hole in each blank, directly opposite the existing lo ...

    99 Luftballons Tutorial(Post)

    ok, so maybe it's just 2 Red Balloons, not 99...Created by: Summer Melaas and Polly Nobbs-LaRue   Designer TipsPunch a 1/16" hole in each blank, directly opposite the existing loop or hole.Clean ...

    Fold-Formed Earrings Tutorial(Post)

    Created by: Polly Nobbs-LaRueDesigner TipsJewelry Lab: 52 Experiments, Investigations and Explorations in Metal has a great tutorial on fold forming. Plus of course, Charles Lewton-Brain's book Foldf ...

    Pretty in Pink Bracelet Tutorial(Post)

    Created by: The Swarovski Design Team Designer TipsFor best way to open and close loops, see Jump Ring Hint in Jewelry Basics 101 (PDF). Suggested Supplies1 6-pack #02-088-34-182  ...

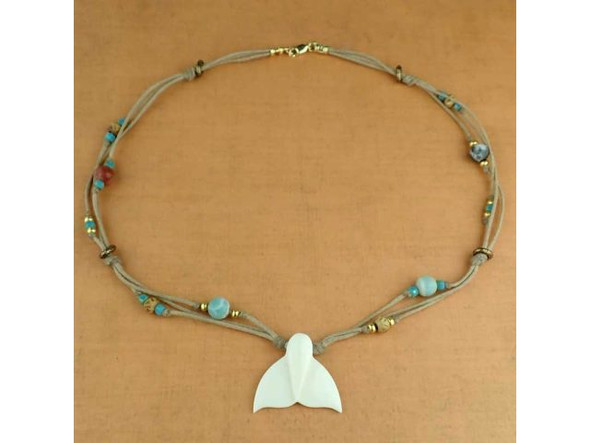
    Aqua Love Necklace Tutorial(Post)

    Created by: Cindy MorrisDesigner TipsString necklace and finish ends following directions in Beading Cable How-To Sheet below. Use Wire Guardians for a professional finish at the ends of yo ...

    Safe Journey Pendant Tutorial(Post)

    Created by: Mollie Valente   Designer TipsTo add texture, place the metal blank on the steel block and use the ball end of the hammer to make a lightly hammered surface.After hammering, the meta ...

    Go West Necklace Tutorial(Post)

    Created by: Mollie ValenteDesigner TipsMaking the Pendant:Cut the handle loop of the heart charm and file smooth.Mark hole locations with a Sharpie®, and use the hole punch to make two 1/16th-inch ha ...

    Pop of Color Enamel Earrings Tutorial(Post)

    Created by: Summer MelaasNote: We've had great success enameling our 24-gauge brass blanks, but for the most consistent color results, this enamel is best with copper blanks. Designer TipsTexture the ...

    Witchy Earrings Tutorial(Post)

    Created by: Jaci BostonDesigner TipsKeep the saw blade well lubricated to create ease while sawing.To avoid breaking your blades, keep the saw upright, without tilting, while you're sawing.For perfec ...

    Go Round-and-Round Enameled-Copper Earrings Tutorial(Post)

    Created by: Mollie Valente Designer TipsMake two enameled copper washers. You can either use the enamel colors of your choice, or the colors listed in the suggested materials. Follow instruction ...

    Eclipse Cuff Links Tutorial(Post)

    Created by: Mollie ValenteDesigner TipsClip the loop off both moon charms, file smooth, and sand with a 600 grit polishing cloth.Use a dapping block to gently dome the moon charms.Soft solder each mo ...

    Enameled Hidden Heart Tutorial(Post)

    Created by: Mollie ValenteMake your Enamel DiskUse the dapping set to dome the copper blank.(See Rings & Things blog post: How to Dap and Dome Metal Jewelry.)Fire the concave (back side) of the c ...

    Dark Skies Enameled Pendant Tutorial(Post)

    Created by: Rita HutchinsonDesigner TipsUse dapping block to shape blank.After dapping, punch 1/16" hole using the smaller (silver) side of a EuroTool "helicopter" punch.Clean blank with penny brite ...

    Spiral Lagoon Bracelet Tutorial(Post)

    Created by: Polly Nobbs-LaRueDesigner TipsPlace the TierraCast® link on the bracelet in desired location, and use a fine-point Sharpie® (or other extra black permanent marker) to mark where to punch ...

    Mehandi Coil Bracelet Tutorial(Post)

    Created by: Rita HutchinsonDesigner TipsUse shears to cut flat wire. Texture as desired with texturing hammer or metal stamps.Create coil by wrapping at an angle around large barrel of bail making pl ...

    Infinite Path Bracelet Tutorial(Post)

    Created by: Kameron FoxDesigner TipsThese earrings and matching bracelet were created using the step by step instructions on page 92 of Beautiful Wire Jewelry for Beaders: Creative Wirework Projects ...

    Busy Bee Earring Tutorial(Post)

    Created by: Tiffany WhiteDesigner TipsTape the stamping blanks to the steel block. Use a permanent marker to draw lines where you want to stamp the phrase "BUSY BEE".When stamping, make sure that eac ...

    Candara Bracelet Tutorial(Post)

    Created by: Polly Nobbs-LaRue   Designer Tips  Unspool approximately 26" of copper wire. Pull it smooth with flat nylon-jaw pliers.Trim the end neatly (flush) with flush cutters.Use ring-be ...

    Double Wrap Hammered Rings Tutorial(Post)

    Depending on the beads you use, this quick and easy unisex design can go from frilly and feminine to macho and masculine.Created by: Michelle HorningDesigner TipsFor step-by-step instructions, see th ...

    Delightfully Dotty Enameled Necklace Tutorial(Post)

    Created by: Rita HutchinsonDesigner TipsCut copper sheet to size or use a premade copper blank. If you have cut your own blank, punch hole in appropriate location and file edges to remove roughness.C ...

    Merry Tag Tutorial(Post)

    Created by: Polly Nobbs-LaRue Designer TipsClean the door blanks in a tumbler for 2-3 hours, or with fine-grit sandpaper and a polishing cloth.Find a pleasing portion of the Christmas tin, that fits ...

    Let it Snow Stamped Necklace Tutorial(Post)

    Created by: Cindy MorrisDesigner TipsCut 24-gauge sterling sheet into a 1" to 1.5" square. (Cindy's is about 1.25" or 32mm)Use a file to smooth the edges and round the corners.Create the stamped meta ...

    Brass Arrow Earrings Tutorial(Post)

    Created by: Mollie ValenteDesigner TipsCut the wire in half and form an "eye" loop on one end of each wire.Flatten the loop by striking with a chasing hammer on a steel block.Add the following beads ...

    Ava's Ladies in Waiting Bridesmaid Necklaces Tutorial(Post)

    Created by: Valorie Nygaard-Pouzar   Designer TipsCarefully stamp the metal blank.Antique the charm so the impressions are more pronounced.Gently sand and polish.Attach to jump ring & chain.

    Slam Dunk Bracelet Tutorial(Post)

    Created by: Rita HutchinsonDesigner Tips Stamp player number onto the tag. (For detailed stamping instructions, see link below.)Add additional tags for multiple players, or use larger tags for team n ...

    It's Good to Be King Tie Bar Tutorial(Post)

    Created by: Mollie ValenteDesigner TipsCut the copper strip to about 2" in length. Use a texture hammer or pattern stamp to apply a random pattern. File the corners and sides until smooth.Soft solder ...

    Memory Journal Necklace Tutorial(Post)

    Created by: Sondra BarringtonDesigner TipsSee the Create a Hinged Metal Memory Journal blog post for a step-by-step tutorial with images.Texturize or etch* various metal pieces for the journal and pa ...

    Winged Heart Brooch Tutorial(Post)

    Created by: Rita HutchinsonDesigner TipsUse two-part epoxy to glue two magnets to the back of the BRONZclay™ piece.Two earring magnets and backings make for a secure hold on clothing.When not being w ...

    Page 394 Bookmark Tutorial(Post)

    "Turn to Page 394" is a quote known to most Harry Potter fans. What will you put on your custom bookmarks?Created by: Rita HutchinsonDesigner TipsThe stamp guides are tremendously helpful for keeping ...

    DIY Adjustable Bangle Bracelet Tutorial(Post)

    This style of bracelet is a great one-size-fits-all design. OK, so technically the same bracelet size won't fit both a petite 6-year-old and a Samoan warrior, but odds are that you can determine one ...

    Enameled Orchid Eye Tutorial(Post)

    Created by: Mollie Valente Make your Enamel DiskUse the dapping set to dome the copper blank. (See Rings & Things blog post: How to Dap and Dome Metal Jewelry.)Fire the concave (back side) o ...

    Hidden Ecosystem Cuff Bracelet Tutorial(Post)

    Created by: Cindy Morris Designer Tips Stamp, hammer and punch holes in the copper until you are satisfied.File any sharp edges.Wrap the strip around a small bottle (aspirin size works well ...

    All Seeing COPPRclay® Bracelet Tutorial(Post)

    Created by: Joe HentgesDesigner TipsCreate the COPPRclay centerpiece according to the manufacturer's instructions. Like most other metal clays, COPPRclay must be fired in a kiln. COPPRclay shrinks ap ...

    Enlightened Earring Tutorial(Post)

    Created by: Rita HutchinsonDesigner TipsUsing a longer head pin allows for double "messy" wrapping at the top of each crystal.Attach 4 crystal dangles to each of 6 jump rings. 2 extra jump rings face ...

    The View Necklace Tutorial(Post)

    Created by: Cindy MorrisDesigner TipsStamp front piece first (I used the "l" to make diagonal lines on the window frame). Flatten. Patina with Win-Ox™ and clean with steel wool.Clean back piece with ...

    Arrow - Etched Copper Bracelet Tutorial(Post)

    Created by: Summer MelaasDesigner TipsOptional: Punch a hole in the corner of the blank, following instructions in hole-punch below. After completing bracelet, dangle a charm or beaded dangle of your ...

    Jet Scarab Copper Ring Tutorial(Post)

    Depending on the beads you use, this quick and easy unisex design can go from frilly and feminine to macho and masculine.  Created by: Michelle Horning   Designer TipsFor step-by-step instr ...

    Fly Bee! Bracelet Tutorial(Post)

    Created by: Polly Nobbs-LaRueDesigner TipsPunch 1/16" holes in the bracelet where you want to place the rivets.Run the first rivet through the leather, place a washer on it, and use a fine-point Shar ...

    Skull Kid Leather Wrapped Bracelet Tutorial(Post)

    Created by: Jaci BostonDesigner TipsCreate a template from a copyright-free image.Glue your image pattern to the metal with rubber cement, and cut along the pattern with a jeweler's saw.Keep the saw ...

    Cowgirl Cuff Bracelet Tutorial(Post)

    Created by: Tiffany WhiteDesigner TipsUse the pein side (rounded) of your hammer to texturize the surface of the copper metal strip on the steel block.Using your metal shears, cut a 3/4 inch by 4 inc ...

    Cave Man Necklace Tutorial(Post)

    Created by: Jaci BostonDesigner TipsCarefully plan the cutting pattern. The shape of these cuts creates decorative prongs or tabs to hold the gemstone slab bead.For this design draw the shape to be c ...

    Captured Aventurine Bracelet Tutorial(Post)

    Created by: Polly Nobbs-LaRueDesigner TipsUnspool approximately 20" of copper wire. Pull it smooth with flat nylon-jaw pliers.Trim the end neatly (flush) with flush cutters.Coil the wire around a 14- ...

    Poppy Field Pendant Necklace Tutorial(Post)

    Created by: Mollie ValenteDesigner TipsSelect and clean two matching glass pieces.Select an image and cut it to match the glass shape and size.Carefully wrap the glass with copper-foil tape. To creat ...

    Drops of Light - Pearl Earrings Tutorial(Post)

    Created by: Mollie ValenteDesigner TipsFor step-by-step pictorial instructions on making this pair of earrings, see Mollie's blog article: ...

    Pennant Pendant Necklace Tutorial(Post)

    Created by: Rita HutchinsonDesigner TipsUse texture plates from the tool kit to create designs on each torch-fired metal clay pennant. Patina each with liver of sulfur.Center one of the pennants on t ...

    Fresh Pots Bracelet Tutorial(Post)

    Created by: Jaci BostonDesigner TipsUse silhouettes of multiple teapots and teacups to make this design. No two are alike.Use rubber cement to glue the paper images to the metal.Saw vertically at all ...

    Pawrific Enamel Necklace Tutorial(Post)

    Created by: Summer MelaasDesigner TipsPunch a hole in the top corners of your copper blank. File any sharp bits.Clean your blank very well with warm water and Penny Brite.Cut your 22 ga bare copper w ...

    Sweet and Sour Engraved Bracelet Tutorial(Post)

    Edged cuff bracelets also work great for leather, fabric, beaded designs and more!Created by: Rita HutchinsonDesigner TipsStamp or sketch design on aluminum sheet if desired.Follow marked (or freehan ...

    Beachcomber Wine Glass Charm Set Tutorial(Post)

    Created by: Veronica GreenwoodDesigner TipsCreate a colorful beaded drop for each wine glass marker, using gemstones or other beads of your choice. New to jewelry-making? See Basic Jewelry-Making Tec ...

    Layered Floral Earrings with Stamping Tutorial(Post)

    Created by: Guest Designer Deb FlorosSuggested Supplies2  #44-722-28-0 Brass Stamping Blank, Long Oval Drop, 41mm1 #69-245-103 ImpressArt Metal Stamp, Floral Swirl1 6-piece pack #44-180-027-6 An ...

    The North Star Necklace Tutorial(Post)

    Created by: Mollie ValenteDesigner TipsCreate a bail using a 5/16" x 3" piece of 24-gauge copper sheet: Cut, file, stamp, punch and ream the holes a bit larger. Use bail-making pliers to bend the sta ...

    Area 51 Pin Tutorial(Post)

    I made this pin when the UFO and alien stamp first came out, but they are no longer in production. But there are so many other fun options for customizing this blank with features for other states! A ...

    The Imp Bracelet Tutorial(Post)

    Created by: Rita HutchinsonDesigner TipsPlan out design, and stamp words and symbols. ("I Drink and I Know Things" is a quote from Game of Thrones, and the colors used here are the colors of house La ...

    On the Bias Corrugated Metal Earring Tutorial(Post)

    Created by: Mollie ValenteDesigner TipsCorrugate the metal blanks by feeding them through the Tube-Wringer® on the diagonal. Squeeze the hand grip to maintain even pressure while turning the turn key ...

    In the Moment Leather Cuff Bracelet Tutorial(Post)

    Created by: Mollie Valente   Designer TipsCustomize the word blank:Place the word blank on the steel block and create a dappled texture with the ball peen side of the chasing hammer.Use the brac ...

    Crystal Tree Earrings Tutorial(Post)

    Designer TipsAdd a smoky quartz cube bead to the head pin, then add the largest fern green margarita bead, then 1 each of the rest of the margarita beads in decreasing size order, and top with the me ...

    Water Droplet Earrings Tutorial(Post)

    Created by: Liz GrafDesigner TipsCut 8 links of your selected chain.I deconstructed and used part of a gunmetal chain tassel, or you can use 8 links from some scrap antiqued brass cable chain.Hook Br ...

    Hearts and Rain Earrings Tutorial(Post)

    Created by: Polly Nobbs-LaRueDesigner TipsAdd bicone crystals to the head pins, and make wrapped loops directly onto the loops of the filigree.For the top beaded pin, cut the ball off a ball-end head ...

    Foliage Necklace Tutorial(Post)

      Created by: Rita Hutchinson   Designer Tips  Make 45 wire-wrapped loop dangles, each with a single crystal bicone. See Basic Jewelry-Making Technique Sheet (PDF)Use a jump ring ...

    Shadow Angel Earring Tutorial(Post)

    Note: this design originally used the (discontinued) Lilac Shadow color of dome bead. Suggested subs: Jet Black Large Dome, or Crystal AB Small Dome. Both are 11mm in diameter.Created by: Rita Hutchi ...

    Chakra Khan Ear Threaders Tutorial(Post)

    Created by: Veronica Greenwood Designer TipsCut a piece of wire and make a wrapped loop on one end. Attach your loop to your ear thread. Add one purple (amethyst) bead to the wire and finish your loo ...

    Superstar Earrings Tutorial(Post)

    Created by: Rita HutchinsonDesigner TipsThe WildFire™ cord has enough body to pass through the beads without a needle, but if you prefer, you can use a 4" Igolochkoy beadwork needle (#65-054) or othe ...

    Little Spiral Necklace Tutorial(Post)

    Created by: Rita HutchinsonDesigner TipsThe extra jump rings used when hanging the cluster of charms on this necklace help keep the spiral charm facing forward.For instructions on making beaded head ...

    5 Minute Rings Tutorial(Post)

    Created by: Polly Nobbs-LaRueDesigner TipsCut a 20-gauge or 24-gauge 0.25" (wide) strip of copper, brass or sterling sheet approximately 2.75" long.Smooth and straighten with a nylon hammer.Optional: ...

    Infinite Path Earrings Tutorial(Post)

    Created by: Kameron FoxDesigner TipsThese earrings and matching bracelet were created using the step by step instructions on page 92 ofBeautiful Wire Jewelry for Beaders: Creative Wirework Projects f ...

    October Ombre Bracelet Tutorial(Post)

    Created by: Rita HutchinsonDesigner TipsTexture and stamp the sterling heart with ribbon design stamp. New to metal stamping? See step-by-step instructions in our free Metal Stamping 101 PDF.Apply st ...

    Tri-Tone Cuff Bracelet Tutorial(Post)

    Created by: Rita Hutchinson   Designer TipsUsing a pre-cut and finished bracelet blank, and precut 6" patterned wire makes this bracelet assemble in a snap!Apply pattern to copper blank with des ...

    Upcycled Cog Bracelet Tutorial(Post)

    Created by: Polly Nobbs-LaRueDesigner TipsWhenever walking, watch for unusual/interesting metal objects on the ground! When they are an unknown metal, do not try antiquing them or punching holes with ...

    Forest Fairy Angel Earring Tutorial(Post)

    Created by: Rita HutchinsonDesigner TipsAdd crystals, angel wing beads and spacers to head pins and finish with a simple loop. (See Making Earrings 101 below for instructions to make loops.)Because t ...

    With Grace Earrings Tutorial(Post)

    Created by: Mollie ValenteDesigner TipsUse a steel burnisher to carefully set the cushion stone in the bezel setting.For illustrated step-by-step instructions, see How to Set Rivoli Stones in Bezels ...

    Basketball Finals - DIY Team Colors Bracelet(Post)

    C'est La Vie Finals BraceletWhether you defy history, or regularly make history, we've got your colors -- over 80 colors to choose from, and a nice variety of frame setting options.Created by: Polly ...

    Sweet Skull Pendant Tutorial(Post)

    Created by: Rita HutchinsonDesigner TipsUsing ball-end head pins, make 8 beaded loop dangles in flowery colors. Use one metal rondelle on each side of the crystal bead for fuller dangles. Wrapped loo ...

    Venus Necklace Tutorial(Post)

    Created by: Mollie Valente Designer TipsUsing a decorative metal stamp on a solid copper tube-top bails is an easy way to sign your work, or simply give a secret little accent to the back of a p ...

    Fused Spirals Earrings Tutorial(Post)

    Created by: Rita Hutchinson Designer TipsLightly dome (dap) the blank in dapping block.How to Dap (Dome)Clean blank with penny brite and dry.Apply counter enamel to back of blank. Fire and allow ...

    Cumulus Threader Earrings Tutorial(Post)

    Created by: Mollie Valente Designer TipsTwist a jump ring to open it extra wide.Loop the jump ring around a single pearl in the pearl ball bead.Attach the loop of an ear thread to the jump ring.Twist ...

    Victoria - Etched Earrings Tutorial(Post)

    Created by: Summer MelaasDesigner TipsEtch earrings (See etching tutorial below).Place cushion in cushion setting and fold over tabs using nylon-jaw pliers or a burnisher.Attach French hooks to top o ...

    Wonder Woman Riveted Cuff Bracelet Tutorial(Post)

    Created by: Polly Nobbs-LaRueDesigner TipsThis bracelet is super fast and fun to make, once you have the necessary tools.The Domed Piercing Base allows you to pierce the domed bracelet without leavin ...

    Emma Dog Tag Tutorial(Post)

    Emma is in our warehouse daily, and I wanted to honor her with some Jewelry.Created by: Rita HutchinsonDesigner TipsNew to stamping? See Metal Stamping 101.The 3mm Bridgette stamp set allowed a long ...

    Interchangeable Constellation Bangle Bracelet Tutorial(Post)

    Create sparkling constellation jewelry in an hour, using minimal supplies and Swarovski Ceralun Ceramic Epoxy Clay, Crystal Clay, or your favorite epoxy clay. This quick-change bracelet form allows y ...

    Soar With Me Cuff Bracelet Tutorial(Post)

    Created by: Valorie Nygaard-PouzarDesigner TipsPatina, seal and use bracelet-bending pliers to apply a gentle curve to the metal sparrow before riveting it to the leather.For hints on applying Vintaj ...

    Lady 12 - Go Hawks - Earrings Tutorial(Post)

    Created by: Liz GrafDesigner TipsPlace your spacer beads, cobalt blue bicones, and peridot round crystals on the eye pin in order.Create (and close) your eye pin the opposite direction of the way the ...

    Sunny Day Skull Earrings Tutorial(Post)

    Created by: Rita HutchinsonDesigner TipsCreate skull dangles and outer-circle Size 6 E bead dangles with headpins, corrugated beads, and seed beads.For step-by-step direction on making head pin loops ...

    Pumpkin on the Vine Earrings Tutorial(Post)

    Created by: Mollie ValenteDesigner TipsMake 2 matching spiral head pins. Follow the steps from the Rings & Things blog post "How to Make Spiral Head Pins.Add the following beads to a spiral head ...

    Christmas Tree Window Tutorial(Post)

    Created by: Polly Nobbs LaRue Designer TipsClean the door blanks with fine-grit sandpaper and a polishing cloth, or in a tumbler for 2-3 hours.Find a pleasing portion of the Christmas tin, that fits ...

    Sun Tea Enameled Pendant Necklace Tutorial(Post)

    Created by: Rita HutchinsonDesigner TipsClean the blank with Penny Brite per package instructions. Rinse thoroughly and avoid touching further.Spray klyr fire onto blank, and sift on a base coat of w ...

    Fidget - Hinged Book Pin Tutorial(Post)

    Created by: Polly Nobbs-LaRueDesigner TipsRead the instructions included with the rivet piercing/setting tool (#69-900>69-900). Also check out the instructional video for more information on using ...

    Shining Stars Lashed Earrings Tutorial(Post)

    Created by: Mollie Valente Designer Tips For a version of this project with step-by-step images, check out Mollie's How to make Lashed Kidney Wire Earrings blog post.Choose two matchin ...

    Flores de Muertos Bracelet Tutorial(Post)

    Created by: Rita HutchinsonDesigner TipsUse 4 of each color crystal to create 28 wrapped loop crystal dangles.This finished length is 8.5". Use larger or smaller jump rings to adjust the length.Free ...

    TierraCast Bee Bracelet Tutorial(Post)

    Created by: TierraCastDesigner TipsCut 20" of 1.5mm cord in your choice of color and cut again into 2 pieces, one 12" and one 8".Feed one open end of each cord through each end of honeycomb link (as ...

    Happy Hour Wine Glass Markers Tutorial(Post)

    Created by: Janet BoyingtonDesigner TipsCreate stamped charms using Monogram stamp set. New to stamping? See Metal Stamping 101 for an overview, or download our step-by-step PDF stamping guide.Use St ...

    Puppy Love Pin Tutorial(Post)

    Created by: Mollie ValenteDesigner TipsThe Complete Metalsmith (#62-011) provides a useful chart for selecting saw blades. Or scroll down to the comments section of our "Tips for Sawing Sheet Metal w ...

    grrrrr / breathe bracelet tutorials(Post)

    Created by: Polly Nobbs-LaRueDesigner TipsUse a ruler and Sharpie to draw a dot or line in the middle if the bracelet. Write your word or phrase on a piece of paper, about the size you'll be stamping ...

    Impression COPPRclay Bracelet Tutorial(Post)

    Created by: Sondra BarringtonDesigner TipsCreate the COPPRclay links according to the manufacturer's instructions. Like most other metal clays, COPPRclay must be fired in a kiln. COPPRclay shrinks ap ...

    Rough Around The Edges Hoop Earrings Tutorial(Post)

    A drawplate is excellent for hardening soft wire without making it brittle, so custom ear wires and handmade hoops are springy and keep their shape.Created by: Rita HutchinsonDesigner TipsCut a lengt ...

    Sandra Leather Bracelet Tutorial(Post)

    Created by: Rita Hutchinson   Designer TipsSqueeze out a few drops of patina (or your favorite metallic acrylic paint) on the craft sheet. Apply patina to the edges of the cuff, and then dry-bru ...

    Mauvey Marigolds Earrings Tutorial(Post)

    Created by: Rings & Things StaffDesigner TipsThe backs of some resin flowers may be slightly concave. For better gluing results, run them over an emery board (or Vintaj® Metal Reliefing Block) to ...

    TierraCast Succulent Post Earrings Tutorial(Post)

    Created by: TierraCastDesigner TipsPlace one bicone, one 8-10mm amethyst rondelle and another bicone onto eye pin. Cut remaining eye pin with wire cutters, leaving .25" to form into loop to close. At ...

    Retro Tree Earrings Tutorial(Post)

    The metallic glint of silver shade Margarita sew-ons reminds me of the retro aluminum Christmas trees of years gone by. I mixed up the crystals with TierraCast Bead caps, which echo the shape of a tr ...

Products (4)

Filters
  • Product
  • Qty in Cart
  • Quantity
  • Price
  • Subtotal
  • When using a ceramic fire block as your soldering / firing surface, it acts as a heat sink, which means it can take longer to heat items up enough to flow your solder, but is useful when soldering small, thin fragile items, or when you want to solder just one area of a larger piece.See Related Products links (below) for similar items and additional jewelry-making supplies that are often used with this item.

    Fire Block, Ceramic, 5.7 x 3.7 x 2" (Each)

    $10.61
    When using a ceramic fire block as your soldering / firing surface, it acts as a heat sink, which means it can take longer to heat items up enough to flow your solder, but is useful when soldering...
    Qty in Cart: 0
    Price:
    $10.61
    Subtotal:
  • For stamps that aren't pre-labeled (or the label wears off with use), place a dot with Wite-Out® or colorful fingernail polish to indicate the bottom of each letter (or symbol) to help keep your letters directionally correct when stamping. For the stamps that are pre-marked with the letter or symbol, marking should generally face toward the user when stamping. If you have a set that's different, you may want to put a dot facing you, to keep all your stamps consistent. For more information on metal stamping take a look at our Metal Stamping 101 page or our free downloadable metal stamping PDF.    See Related Products links (below) for similar items and additional jewelry-making supplies that are often used with this item.

    ImpressArt Basketball Metal Stamp (Each)

    ImpressArt
    $6.00
    For stamps that aren't pre-labeled (or the label wears off with use), place a dot with Wite-Out® or colorful fingernail polish to indicate the bottom of each letter (or symbol) to help keep your...
    Qty in Cart: 0
    Price:
    $6.00
    Subtotal:
  • Included with the Rings & Things Micro Torch Kit...        Butane Micro Torch*#69-1806" tall (137x101x36mm) butane micro torch, for firing Art Clay Silver. Comfy rubber grip, comes with stand. Purchase your own triple-refined butane to use with torch (holds 64ml). Burning time 60-70 minutes. Temperature 1300C/ 2450F.        Tripod with Mesh Screen#69-354-9Approx. 9" Eurotool tripods with mesh screen. Use as a platform for soldering or enameling, for items that need to be heated from all sides, or stand tripod over an alcohol lamp or Bunsen burner.        Ceramic Fire Block#69-182 5.7x3.7x2" ceramic fiber block. For insulation under Art Clay Silver pieces when torch firing.        Magnesia Soldering Block#69-184Approx. 3x6x1.5" magnesia soldering block. Porous and fireproof block, used to support metalwork when soldering, also heats up and helps maintain the temperature of the piece. Effective for temperatures up to 2000 F (1093 C).        Fiber-Grip Tweezers 6.25"#69-428Eurotool fiber-grip tweezers. Straight soldering tweezers with polished steel cross-locking jaws to hold your work securely. 6-1/4" long (160mm).        Fiber-Grip Tweezers 8"#69-429 Eurotool jumbo fiber-grip tweezers. Straight soldering tweezers with polished steel jaws to hold your work securely. 8" long (200mm).        Titanium Soldering Pick#69-427Eurotool titanium soldering pick. Non-roll handle features a titanium shaft, which is the absolute best for all non-ferrous metal except platinum. 6-1/4" long.        *Butane not included due to shipping restrictions. Butane is widely available at hardware and tobacco stores.  See Related Products links (below) for similar items and additional jewelry-making supplies that are often used with this item. Included with the Rings & Things Micro Torch Kit...        Butane Micro Torch*#69-1806" tall (137x101x36mm) butane micro torch, for firing Art Clay Silver. Comfy rubber grip, comes with stand. Purchase your own triple-refined butane to use with torch (holds 64ml). Burning time 60-70 minutes. Temperature 1300C/ 2450F.        Tripod with Mesh Screen#69-354-9Approx. 9" Eurotool tripods with mesh screen. Use as a platform for soldering or enameling, for items that need to be heated from all sides, or stand tripod over an alcohol lamp or Bunsen burner.        Ceramic Fire Block#69-182 5.7x3.7x2" ceramic fiber block. For insulation under Art Clay Silver pieces when torch firing.        Magnesia Soldering Block#69-184Approx. 3x6x1.5" magnesia soldering block. Porous and fireproof block, used to support metalwork when soldering, also heats up and helps maintain the temperature of the piece. Effective for temperatures up to 2000 F (1093 C).        Fiber-Grip Tweezers 6.25"#69-428Eurotool fiber-grip tweezers. Straight soldering tweezers with polished steel cross-locking jaws to hold your work securely. 6-1/4" long (160mm).        Fiber-Grip Tweezers 8"#69-429 Eurotool jumbo fiber-grip tweezers. Straight soldering tweezers with polished steel jaws to hold your work securely. 8" long (200mm).        Titanium Soldering Pick#69-427Eurotool titanium soldering pick. Non-roll handle features a titanium shaft, which is the absolute best for all non-ferrous metal except platinum. 6-1/4" long.        *Butane not included due to shipping restrictions. Butane is widely available at hardware and tobacco stores.  See Related Products links (below) for similar items and additional jewelry-making supplies that are often used with this item.

    Rings & Things Micro Torch Kit (Each)

    $45.90
    Included with the Rings & Things Micro Torch Kit... Butane Micro Torch*#69-1806" tall (137x101x36mm) butane micro torch, for firing Art Clay Silver. Comfy rubber grip, comes with stand...
    Qty in Cart: 0
    Price:
    $45.90
    Subtotal:
  • Total: items /

Adding your products to cart