
News & Information (16)
-
Adjustable Necklace Extenders Tutorial(Post)
Created by: Mollie ValenteDesigner TipsFor instructions with step-by-step photos, please see our blog article: How to Make an Adjustable Necklace Extender.Suggested Supplies1 foot (use 4") #40-011-001
Flying the Nest - Nest Bracelet Tutorial(Post)Created by: Kayla HeflingDesigner TipsCreate the bird nests. For step by step instructions with images, see the How To Make A Wire Bird Nest blog post.Use 22-26 gauge wire depending on the hole size o
Beachy Panel Bracelet & Earrings Set(Post)Created by: Guest Designer Deb FlorosSuggested Supplies 1 #40-090-34-3 Silver Plated Disk & Loop Chain, 7mm by the FOOT1 #05-817-LTU8 PRESTIGE 5817 8mm Crystal Pearl Cabochon Crystal Iridescent Light
Cute as a Button Necklace Tutorial(Post)Created by: Mollie Valente Designer TipsCenter the button on the pendant finding and mark the hole locations with a Sharpie® pen. Punch holes in the pendant finding.Tie the button onto the pendant fin
Garden Gate Earrings Tutorial(Post)Created by: Mollie ValenteDesigner TipsFor step-by-step illustrated instructions for making this pair of earrings, see our Swarovski Dome Round Stone blog article.Suggested Supplies2 each #01-400-12-4
Mardi Gras Earrings Tutorial(Post)Created by: Tiffany WhiteDesigner TipsPlace one bead (glass, crystal or brass), on each headpin and secure with wrapped loops.Arrange the dangles onto the jump rings. Place two brass beads on first ju
Fat Tuesday Bracelet Tutorial(Post)Created by: Tiffany White Designer Tips Assemble all glass, brass and pearl beads on head pins. (Use round glass beads or Swarovski crystal beads, or both.) Secure with wrapped loops.Attach all charms
Poppy Field Pendant Necklace Tutorial(Post)Created by: Mollie ValenteDesigner TipsSelect and clean two matching glass pieces.Select an image and cut it to match the glass shape and size.Carefully wrap the glass with copper-foil tape. To create
Bermuda Crescent Earrings Tutorial(Post)Created by: Rita HutchinsonDesigner TipsCut 4 lengths of chain, each 4 links long.Use 4.5mm jump rings to attach chain to the top holes of the crescent link. For best way to open and close loops, see
Transylvanian Visitor Pin Tutorial(Post)Created by: Rita HutchinsonDesigner TipsLaminate or seal the image with Crafter's Pick™ The Ultimate adhesive.Glue the image onto the blank "back" with the Crafter's Pick.Use side cutters to remove pa
Ring Around the Rosies Earring Tutorial(Post)The TierraCast Dulce Vida rings are reversible, with a different design on each side. If you wish the earrings to match, face the rings in the same direction during assembly.Created by: Rita Hutchinso
Promise Pin Tutorial(Post)Created by: Mollie Valente Designer TipsUse 26-gauge wire to lash the beads to the pin back.Cut the chain into two pieces: 5-1/2" and 6-1/2" in length.Use 6mm jump rings to attach the chain to the pin
Blue Pin Stripe Lashed Memory Wire Bracelet Tutorial(Post)This project uses durable, springy memory wire as the base, and 26-gauge dark blue Artistic Wire as an accent. Created by: Amy MickelsonDesigner TipsUse heavy-duty cutters to cut memory wire.Lashing t
Passage To India - Coin Earrings Tutorial(Post)These verdigris coin earrings are a beautiful combination of metal and gemstones, with a hint of sparkle. This beginner project requires only a few basic jewelry-making tools and can be completed quic
Fresh Pots Bracelet Tutorial(Post)Created by: Jaci BostonDesigner TipsUse silhouettes of multiple teapots and teacups to make this design. No two are alike.Use rubber cement to glue the paper images to the metal.Saw vertically at all
Satsuma Surprise Bracelet Tutorial(Post)Designer TipsUsing alcohol wipes, clean all the settings and set aside to dry.Using one flatback stone, glue into one setting and set aside for 24 hours to dry. Repeat 5 more times.Using one jump ring
Products (0)
- Product
- Qty in Cart
- Quantity
- Price
- Subtotal
Featured Products


TOHO Amiet Beading Thread, Burgundy (20 Meters/22 Yards)


TOHO Glass Seed Bead, Size 8, 3mm, Transparent Rainbow Frosted Amethyst (Tube)


The BeadSmith Jewelry Pliers, 1-Step Looper, 2.25mm (Each)


Magnet, Round, 18mm (35 Pieces)


14kt Gold-Filled Lobster Clasp, 10mm (Each)

Leather Cuff Bracelet, 1" - Denim (Each)


Leather Wrap Bracelet, 1/2" - Natural (Each)
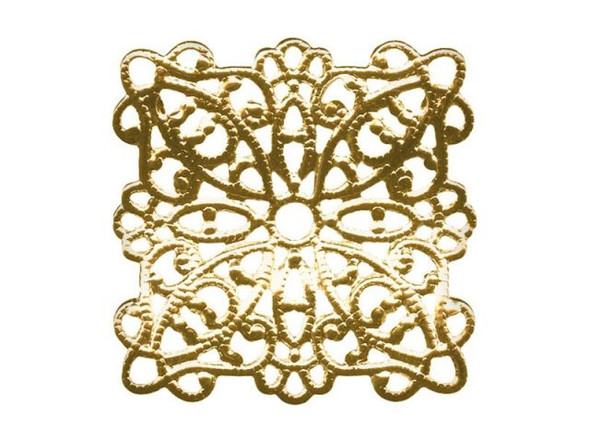
22mm Raw Brass Wavy Square Filigree


Raw Brass Small Oval Filigree with 4 Loops

Antiqued Copper Plated Hair Pin, 15mm Flat Pad (12 Pieces)
