Rings & Things Jewelry Blog
Tips for Securely Gluing Jewelry
Which glue is best?Two-part epoxies are more work, but have excellent durability, for when you really want your designs to last.Super glues are best for surfaces that fit exactly together (no gaps), or where you need just a small dab of extra security.Some specialty & craft glues are flexible or work well for bonding plastics, foil-back crystal, porous materials such as wood and fabric, or metal-to-metal bonds. Each adhesive in our website includes detailed usage information to help you
…
Dec 27th 2021
Jump Ring Hint
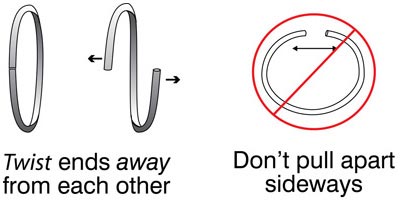
When you open and close jump rings, twist ends instead of "ovaling" them.This keeps their round shape better, which makes them easier to close neatly and securely.Many people find it easier to grip jump rings with round-nose pliers, but smooth flat-nose and chain-nose pliers make it easier to grip your jump ring without leaving tiny dents. For best control, try using a pair of chain-nose pliers in one hand, and a pair of bent flat-nose pliers in the other hand.
…
Oct 27th 2021
Choosing Clasps & Finishing Methods
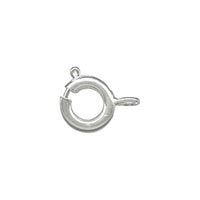
Are you asking yourself "What clasp should I use for my bead stringing, wire lashing, kumihimo, multi-strand, chunky chain, awesome creation?" There are 100's of options, and the "correct" answer is based on the weight and type of jewelry, as well as your personal preference and the stringing material(s) you choose. Find brief answers and illustrations here, with links to jewelry-making findings and supplies.Get more how-to tips with our free guides to finishing methods and stringing mater
…
Oct 27th 2021
Soldering 101
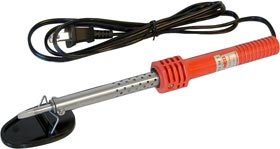
Soldering (usually pronounced soddering) is the method of joining metal parts together, using another metal that has a lower melting temperature than the parts being joined.Solder is the portion that melts at a lower temperature. Flux is a substance that cleans the metal surfaces to create a stronger bond and help prevent oxidation. Most -- but not all! -- soft solders and hard solders require the use of flux.For details about soft solder vs. hard solder, and which typ
…
Oct 27th 2021
Metal Stamping 101
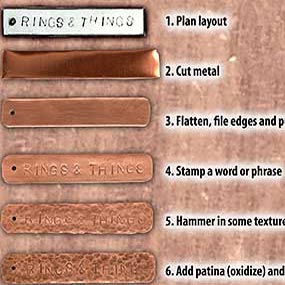
Make your own custom charms, pendants, connectors, tags and more! Metal stamping is not only the latest craze — it's also a lot of fun and gives you design freedom. Plus, handcrafted metal components give your designs a personal touch, both in look and meaning. They can also add to the value of your finished jewelry.Outfitting Your Toolbox:It's true that metal stamping requires a bit of hardware. But, once you've acquired the necessary tools, they'll work hard for years! Here are the basics you'
…
Oct 27th 2021
Leather 101
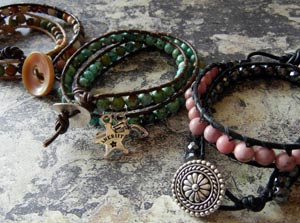
Leather continues to be a powerhouse material in jewelry fashions --especially bracelet design! Learn about various types of leather (from straps to cord to finished cuffs), and find tutorials and projects to make your own leather bracelets, handmade leather jewelry, and crafts. You can also shop our leather cord, leather straps, & leather bracelet blanks.Table of ContentsWorking with Strips of LeatherWorking with Leather Cuffs & WrapsWorking with Leather CordLeather Strips (a.k.a. Leath
…
Oct 27th 2021
Metal Etching 101
Etching is a method of using chemicals to cut a design or pattern into a metal surface. Etching your own designs into metal is easier than it may sound, and it can be a fun and rewarding way to make your own jewelry! Learn the basics of how to choose your metals, choose your etchants, create or transfer your images with resists, and complete the etching process. Discover how to make a float boat for suspending your designs in etchant — plus find basic etching safety precautions, design consider
…
Oct 26th 2021
Crimping 101
Using crimp beads to finish a necklace or bracelet: 1. String a crimp bead onto the beading cord or wire cable, then string the clasp. 2. Bend the cable back through the crimp bead. 3. Tighten the loop (but not too tight!). Use crimping pliers to crimp the bead into a small round crimp, or use flat-nose pliers to simply flatten the crimp. 4. Trim the excess cord/cable. 5. Use crimping pliers to close a crimp cover over the crimp bead. For all crimping, apply pressure similar to a firm handshake,
…
Oct 26th 2021
How to Make Loops on Head & Eye Pins
Basic Loops:The loop size will depend on how much wire you leave past the end of your beads, and around which part of your pliers you bend the loop. A good loop size is usually about 1/3 of the way from the tip of your pliers, with about 8mm of wire.Use round needle-nose pliers.If using an eye pin, decide which way you want the loop to go - the same direction as the premade loop on the other end, or 90º off. Keep this direction in mind as you bend the rest of the wire.Cut off any excess wire (we
…
Sep 15th 2021
Riveting 101
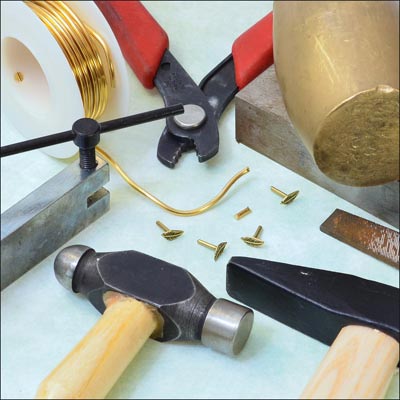
Learn the basics of riveting, including how to distinguish various types of rivets and how to set different rivets. Riveting is a classic, durable and popular way to create cold connections in jewelry designs (a "cold connection" is the joining together of metal components without using solder). Each type of rivet used to make jewelry requires different tools and techniques. Discover these methods below. Once you're ready to create your own custom riveted jewelry, check out our full line of rive
…
Jan 1st 2015

