Rings & Things Jewelry Blog
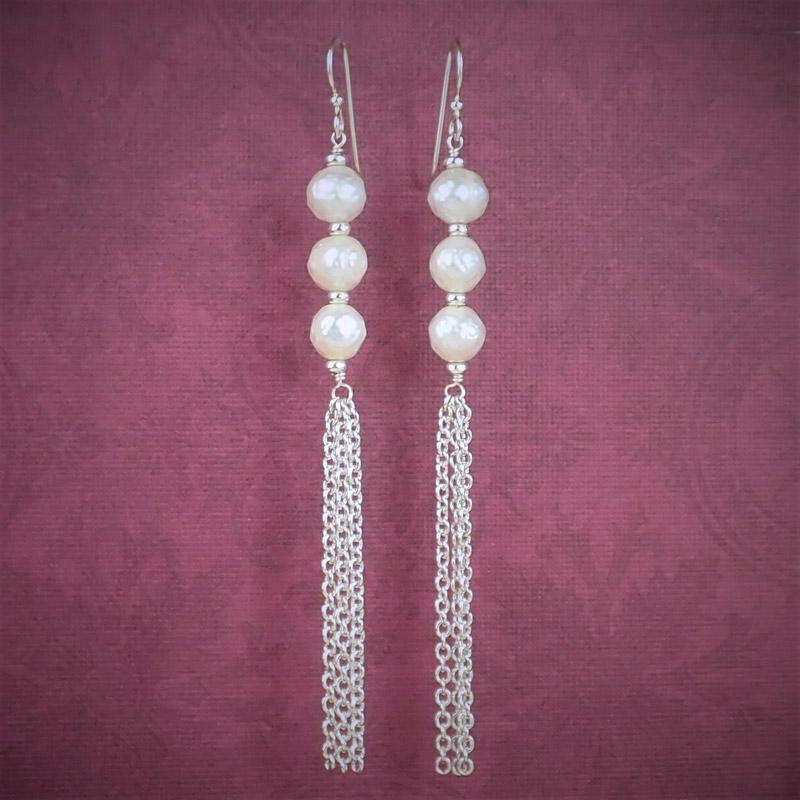
Pearl and Tassel Madness Earrings Tutorial
Created by: Janet BoyingtonDesigner TipsCut six 2" lengths of chain.Cut 5" of Artistic wireMake a loop with round nose pliers, slide 3 lengths of chain onto the loop, wire wrap that end. For step-by-step instructions for making wire-wrapped loops, see Jewelry Basics 101 (PDF).Add a heishi spacer, pearl, heishi spacer, pearl, heishi spacer, pearl, heishi spacer.Wire wrap the end, add to the ear wire.Voila! Beautiful earrings!Suggested Supplies1 strand (use 6 beads) #20-638-09-011 Freshwater Pearl
…
Aug 31st 2021
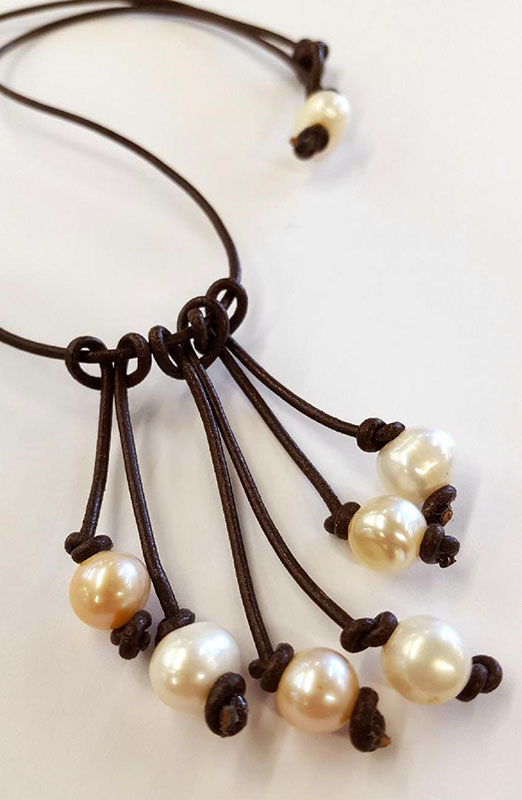
Big Bold Pearls as Tassels - Necklace Tutorial
Created by: Sondra BarringtonDesigner TipsCut approximately 25" of cord, add a pearl, and tie a simple overhand knot at one end. Pull the knot tight, then pull the pearl up against this knot and add another knot at the other side of the pearl. Use an awl or strong needle to pull the knot tight against the pearl.At the other end, make a loop for a button/loop style closure, and secure it with a knot. Before tightening the knot, make sure the loop fits over the knotted pearl bead. (See "Trio of Pe
…
May 31st 2021
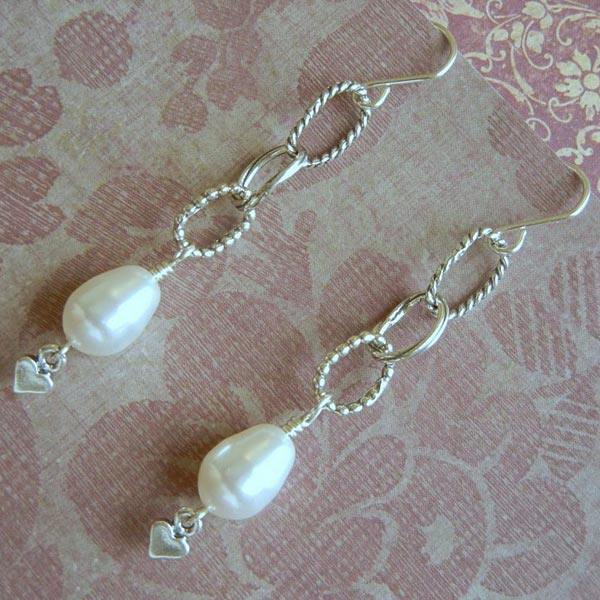
Simply Gorgeous Pearl Earrings Tutorial
Simple, yet gorgeous: These earrings were a big hit, as part of our "basics" series of local jewelry-making classes. They are simple to make, and are a perfect Christmas, sweet-16 or Valentine's Day gift. Created by: Janet Boyington Designer TipsAdd a heishi bead* and pearl to a ball-end head pin. Begin a wire-wrapped loop, but don't close it yet. Add the sterling textured link, then complete the wrap. For step-by-step instructions on making wire-wrapped loops, see Jewelry Bas
…
May 31st 2021
Shoreline Bangle Bracelet Tutorial
Created by: Rita HutchinsonDesigner TipsMake wire-wrapped loops with the pearls, and add a jump ring to each charm. For instructions on wire-wrapped loops, and best way to open and close jump rings, see Jewelry Basics 101 (PDF)This steel bracelet is springy. You can free one side of the bracelet, allowing you to string on the wrapped loop pearls and the button, and then lock it back into place.The shank on all the TierraCast buttons with shank are large enough to string onto these bracelets. Mix
…
Feb 1st 2021
Easy Peasy Lariat Tutorial
Created by: Rita Hutchinson Just 3 parts total: leather cord, leather-hole pearls, and a link about the size of a quarter (around 25mm). Choose from a wide variety of link options in sterling silver and gold fill. Designer TipsDetermine finished necklace length (this piece is about 28"").Tie a double overhand knot at one end of leather. Slide all 4 pearls on the leather from the other end.Tie silver link to the other end of the leather with another double overhand knot.Settle one pear
…
Jan 1st 2021
Pearl Wraparound Swarovski Necklace Tutorial
Created by: Swarovski's Create Your Style Design TeamDesigner TipsUsing one head pin, slide on one 5844 10mm elongated baroque pearl, make a simple loop and set aside. Repeat 29 more times and set aside.For step by step instructions on making simple loops, and most secure way to open and close jump rings, see Jewelry Basics 101 (PDF).Using the gold chain, take one side of the chain and beginning 3" up on the chain, attach 15 pearls from step 1, one on each ring.On the other side of the gold chai
…
Jan 1st 2021
Pearl and Tassel Charm Leather Bracelet Tutorial
Created by: Sondra Barrington Designer TipsThe ring connector is the focal of this bracelet. For a more free-flowing design, attach charms to the leather cording.Wire-wrap a pearl bead with a large loop, directly onto the large ring connector. (You may need to use a heishi bead to hold the pearl onto the head pin.) For step-by-step wire-wrapped loop instructions, see Jewelry Basics 101 (PDF).Cut leather flush (flat) after measuring. Insert leather into the cord end, and gently but firm
…
Jan 1st 2021
Tree of Life Leather Bracelet Tutorial
Created by: Sondra Barrington This design uses a pearl bead (one of June's birthstones). Use a pearl bead from your bead stash to create this design as-is, or substitute other charms, beads, or birthstones in place of the pearl bead and swirling side charms. Designer TipsMake a wire-wrapped head pin with the pearl bead (with a loop large enough to slide freely along the leather). See step-by-step instructions in Jewelry Basics 101 (PDF). You may need to use a heishi bead or seed bead to h
…
Jan 1st 2021
Easy Pearl Lariat Tutorial
Created by: Rita Hutchinson Just 3 parts total: leather cord, leather-hole pearls, and a link about the size of a quarter (around 25mm). Choose from a wide variety of link options in sterling silver and gold fill. Designer TipsDetermine finished necklace length (this piece is about 28").Tie a double overhand knot at one end of leather. Slide all 4 pearls on the leather from the other end.Tie silver link to the other end of the leather with another double overhand knot.Settle one pearl
…
Jan 1st 2021
Drops of Light - Pearl Earrings Tutorial
Created by: Mollie ValenteDesigner TipsFor step-by-step pictorial instructions on making this pair of earrings, see Mollie's blog article:
…
Jan 1st 2021


