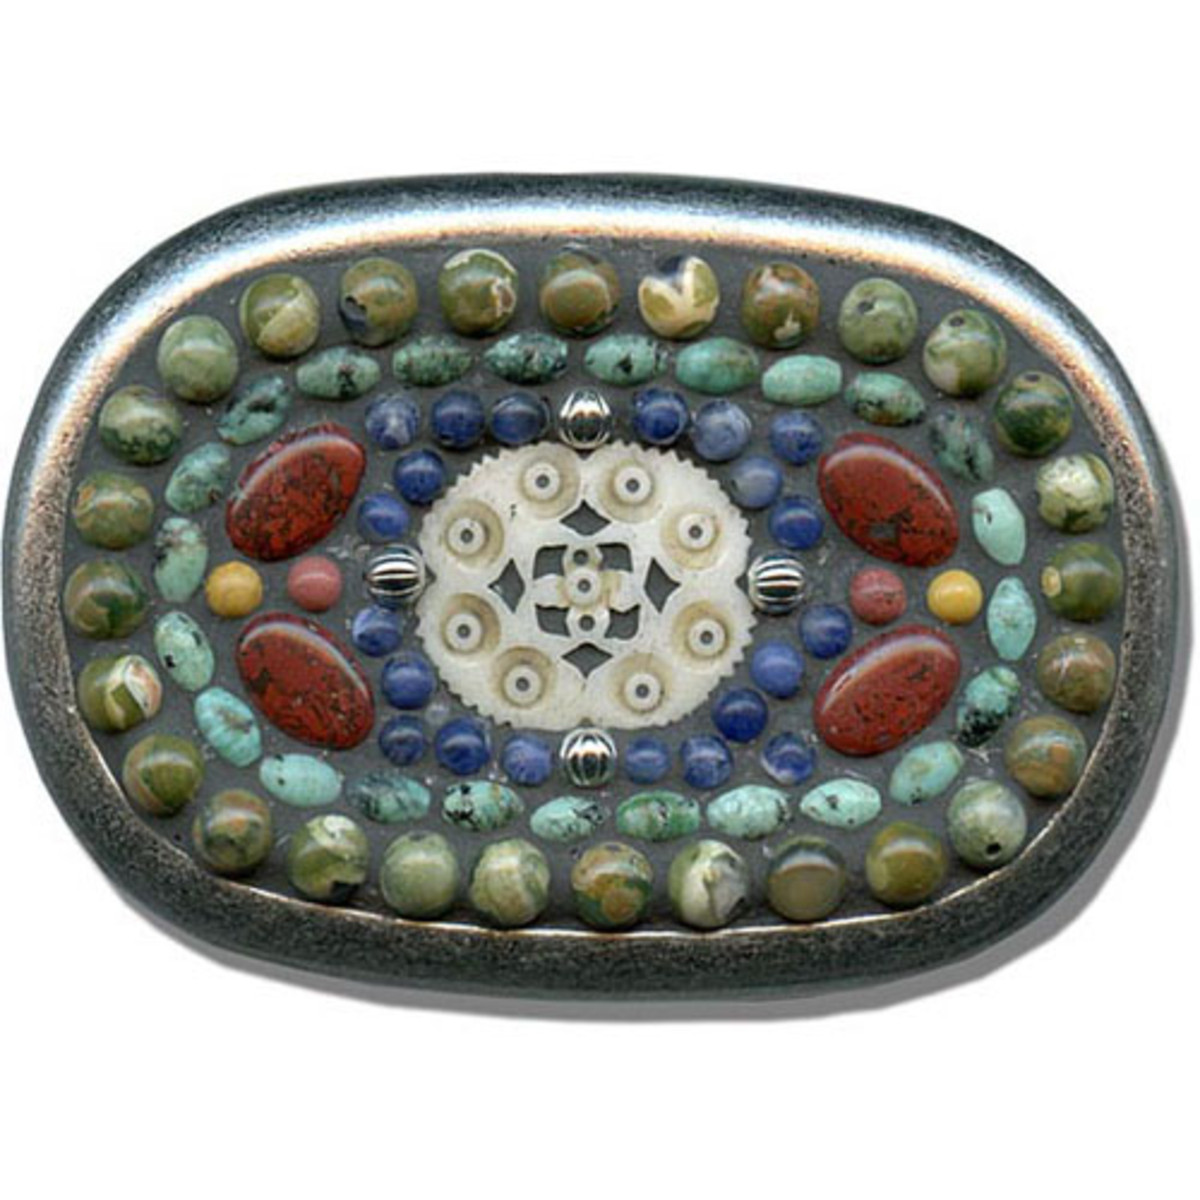
Albuquerque Belt Buckle Tutorial
Created by: Mollie Valente
Designer Tips
- Plan your layout for design and fit.
- Use two-part epoxy to glue the mosaic components in place. Allow to cure overnight.
- Mix grout according to manufacturer's instructions. Read and follow application and clean up directions.
- Apply the grout to the mosaic in a circular motion while pushing the grout into all voids.
- Allow grout to set for 10 minutes, then use a slightly damp sponge to clean up excess grout and smooth the surface. Rinse sponge and repeat until clean.
- Allow the grout to cure fully.
Free Technique Sheets & How-Tos
Suggested Supplies
- 1 ea #60-230 Adhesive, Epoxy, 330
- 1 gross [use 4] #26-464-1 Bead, 4.5mm Round, Corrugated (White)
- 1 strand [use 4] #21-884-147 Bead, Gemstone, Round, 4mm (Mookaite)
- 1 strand [use 21] #21-884-030 Bead, Gemstone, Round, 4mm (Sodalite)
- 1 ea #30-682-01-AS Belt Buckle Blank, Rounded Rectangle, 87mm (Antiqued Silver Plated)
- 1 bag of 10 [use 1] #25-130-03-1 Button, Bone, Oval, 21x25mm (Can be antiqued using tea, coffee or store-bought dyes)
Tools
Additional Supplies- Non-sanded black grout for mosaics (from the craft or home improvement store)
- Sponge
- Miscellaneous gemstone beads: Mollie used 4x6mm - 8x12mm ovals in Poppy Jasper and African Turquoise, and 4-6mm rounds in Mookaite, Sodalite and Rhyolite.
Jan 1st 2021
Our Bead Blog
-
Simple Aromatherapy Earrings
Apr 26th 2024Created by: Guest Designer Deb FlorosSuggested Supplies1 #21-888-925 White "Lava" Stone Beads, 8mm R
-
Knotted Gemstone Bracelet
Apr 26th 2024Created by: Guest Designer Deb FlorosSuggested Supplies 1 #21-886-716 Matte Natural Druzy Agate Rou
-
Edgy Elegance Necklace
Mar 22nd 2024Created by: Guest Designer Deb FlorosSuggested Supplies 1 #20-111-204 TOHO Glass Seed Bead, Size 11


