Rings & Things Jewelry Blog
Sand Dollar Leather Bracelet Tutorial
This stylishly simple bracelet looks great worn alone, or with other bangles or leather bracelets. Created by: Sondra Barrington Designer TipsCut leather flush after measuring. Use a dab of glue inside one cord end. Insert leather into the cord end and gently pinch the cord end prongs together until secure.Slide guru bead onto leather.Finish other end of leather cord.Use a small jump ring to attach cord end to lobster clasp, and add a large jump ring at the other end of the bracelet
…
Feb 1st 2021
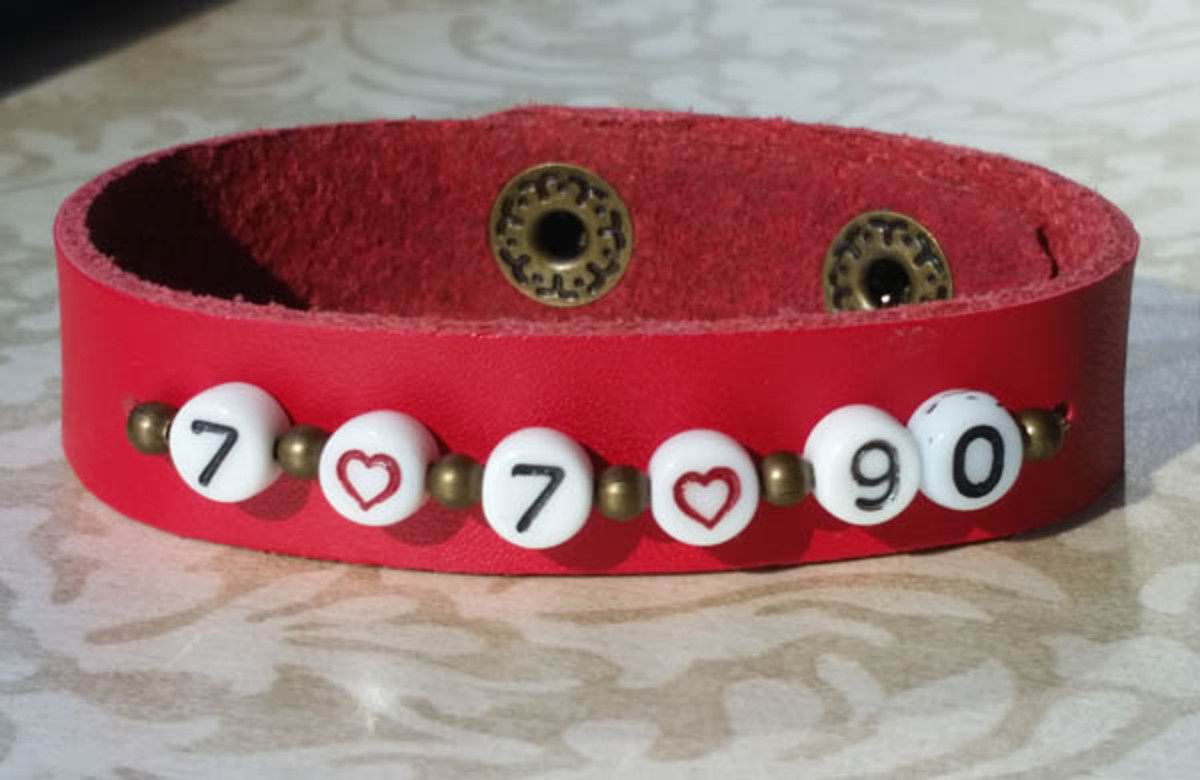
Custom Anniversary Bracelet Tutorial
Learn how to make a leather anniversary bracelet using porcelain number beads to "spell out" a custom anniversary date (7/7/90).Created by: Polly Nobbs-LaRueDesigner TipsUse a finished leather bracelet blank, or create the bracelet from scratch using a leather strip and clasp of your choice.Select your beads: Here I used black & white porcelain number beads, red & white porcelain heart beads, and 2mm round brass spacer beads.I used 26g non-tarnish brass Artistic wire to "stitch" the bead
…
Jan 25th 2021
Copper & Purple Love - Bracelet Tutorial
Created by: Polly Nobbs-LaRueDesigner Tips
Set link on leather bracelet, and use a sharp pencil, or fine-point non-smudging marker, to make a dot at each spot to punch.Rotate leather hole punch to smallest setting, and carefully punch holes.Click into the rivet below, and follow the steps in the "more details" section for setting these 2-part rivets.Optional: Use bracelet-bending pliers to gently shape the link into a smooth wrist-shaped arc.For more information about riveting, download and pri
…
Jan 25th 2021
Metallo Elemento Bracelet Tutorial
Created by: Polly Nobbs-LaRue Designer Tips For a small wrist (shown), cut 2 pieces of leather each 5" long. For a standard men's bracelet, cut 2 pieces each 6" long. or measure the wrist size you want, add 4" (for the riveted overlap portions), and divide in half.Adjust rotary punch to 2.5mm.Wrap one end of the leather strap around the centerpiece, overlapping leather by approximately 1". This gives you room to safely set the rivet without hitting the gemstone or crystal centerp
…
Jan 1st 2021
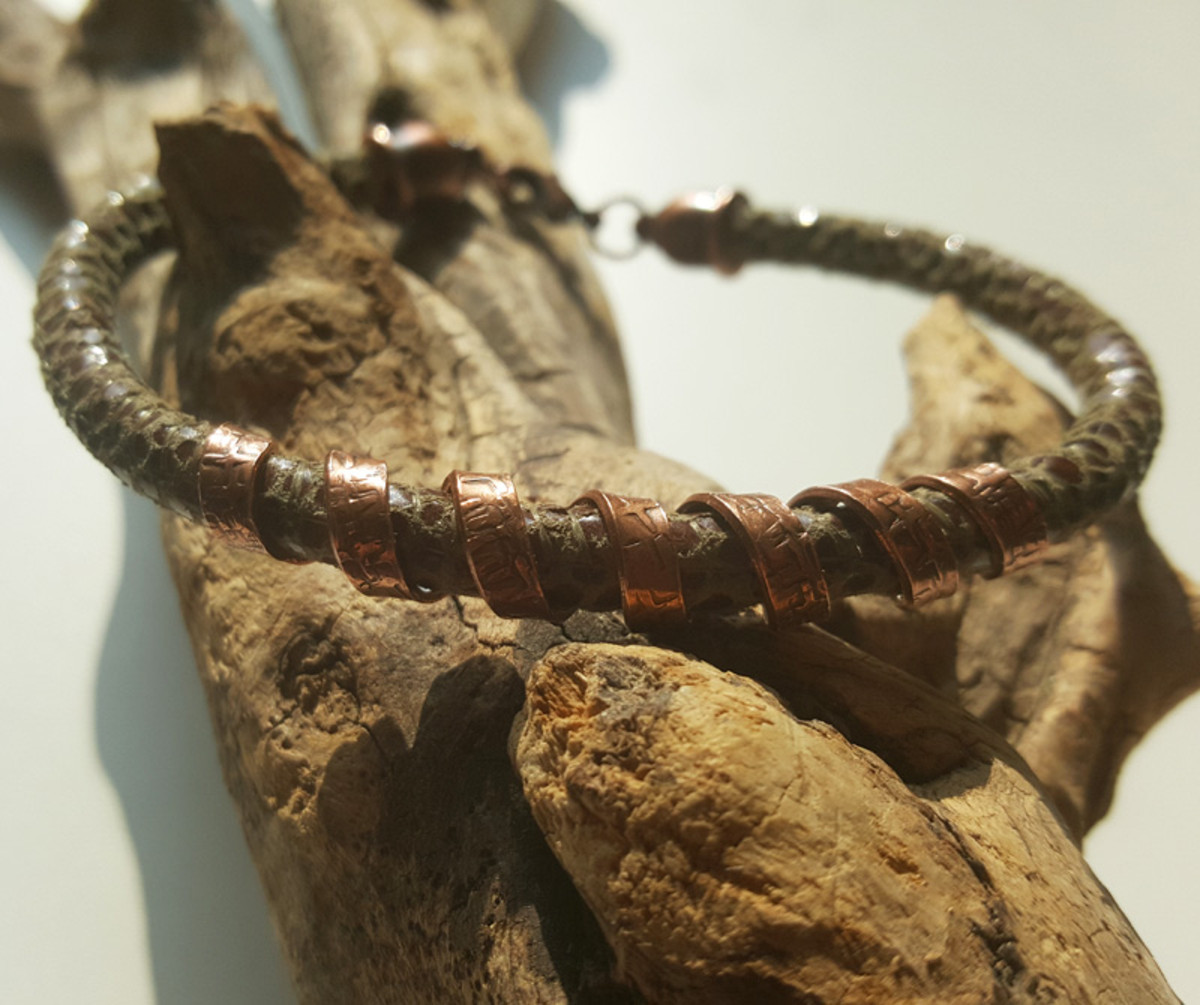
Mehandi Coil Bracelet Tutorial
Created by: Rita HutchinsonDesigner TipsUse shears to cut flat wire. Texture as desired with texturing hammer or metal stamps.Create coil by wrapping at an angle around large barrel of bail making pliers (coil from the tip toward the handle to allow entire length to be done).Gently adjust the shape of the coil to match the bend of a wrist.Antique the coil and rinse, then tumble to a high shine. This also will remove sharp ends on the wire.Apply coil to suede cord and cut cord to desired length.
…
Jan 1st 2021
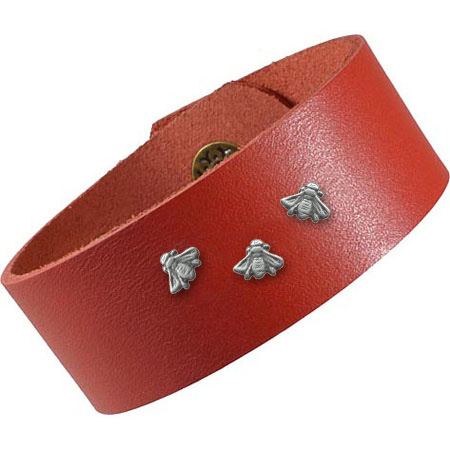
Fly Bee! Bracelet Tutorial
Created by: Polly Nobbs-LaRueDesigner TipsPunch 1/16" holes in the bracelet where you want to place the rivets.Run the first rivet through the leather, place a washer on it, and use a fine-point Sharpie to mark a line on the rivet shaft about 1mm past the washer.Use heavy-duty flush cutters (or a jewelers saw) to cut at this line. Be sure to cut nice and flat (parallel with the rivet head). File flat if necessary.Place the bracelet rivet-head-down on the rubber side of a steel/rubber bench block
…
Jan 1st 2021
In the Moment Leather Cuff Bracelet Tutorial
Created by: Mollie Valente Designer TipsCustomize the word blank:Place the word blank on the steel block and create a dappled texture with the ball peen side of the chasing hammer.Use the bracelet-bending pliers to curve the word band.Apply Vintaj® Patina™ to the words and use a damp paper towel or baby wipe to remove the excess.Finish the bracelet:Use a ruler and hobby knife to cut the leather strip to length.Measure and mark the leather strip for placement of the word blank holes (2mm)
…
Jan 1st 2021
Easy Peasy Lariat Tutorial
Created by: Rita Hutchinson Just 3 parts total: leather cord, leather-hole pearls, and a link about the size of a quarter (around 25mm). Choose from a wide variety of link options in sterling silver and gold fill. Designer TipsDetermine finished necklace length (this piece is about 28"").Tie a double overhand knot at one end of leather. Slide all 4 pearls on the leather from the other end.Tie silver link to the other end of the leather with another double overhand knot.Settle one pear
…
Jan 1st 2021
Palomita Wrapped Leather Bracelet Tutorial
Created by: Polly Nobbs-LaRueDesigner TipsCast silver star beads and Bali-style flower beads make wonderful riveted accents. If a bead's hole isn't quite large enough, center the bead on the 1/16" cutting end of the Crafted Findings riveting system, and re-cut the hole. Do not pull the bead off the cutter - this can damage the cutter. Simply unscrew until the bead comes off naturally. The purple leather bracelet pictured is no longer available - but 50 other colors / sizes are! (See links below.
…
Jan 1st 2021
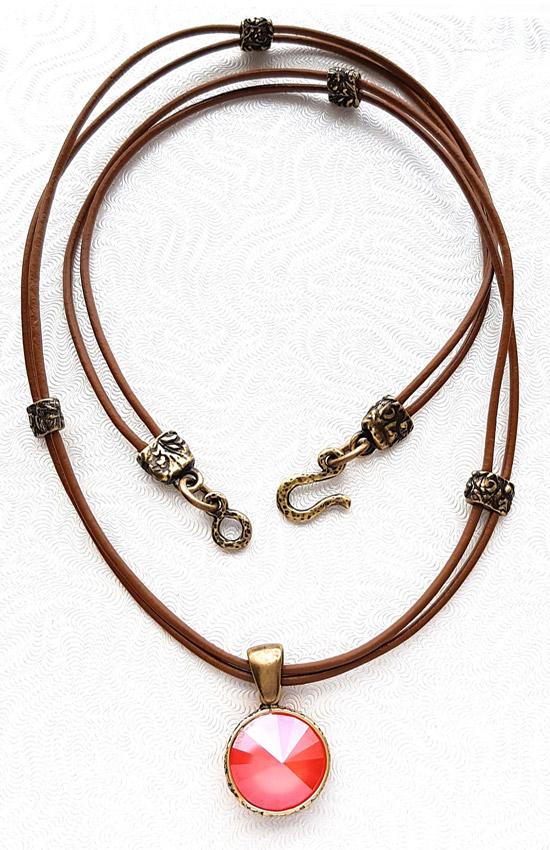
Just Peachy Leather Necklace Tutorial
Created by: Bridget AustinDesigner TipsSee the Jewelry Basics 101 PDF for hints and instructions on how to open and close jump rings.The cord ends and barrel beads are all crimped, no glue required!Start with 2 strands of leather cut to the desired length of your necklace.String all 4 barrel beads onto the leather.Attach cord ends to each end of the necklace and crimp tightly with the nylon jaw pliers.Attach the hook and eye clasp with 2 jump rings to the cord ends.Space the beads out evenly and
…
Jan 1st 2021


