Rings & Things Jewelry Blog
Sand and Sea Gemstone Jewelry Tutorial
This simple strung jewelry design can be worn as a necklace or a wrap bracelet. Bead Stoppers make it easy to test the length of your finished design before crimping ends.Created by: Veronica GreenwoodDesigner TipsCut 18-20"" of cable.String one copper heishi, one pearl, one copper heishi, one sunstone, one 3mm blue shade crystal, one sunstone, one copper heishi, one pearl, one copper heishi, one aquamarine, one 3mm rose gold crystal, and one aquamarine. Repeat pattern until you reach desired le
…
Jan 1st 2021
U Look Good in Pink Tutorial
Created by: Rita HutchinsonDesigner TipsThe ""back"" of the U shaped connector is lashed to in this design, because it has a channel that helps to hold the beads in place.Check the spacing of the beads prior to starting this project to determine the best pattern to use.See Wire Lashing blog article for tips on successful wire lashing. Use at least 2 wraps between each bead to keep everything nicely in place.Use jump rings to attach rollo chain to U-shaped link, and to clasp at desired length. Fo
…
Jan 1st 2021
Swarovski Emerald Eye Necklace Tutorial
Modified from a design created by Swarovski's Create Your Style Design Team
Designer Tips
Using the 1.5mm plier punch, or the smaller (silver) side of the 2-hole punch, make 6 holes in the Mandala Eye blank (5 on the bottom, and one on the top).
Using the jump rings, attach in order of the 5 holes left to right, one 9mm Emerald-cut Pendant, one 11.5mm, one 16mm, one 11.5mm, and a final 9mm. Attach another jump ring to the center hole on the top, and close. New to jewelry-making?
…
Jan 1st 2021
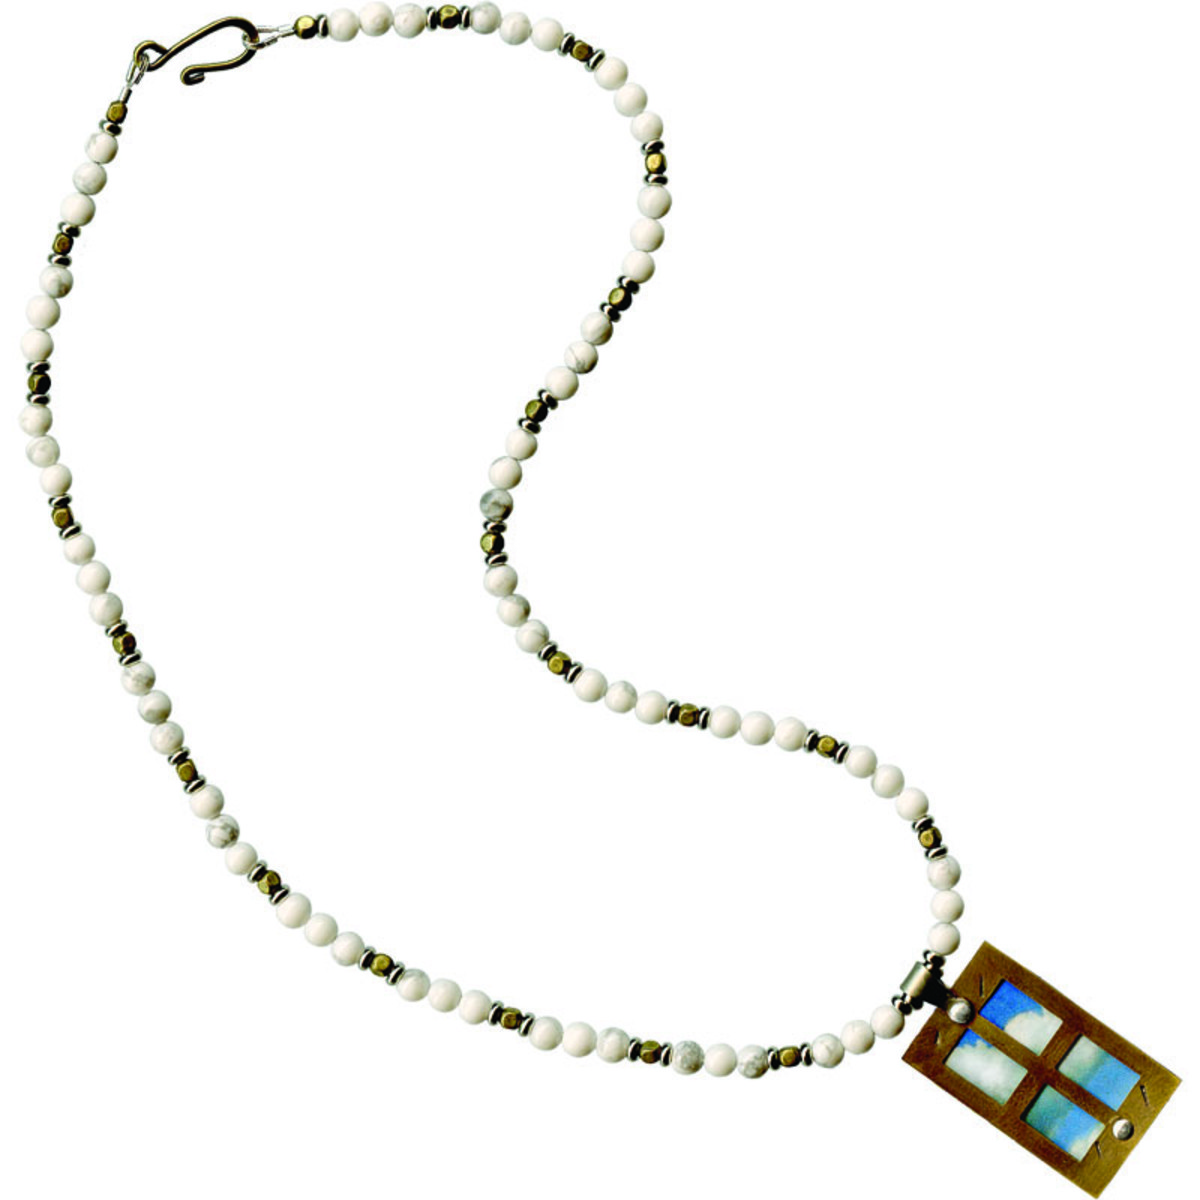
The View Necklace Tutorial
Created by: Cindy MorrisDesigner TipsStamp front piece first (I used the "l" to make diagonal lines on the window frame). Flatten. Patina with Win-Ox™ and clean with steel wool.Clean back piece with rubbing alcohol. Decoupage or seal an image onto the back piece – allow to dry.Punch holes in the top piece only with the hole punch side of the rivet tool.Place over the back piece and mark hole location at top only. Attach a rivet bail with a 5/32" long (1/16" diameter) rivet.Then punch a second ho
…
Jan 1st 2021
Russ Recycles Clip Tutorial
Created by: Amy MickelsonDesigner TipsPostage stamp charmThe canceled postage stamp was scanned and reduced to fit the square picture-frame charm.Seal front and back of the image with a waterproof barrier before applying the Magic-Glos™ resin. Use clear packing tape, transparent shelf liner, laminating film or a coating of liquid polymer clay. Do not use a water-soluble sealer like decoupage fluid or Mod Podge®.Burnish around the the edges to make sure the image is sealed completely.Use a small
…
Jan 1st 2021
Random Scraps Bib Necklace Tutorial
Created by: Valorie Nygaard-PouzarDesigner TipsUse whatever random scraps of chain you have handy, to create this quick and trendy layered chain bib-style necklace.Determine how long you want the longest chain section, then cut each one about 1/4" shorter than the last. The longest chain in this design is 20".You can also mix and match random short pieces of chain, and link together with jump rings.Use large 13.5mm jump rings to link the chain ends together, and attach the clasp. Use 5mm jump ri
…
Jan 1st 2021
Flowers Cove Viking Knit Necklace Tutorial
Created by: Amy ScaliseDesigner TipsFollow the instructions that come with the Lazee Daizee™ to create a Viking knit necklace using 20-gauge wire. The 16" necklace uses about 8 yards of wire.Use 28-gauge wire to create the wire bail. 40 yards makes approximately 20" of tubular knit chain. Attach the donut with a lark's-head knot and wrap a short piece of 20-gauge wire around the chain to secure the ends.Free Technique Sheets & How-TosBasic Jewelry-Making Technique Sheet (PDF)Suggested Suppli
…
Jan 1st 2021
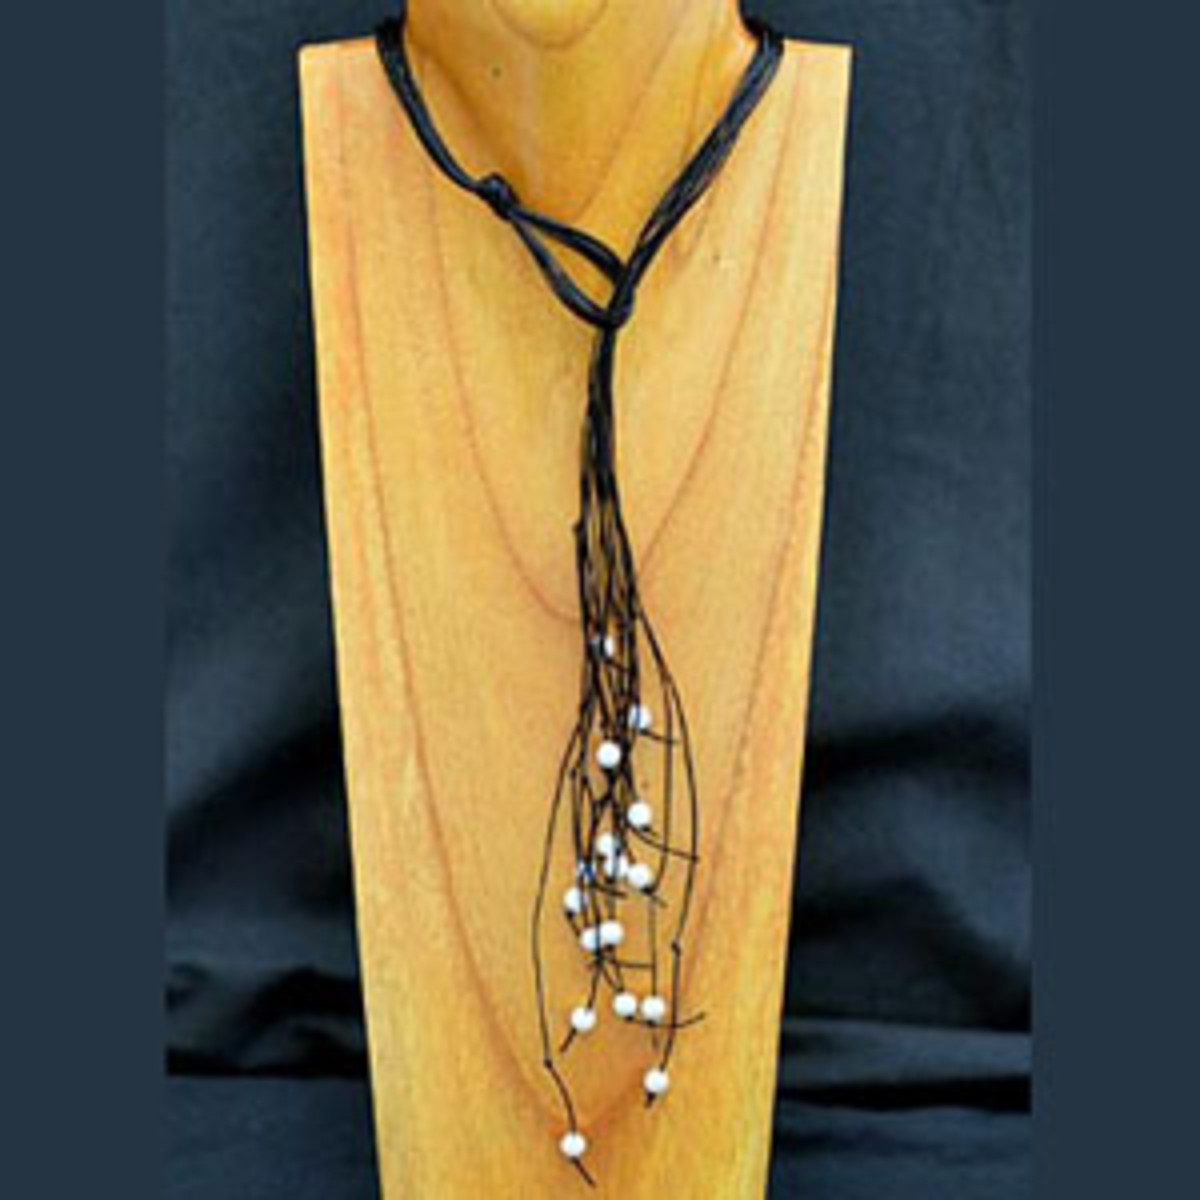
Corralled Pearls Necklace Tutorial
For their safety and your health, pearls and shells should always be drilled, reamed, etc underwater.Created by: Rita HutchinsonDesigner TipsCut a small piece of leather to test the hole sizes as you are reaming.Hold the pearl and bead reamer tip underwater, and ream in a back and forth motion, from both sides of the hole.Cut 8 lengths of leather approx. 48-52" each.Tie an overhand knot, about 3-5" from one end, slip on a pearl, and tie another knot to hold it in place. Repeat on the other end o
…
Jan 1st 2021
Constellation Pendulum Pendant Tutorial
Make this constellation pendant with crystal head pins and ball-end head pins for different sizes of stars, using Swarovski Ceralun Ceramic Epoxy Clay.Created by: Sondra BarringtonDesigner TipsBegin by choosing a constellation from a preferred book or website, to use as reference.Read our blog article:Ceralun Constellation Jewelry for step-by-step instructions on how to set head pins, swirl clay and more.You can make a larger (or more delicate) necklace by selecting a different bezel cup and cry
…
Jan 1st 2021
Pearls Before Swine Necklace Tutorial
Created by: Mollie ValenteDesigner TipsCreate a saddle for the pig with two filigrees wrapped around his middle.Use jump rings to connect the two filigrees at the top. Carefully bend the filigrees around the pig (or use oval mandrel pliers)and connect at the bottom with another jump ring.New to jewelry-making? See Basic Jewelry-Making Technique Sheet (PDF).Suggested Supplies1 spool [use 16"] #40-099-08-7 Chain, Footage, Curb, 2.8mm1 dozen [use 1] #39-343-7 Clasp, Lobster, 12mm1 strand [use 4] #0
…
Jan 1st 2021


