Rings & Things Jewelry Blog
Lucky Penny Bracelet Tutorial
Created by: Tiffany White Designer TipsFind pennies in the years of your choice.Clean the pennies with Penny Brite®.Using a permanent marker or Stamp Enamel, cover the surface of each penny in permanent ink. Allow them to dry.Using a sanding pad or steel wool, remove the the permanent ink, leaving some in the indents, so the design really pops.Attach the pennies and copper buttons to the disk on the bracelets with E-6000 or 2-part epoxy. Allow the bracelet to dry overnight before wearing.
…
Jan 1st 2021
Low Tide Asymmetrical Earrings Tutorial
Created by: Mollie Valente Designer Tips: Earring 1String a pear-shaped pearl and a 3mm corrugated bead onto a head pin. Form a wrapped loop. (See Jewelry Basics 101 PDF).Twist open the Vintaj roped-cable jump ring and attach to the wrapped loop. Also attach to an eye pin loop and twist the jump ring closed.String a mauve pearl, a white pearl, and a 3mm corrugated bead onto the eye pin and form a wrapped loop.Attach a French hook ear wire.Earring 2Patina and polish the moon charm
…
Jan 1st 2021
99 Luftballons Tutorial
ok, so maybe it's just 2 Red Balloons, not 99...Created by: Summer Melaas and Polly Nobbs-LaRue Designer TipsPunch a 1/16" hole in each blank, directly opposite the existing loop or hole.Clean the blanks with Penny Brite to remove all oils.Spray each blank lightly with Klyr Fire before sifting enamel evenly onto each blank: red on the balloons, and foundation white on the strips.Carefully transfer a blank to torching basket (in tripod, over a heat-resistant work surface), and torch fire.
…
Jan 1st 2021
5 Minute Rings Tutorial
Created by: Polly Nobbs-LaRueDesigner TipsCut a 20-gauge or 24-gauge 0.25" (wide) strip of copper, brass or sterling sheet approximately 2.75" long.Smooth and straighten with a nylon hammer.Optional: Texture or stamp if desired. (see "Creating a Stamped Metal Charm" technique sheet below) File corners and edges smooth, using #2-cut needle file, so the ring fits comfortably.Optional: Antique components if desired before assembling!Use nylon-jaw ring-bending pliers to bend ring into shape. Overlap
…
Jan 1st 2021
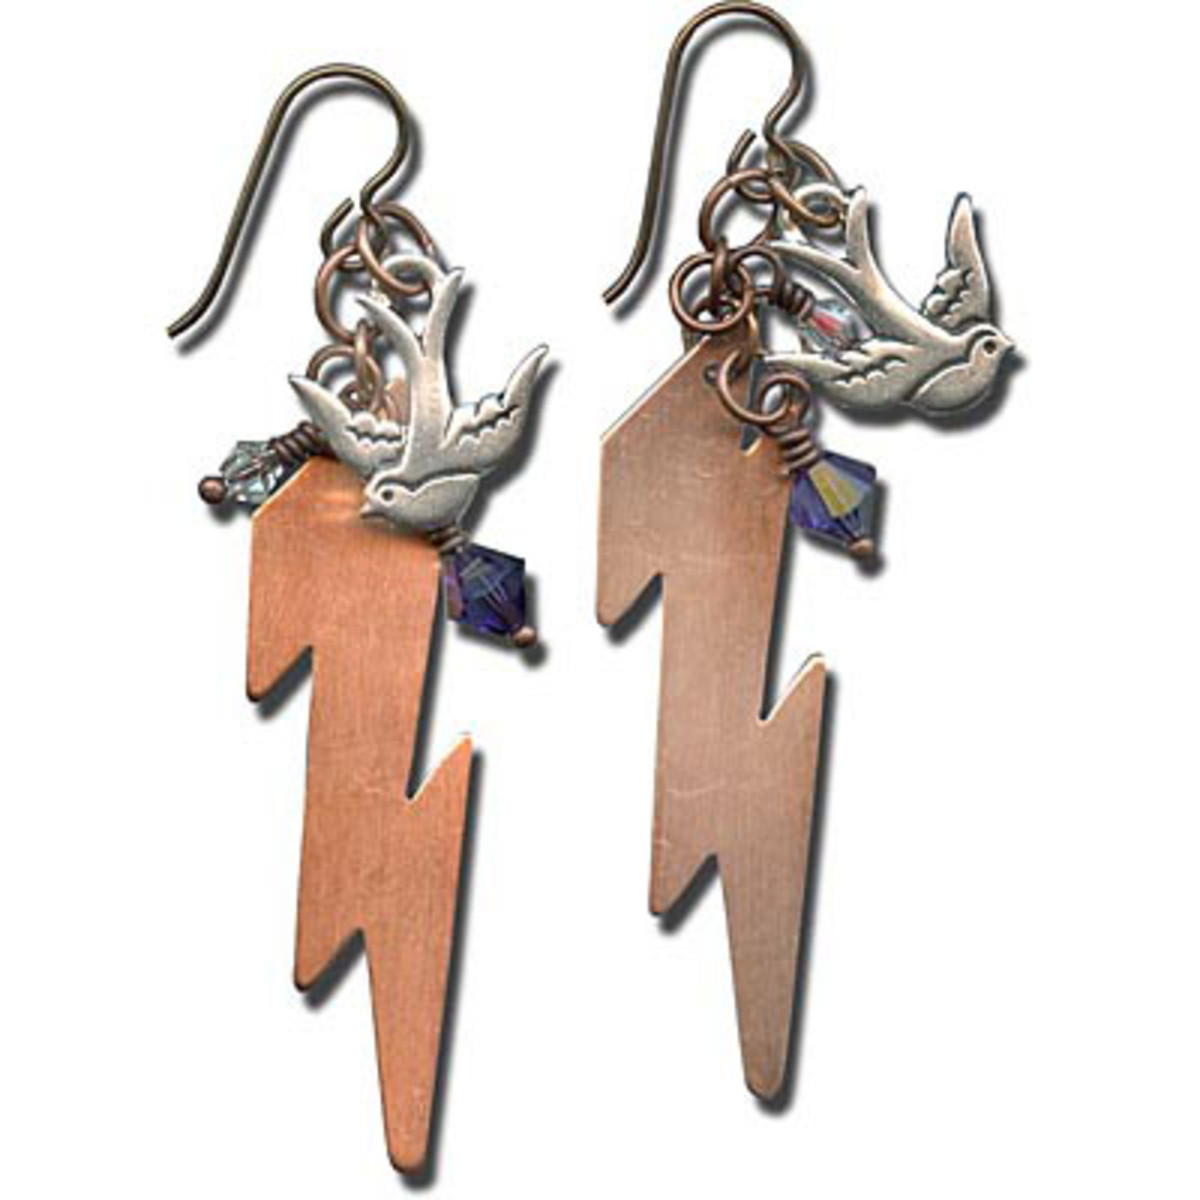
An Ode to Ojo Earrings Tutorial
Created by: Lindsey GreenDesigner TipsBrushing steel wool lightly over the copper blanks gives them a nice shine and textured look.Free Technique Sheets & How-TosBasic Jewelry-Making Technique Sheet (PDF)Suggested Supplies2 each #44-780-40 Blank, Copper, Lightning Bolt, 49x13mm (Copper)1 pkg of 10 [use 2] #44-940-52-AS Charm, Cast, Swallow (Antiqued Silver Plated)1 doz [use 2] #05-328-04-160 Crystal, Bead, Faceted Bicone, 4mm (Crystal/ Silver Shade)1 doz [use 2] #05-328-06-156 Crystal, Bead,
…
Jan 1st 2021
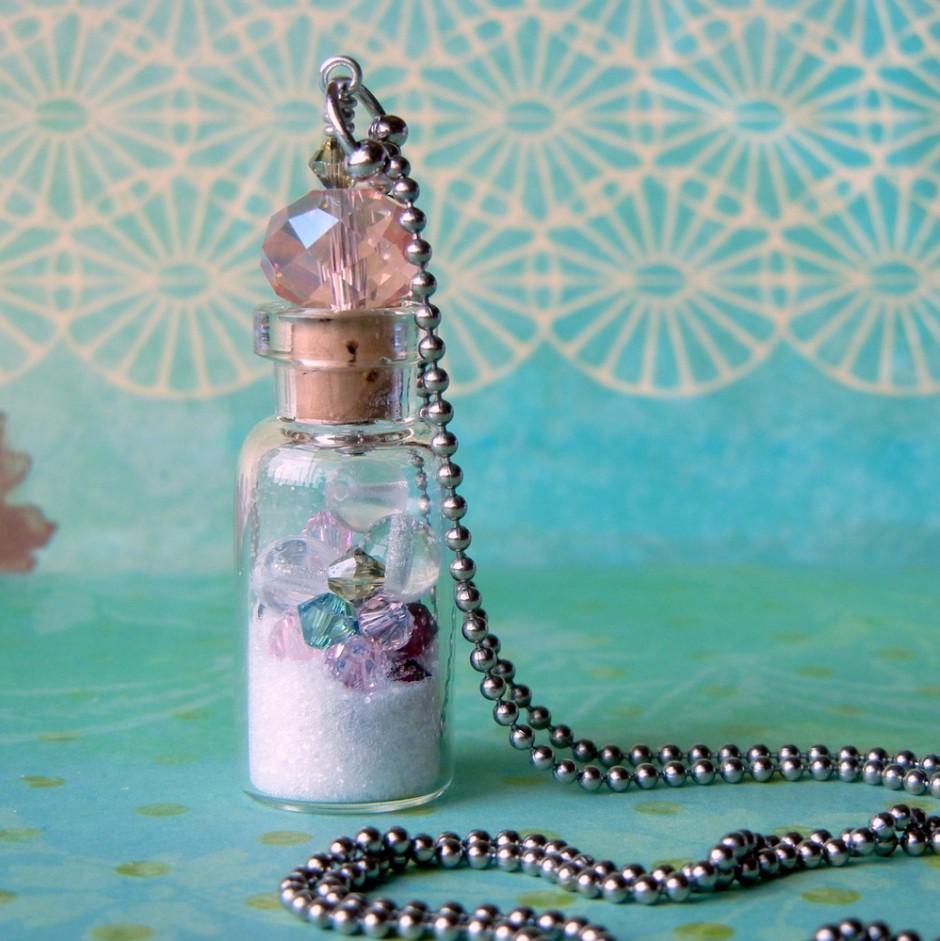
Beachcomber Glass Vial Tutorial
Created by: Mollie ValenteFor step-by-step illustrated instructions to make this Beachcomber glass bottle treasure necklace, see our blog post: How to Make a Glass Vial NecklaceSuggested Supplies1 each #30-187-3515 32x15mm clear glass bottle1 each #05-040-12-02 12mm faceted briolette or rondelle crystal bead1 dozen [use 3-4 beads] #05-328-04-124 Swarovski 5328 Faceted XILION Bicone Beads, 4mm - Indicolite1 dozen [use 3-4 beads] #05-328-04-407 Swarovski 5328 Faceted XILION Bicone Beads, 4mm - Den
…
Jan 1st 2021
Basic Bead Stringing Kit Supplies
coming soon
Jan 1st 2021
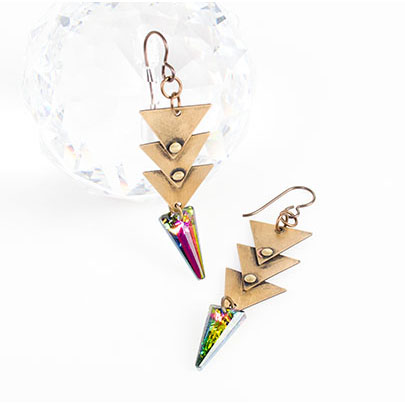
Aztec Princess Earring Tutorial
This project uses Swarovski crystals. Created by: Tiffany WhiteDesigner TipsMark all six of your triangle blanks with a permanent marker dot in one of the points and straight down on the opposite side.Use the hole-punching side of the riveting tool to make a hole in the triangle blanks where you placed your dots.Use the riveting tool to rivet the triangles together with the brass rivets.Antique the brass pieces with Novacan black.Using the sanding sponge remove some of the patina from the brass
…
Jan 1st 2021
Ava's Ladies in Waiting Bridesmaid Necklaces Tutorial
Created by: Valorie Nygaard-Pouzar Designer TipsCarefully stamp the metal blank.Antique the charm so the impressions are more pronounced.Gently sand and polish.Attach to jump ring & chain.Make a pearl dangle, and slide onto the chain.Pendants for the bride and bridesmaids are elegant jewelry, as well as keepsakes that will last forever. For the bride's jewelry, see Ava's Big Day Bridal Set. Free Technique Sheets & How-TosJewelry Basics 101 (PDF)Metal Stamping 101 (PDF
…
Jan 1st 2021
Area 51 Pin Tutorial
I made this pin when the UFO and alien stamp first came out, but they are no longer in production. But there are so many other fun options for customizing this blank with features for other states! Apples or pine trees for Washington, mountains for Montana, ...?Created by: Polly Nobbs-LaRueDesigner TipsBrass is harder than some other commonly-stamped metals, and the Simple Strike Jig is a great help for making good solid impressions using ImpressArt's 6mm stamps. You may need an extra scrap or 2
…
Jan 1st 2021


