Rings & Things Jewelry Blog
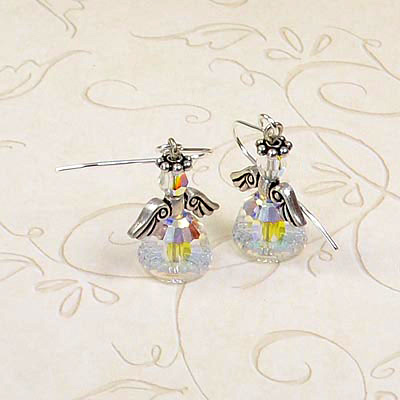
Angel in Training Earring Tutorial
Created by: Rita HutchinsonDesigner TipsAdd crystals, angels wing beads and spacers to head pins and finish with a simple loop.Because the large end of the dome beads are concave, it can be tricky to measure and cut the headpin for making your loop. Press thumb or other finger against the head of the pin, to pull it up to the inside of the dome for best results.Use any ear wire you like with these designs.These designs can be made as a pendant, by only making one.Free Technique Sheets & How
…
Jan 1st 2021
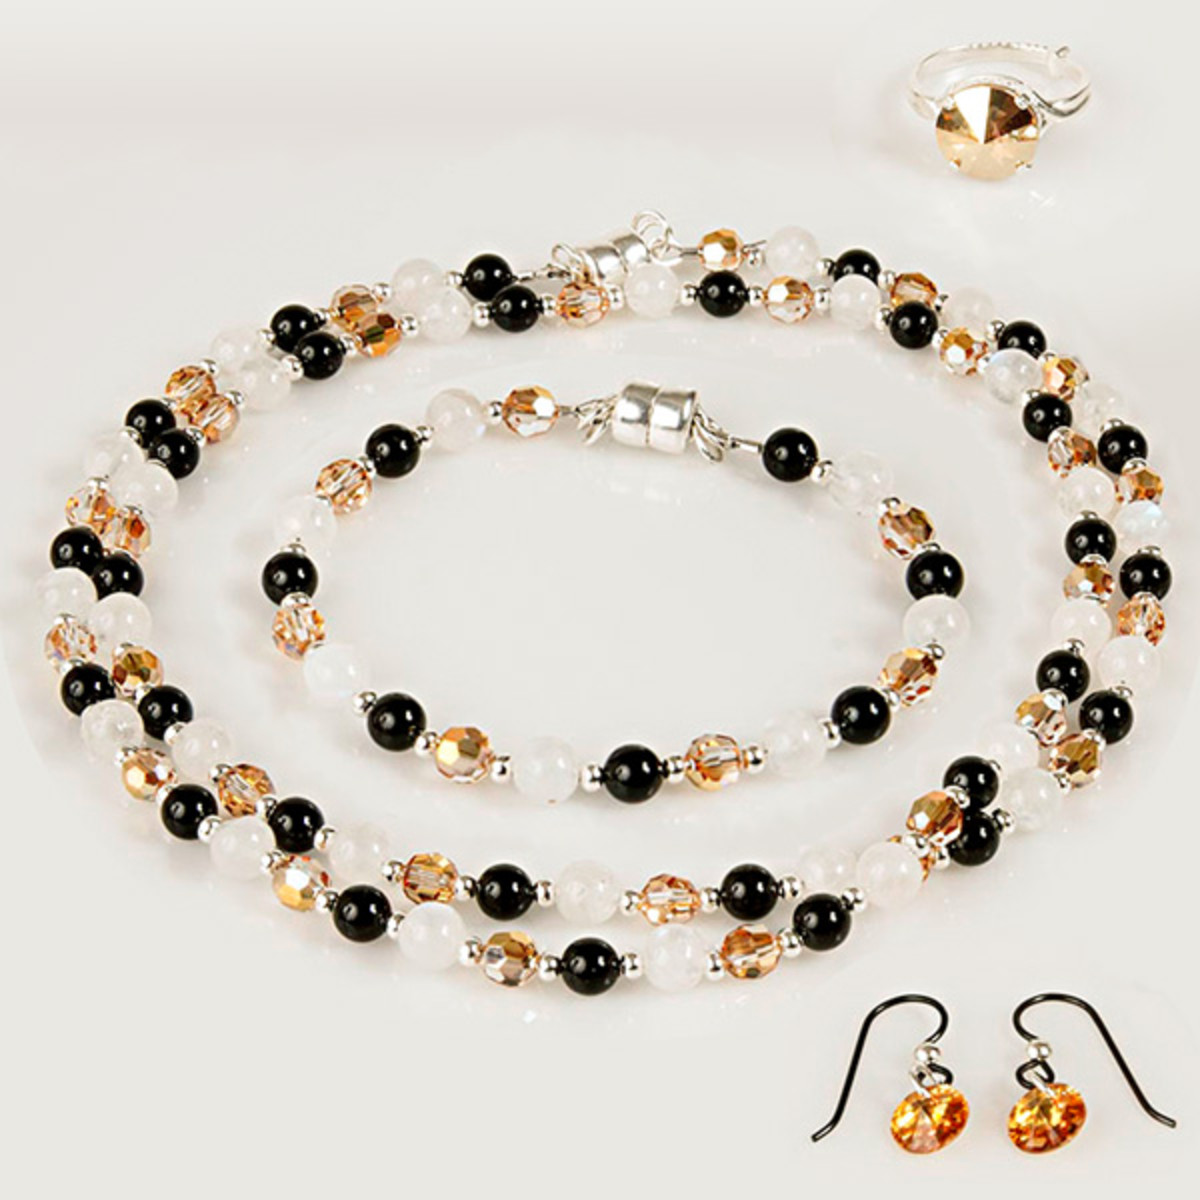
When the Day Met the Night
Created by: Tricia Van LeuvenShimming moonstone, sparkling Metallic Sunshine crystal, and Mystic Black pearls make a perfect set of jewelry for the next solar Eclipse. Try subbing malachite, azurite or turquoise for the Earth (in place of the sun color), when there is a lunar eclipse!Designer TipsCenter the stone in the ring setting and gently squeeze in prongs with nylon jaw flat-nose pliers, forking from apposite sides to keep the stone centered.Once the prongs are bent in, use the burnishing
…
Jan 1st 2021
Wonder Woman Riveted Cuff Bracelet Tutorial
Created by: Polly Nobbs-LaRueDesigner TipsThis bracelet is super fast and fun to make, once you have the necessary tools.The Domed Piercing Base allows you to pierce the domed bracelet without leaving a dent or divot.The Reverse Riveting accessory is the answer to a problem: It allows you to rivet curved items, keeping the nice rivet head on the top side (outside) of the bracelet or ring.Put a few strips of double-stick (2-sided) tape on the top of the bracelet and lay out the design.Gently shap
…
Jan 1st 2021
Wickedly Simple Wire Wrapped Ring Tutorial
Created by: Michelle HorningDesigner TipsFor step-by-step instructions -- with detailed photographs -- for making wickedly simple wire-wrapped rings with beads and 22-gauge wire, see our tutorial at blog.rings-things.com.Choose your favorite dead-soft to half-hard 22-gauge wire (4 popular silver options shown below).Keeping the wires tight and close together will make a more stable, cleaner looking ring.Hide the cut ends of the wire on the back side of the ring.Optional: use a cup bur to smooth
…
Jan 1st 2021
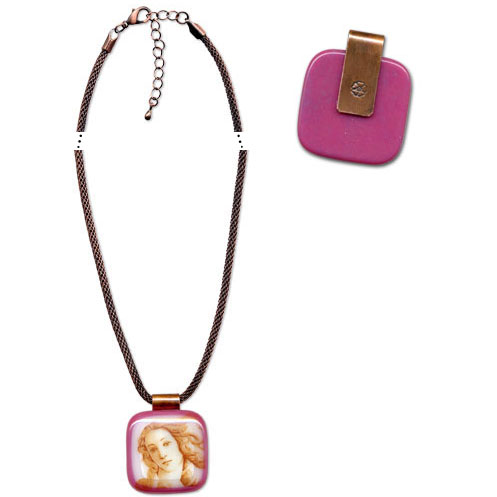
Venus Necklace Tutorial
Created by: Mollie Valente Designer TipsUsing a decorative metal stamp on a solid copper tube-top bails is an easy way to sign your work, or simply give a secret little accent to the back of a piece. Stamp the bail prior to gluing.To match the color of the mesh choker, and make the stamped design "pop", darken the bail using Win-Ox™.Glue the cabochon or other focal piece to the bail.Slide the choker onto the pendant.Free Technique Sheets & How-TosGluing Hints for Metal Findings (PDF)Tec
…
Jan 1st 2021
With Grace Earrings Tutorial
Created by: Mollie ValenteDesigner TipsUse a steel burnisher to carefully set the cushion stone in the bezel setting.For illustrated step-by-step instructions, see How to Set Rivoli Stones in Bezels (blog article).Use round-nose pliers to shape the lower loop of the bezel setting. Add a filigree cross charm and close the loop. For best way to open and close loops, see Jump Ring Hint in Jewelry Basics 101 (PDF).Attach the earring hook to the top bezel loop.Repeat steps 1-3 to make the second earr
…
Jan 1st 2021
TierraCast Bee Earrings Tutorial
Created by: TierraCast Designer TipsTwist open loops of niobium earring hooks and feed an open end through the top of each honeycomb charm. Twist closed.Open each jump ring by twisting open and feed through the top of each bee charm. Attach bee charms on jump rings through the bottom of each honey comb charm. Twist to close. For most secure way way to open and close jump rings, see Jewelry Basics 101 (PDF).Thread optional hibiscus flowers (shown) or other approximately 7mm bead of yo
…
Jan 1st 2021
Two-Hole Rulla Wrap Bracelet Tutorial
Created by: Amy MickelsonDesigner TipsUse a cloth/soft tape measure to determine the desired number of wraps and the length of bead cable or cord.Double the length of beading cord and add about 6".Create a loop with size 11 seed beads to fit the button.String rullas on the bead cord with two size 11 seed beads in between each rulla.Use 2 crimp tubes to finish the bracelet.This project uses an entire tube of rullas (approx 220 beads), measures approximately 42" long and wraps 5 times around an 8"
…
Jan 1st 2021
Twilight Tide Pool Bracelet Tutorial
Created by: Polly Nobbs-LaRueDesigner Tips Memory wire is steel, and unkind to most jewelry tools. Use heavy-duty flush cutters to cut the desired length: Most memory wire bracelets are 3-5 coils. The design pictured is about 3.5 coils. Tip: Flush cutters cut the wire flat, rather than pointed, so you don't have to file the end flat (flush).Use memory-wire bending pliers (or other strong round-nose pliers) to make a loop at one end of the wire. Close the loop tightly, or the triangle beads will
…
Jan 1st 2021
Witchy Necklace Tutorial
Created by: Jaci BostonDesigner TipsKeep the saw blade well lubricated to create ease while sawing.To avoid breaking your blades, keep the saw upright, without tilting, while you're sawing.For perfect hole placement on the triangle, take extra time and care by using a ruler to measure and mark up where you want to punch your holes.If you use a Sharpie to mark up your metal, you can easily wipe it off with a polishing pad.Don't worry if the edges of your triangles are jagged, you can file them to
…
Jan 1st 2021


