Rings & Things Jewelry Blog
Springtime Blues Earrings Tutorial
Created by: Rita HutchinsonDesigner TipsApply a dab of Loctite gel to Swarovski Setting and place rivoli stone inside. Place on a level surface to dry (if you can find a flat Styrofoam remnant, press the setting in before gluing the crystal, to create a divot.)Set square cushion stone in JBB setting using nylon jaw pliers to fold down one corner, then the opposite, and then the remaining two. This will help keep the stone straight.Attach the set rivoli to the open loop of the cushion setting and
…
Jan 1st 2021
Stella, A Night on the Town Earrings Tutorial
Created by: Polly Nobbs-LaRue Designer TipsString desired pattern of spikes onto the Vintaj® Creative Hoop.Gently bend hoop so the holes are aligned tightly together.Select a medium-sized jump ring from the assortment. To prevent marring, use 2 pairs of non-serrated flat-nose pliers to open the jump ring.Run jump ring through both holes of the Vintaj hoop, add the ear wire, and carefully close jump ring.Optional Necklace: Make a 3rd spiky hoop, and use an additional jump ring to hang it f
…
Jan 1st 2021
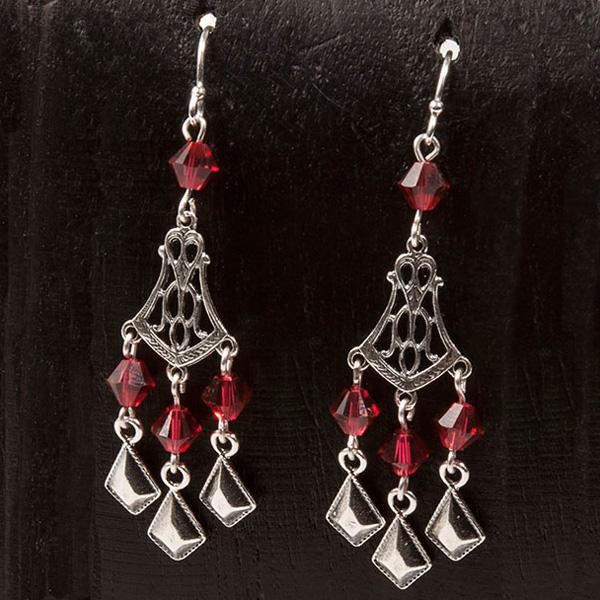
Red Kite Earrings Tutorial
Created by: Rita HutchinsonDesigner TipsUse fine tip round nose pliers in order to make loops that match the small loops on the eyepins. For looping instructions, see Jewelry Basics 101 (PDF)As you make the beaded connectors, pay careful attention to the angle of the loops you're making:Make each of the beaded connectors below the filigree, with parallel loops.The bead connectors at the top (connecting the earwires to the filigree) needs perpendicular loops for the earring to hang correctly.The
…
Jan 1st 2021
Sparkling Squares Earring Tutorial
Created by: Summer MelaasDesigner TipsPlace a crystal stone into the setting. Use a burnishing tool to gently press the bezel down on all sides of the crystal. Use the burnisher to smooth all sides of the bezel evenly up and over over the stone.Repeat with other crystal cushion stones.Use pliers to open the loop on an ear wire, and attach to the top of the setting. (See Jump Ring Hint in Jewelry Basics 101 (PDF) for best way to open and close a loop.)Suggested Supplies6 each #04-470-10-445 Swaro
…
Jan 1st 2021
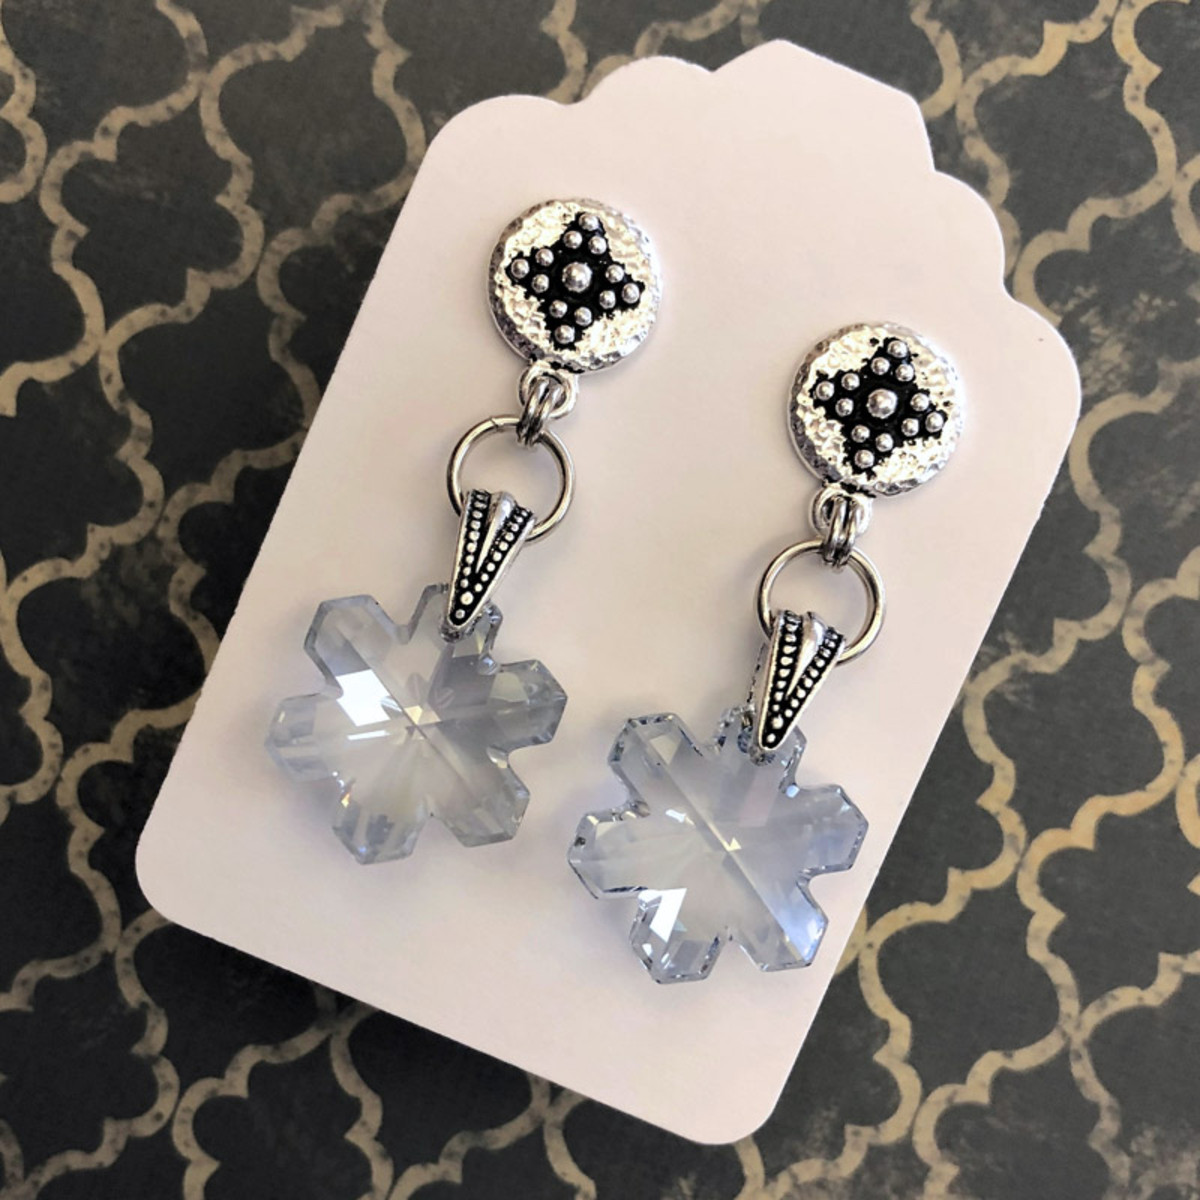
Winter is Coming - Post Earrings Tutorial
Created by: Mollie ValenteDesigner TipsAttach the pinch bail to the top of the snowflake crystal. Align the bail prongs and the crystal hanging holes, then pinch together. Once attached, you can use nylon-jawed pliers to secure the bail by gently squeezing.Add two 8mm jump rings to the bail. Use flat-nose pliers and chain-nose pliers to twist the jump rings open and then closed. See Jump Ring Hint in Jewelry Basics 101 (PDF).Use two 4.5mm jump rings to connect the 8mm jump rings to the post earr
…
Jan 1st 2021
Ultraviolet Crystal Bracelet Tutorial
Created by: Rita HutchinsonDesigner TipsUse chain nose pliers to gently close the tabs over the crystal stones. See Learn to make easy rivoli crystal rings blog for tips on setting crystals in bezels.The 2-Loop bezel settings have one open loop on each; no jump rings are required for creating the crystal portion of the bracelet. For best way to open and close these loops, see Jump Ring Hint in Jewelry Basics 101 (PDF).Adding chain to the back of the bracelet makes the finished project more comfo
…
Jan 1st 2021
Water's Edge Bracelet Tutorial
Created by: Mollie ValenteDesigner TipsGlue the bead cappers into the holes of the focal bead and dry according to manufacturer’s directions.Use jump rings to attach chain and lobster clasp to the focal bead.Add the metal bead and crystal to a head pin and make a wrapped loop.Connect this dangle and charms to the bracelet with jump rings, as pictured.Free Technique Sheets & How-TosBasic Jewelry-Making Technique Sheet (PDF)Suggested Supplies1 each #60-230 Adhesive, Epoxy, 3301 pkg of 10 [use
…
Jan 1st 2021
TierraCast Succulent Post Earrings Tutorial
Created by: TierraCastDesigner TipsPlace one bicone, one 8-10mm amethyst rondelle and another bicone onto eye pin. Cut remaining eye pin with wire cutters, leaving .25" to form into loop to close. Attach one eye pin end to the bottom loop of succulent post and link all together by attaching other end to succulent charm. Repeat for other earring. For most secure way way to open and close jump rings, see Jewelry Basics 101 (PDF).Add your favorite style of earring backs.Suggested Supplies1 pair #32
…
Jan 1st 2021
Tangerine Sunrise Earrings Tutorial
Created by: Summer Melaas Designer TipsCut 3" of 26g sterling silver wire. Add 5 Indicolite (dark turquoise) 3mm crystals to the middle of the wire. Use chain nose pliers and bend wire to a 90° angle on each side of the crystals. Wrap one side of the wire 3x tightly to the center bottom right of the hoop. Wrap the other wire 3x to the center bottom left of the hoop. Cut excess wire on both sides and crimp the end with your chain nose pliers.Cut about 4" of 26g sterling wire. Add 6 Light t
…
Jan 1st 2021
Winter in Bermuda Bracelet Tutorial
Created by: Amy MickelsonDesigner TipsRoughen the pads on the disk and loop bracelet with sandpaper or a sanding sponge. This increases the surface texture to help the glue adhere.If desired, plan your layout for symmetry.Once you plan your layout, glue one item at a time allowing the adhesive to set before adding the next item.Hint: Glue all the crystal flat backs and diamond shaped connectors to the bracelet first. Then glue on the coin pearls. Since coin pearls are not uniform in size, you ca
…
Jan 1st 2021


