Rings & Things Jewelry Blog
Circles in the Sand Necklace Tutorial
This is a lovely summery design with secure wire-wrapped links, and can also double as November birthstone jewelry (citrines) or June (pearls).Created by: Veronica Greenwood Designer TipsUsing a 12" piece of wire, wrap one 4mm citrine bead, one 4mm apatite, and one 4mm citrine around a section of the 26mm hammered link.Using a jump ring, attach all three hammered rings to the center link of your chain.For wire-wrapped loop instructions, and most secure way way to open and close jump r
…
Sep 30th 2021
Mala Prayer Necklace Tutorial
Created by: Mollie ValenteDesigner TipsFor step-by-step instructions (with photos!) to make this necklace, see our illustrated blog article: Make a Tassel Necklace with Prayer BeadsSuggested Supplies1 spool (use 42") #61-710-007 Super-Lon Bead Cord1 pack (use 111 beads) #20-225-221 Size 8 TOHO Seed Beads1 strand (use 100 beads) #29-580-08 Rosewood Mala Beads1 pack (use 1 bead) #26-816-205 Brushed-Finish Gold Bead1 each #49-958-52-AG TierraC
…
Sep 30th 2021
Safe Journey Pendant Tutorial
Created by: Mollie Valente Designer TipsTo add texture, place the metal blank on the steel block and use the ball end of the hammer to make a lightly hammered surface.After hammering, the metal blank will be work-hardened and will require annealing. Place the blank on a fire block and use a micro torch to anneal the piece. Cool to room temperature. Bonus: annealing also serves to heat patina the piece of metal.To bend the bail, place the metal blank in the jaw of the bail-making pliers, c
…
Sep 30th 2021
Noble Fir Necklace Tutorial
Created by: Mollie ValenteDesigner TipsCreate a COPPRclay™ pendant following the manufacturer's guidelines included with the clay and your kiln.Mollie made her own pattern sheet by taking a piece of textured wallpaper and punching a branch design in it.Pre-roll your clay to 8-card thickness, and then lay the paper beneath and roll again to 6 card thickness.Remove paper, and cut to the desired shape (Mollie cut an oval), then create a hole for hanging the pendant.Allow the piece to fully dry, and
…
Sep 30th 2021
M is for Monogram Necklace Tutorial
Created by: Mollie ValenteDesigner TipsFabricate the BRONZclay focal according to the manufacturer's instructions. Like many other metal clays, BRONZclay must be fired in a kiln. BRONZclay shrinks approximately 20% from package to finished product. When you create your pieces, keep this in mind.If you also work with Art Clay™ Silver (ACS), your ACS tools and work surfaces must be kept separate from the tools and surfaces that you use with BRONZclay. The materials do not work well together, and y
…
Sep 30th 2021
Frippery Soldered Frame Pendant Necklace Tutorial
Created by: Cindy MorrisDesigner TipsChoose 2 pieces of glass from the package and clean.NOTE: this design was created with 1.25" square glass, which is no longer available. 1" and 22mm replacements are linked below.Cut the images, phrases and paper to fit the glass slide. Glue images and words to the paper.Sandwich the papers back to back between the glass pieces and carefully wrap the glass with copper-foil tape.To create a tight seal, burnish the foil to the glass (a Sharpie pen handle makes
…
Aug 31st 2021
Delightfully Dotty Enameled Necklace Tutorial
Created by: Rita HutchinsonDesigner TipsCut copper sheet to size or use a premade copper blank. If you have cut your own blank, punch hole in appropriate location and file edges to remove roughness.Create rings for pendant polka dots. Use solid copper wire and either a coiling tool to create coils of different sizes or the jaws of round nose pliers to create a tapered coil.Cut individual rings from coils with flush cutter. Alternate sides when cutting the coil and trimming the end to maintain fl
…
Aug 31st 2021
Dark Skies Enameled Pendant Tutorial
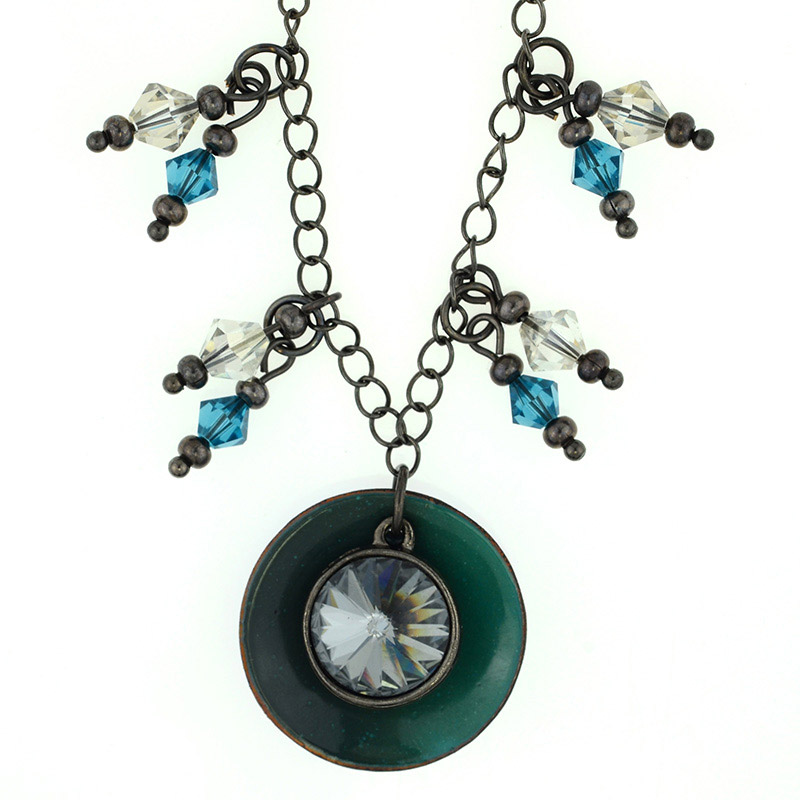
Created by: Rita HutchinsonDesigner TipsUse dapping block to shape blank.After dapping, punch 1/16" hole using the smaller (silver) side of a EuroTool "helicopter" punch.Clean blank with penny brite and enamel one side. Allow to cool.Clean other side of blank with penny brite and enamel. Allow to cool.Glue rivoli into setting.Cut chain to desired length.Add enameled pendant and rivoli to center link of chain with jump ring.Create dangles with crystal beads and gunmetal rondelles.Attach dangles t
…
Aug 31st 2021
Moonrise Necklace Tutorial
Created by: Summer Melaas and Janet BoyingtonDesigner TipsStretch and wax 1 yard of thread.Using a size 12 needle, add Delica beads to the charm following the instructions in the free printable PDFs below.Cut eleven 1.25 - 1.5" sections of chain. Make 10 wire-wrapped links (with one labradorite bead on each), and wire-wrap these links directly to the chain sections, creating a 19.5" beaded chain.Cut two approximately 3.25" sections of chain. String remaining labradorite beads onto Soft Flex wire
…
Aug 31st 2021
Tuli Tribal Necklace Tutorial
Created by: Joe HentgesDesigner TipsThe hole size for these handmade pendants can be variable.Use a drill to enlarge the hole to accommodate a 13-gauge jump ring.Darken the bone inside the enlarged hole with a black permanent marking pen.Free Technique Sheets & How-TosBasic Jewelry-Making Technique Sheet (PDF)Suggested Supplies1 oz [use 1] #37-189-9 Jump Ring, Round, 13.5mm1 pkg of 10 [use 1] #52-135-02-18 Necklace, Genuine Leather, 5mm, Economy, 18"1 ea #25-110-66-3 Pendant, Bone, Barbed Fi
…
Aug 14th 2021


