Rings & Things Jewelry Blog
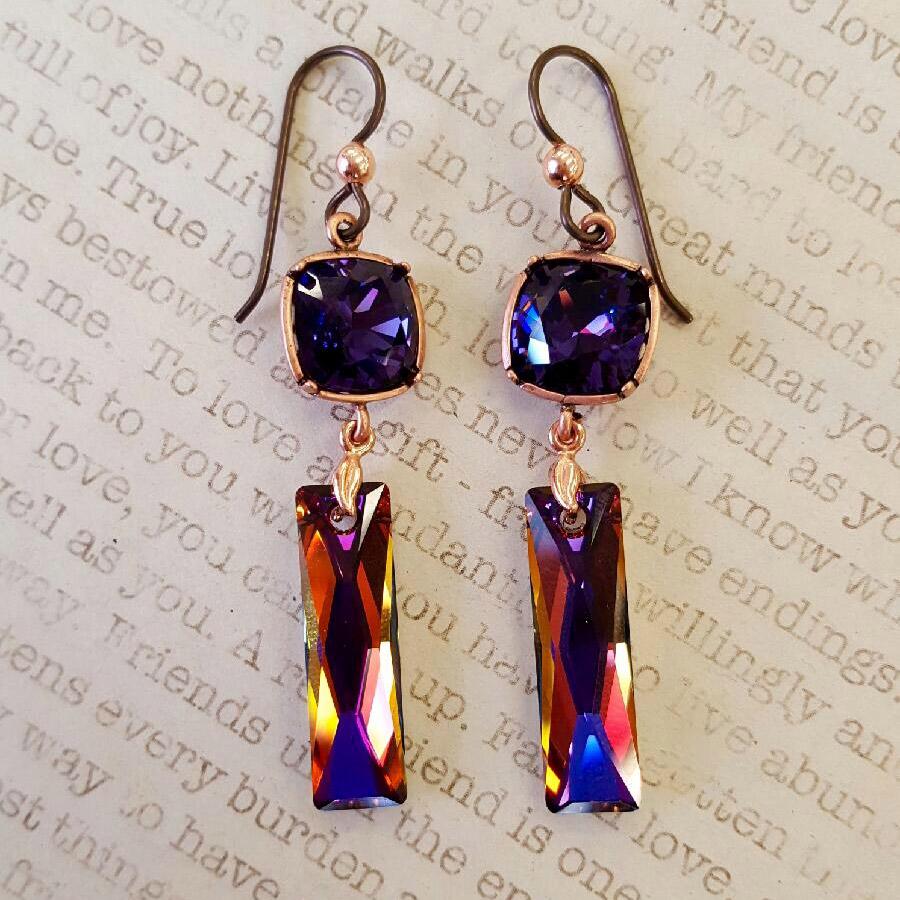
Carnival Queen Earrings Tutorial
Created by: Summer MelaasDesigner TipsPlace 10mm cushion square stone into setting, and use nylon-jaw or chain-nose pliers to gently flatten the prongs onto the stone. See tips in our blog, for best way to keep your stone safe and centered.Carefully add bail to top of pendant (gently open the prongs with needle-nose pliers if needed). Use nylon-jaw or chain-nose pliers to securely close the bail.One loop on the setting is openable. Twist the loop open far enough to add the bail, then twist to se
…
Jan 3rd 2021
Music Lover Necklace Tutorial
Created by: Valorie Nygaard-PouzarDesigner TipsCut out the desired image.Consider sealing both sides of the image to prevent possible discoloration of the image.24mm Piddix collage hearts should fit snugly in the heart bezel, but glue image to bezel cup to prevent the image from floating.Read and follow the manufacturer's instructions for preparing resin.Slowly pour resin into the bezel. Remove any bubbles by waving a flame over the piece.For additional tips & hints, see...Epoxy Resin Tip Sh
…
Jan 3rd 2021
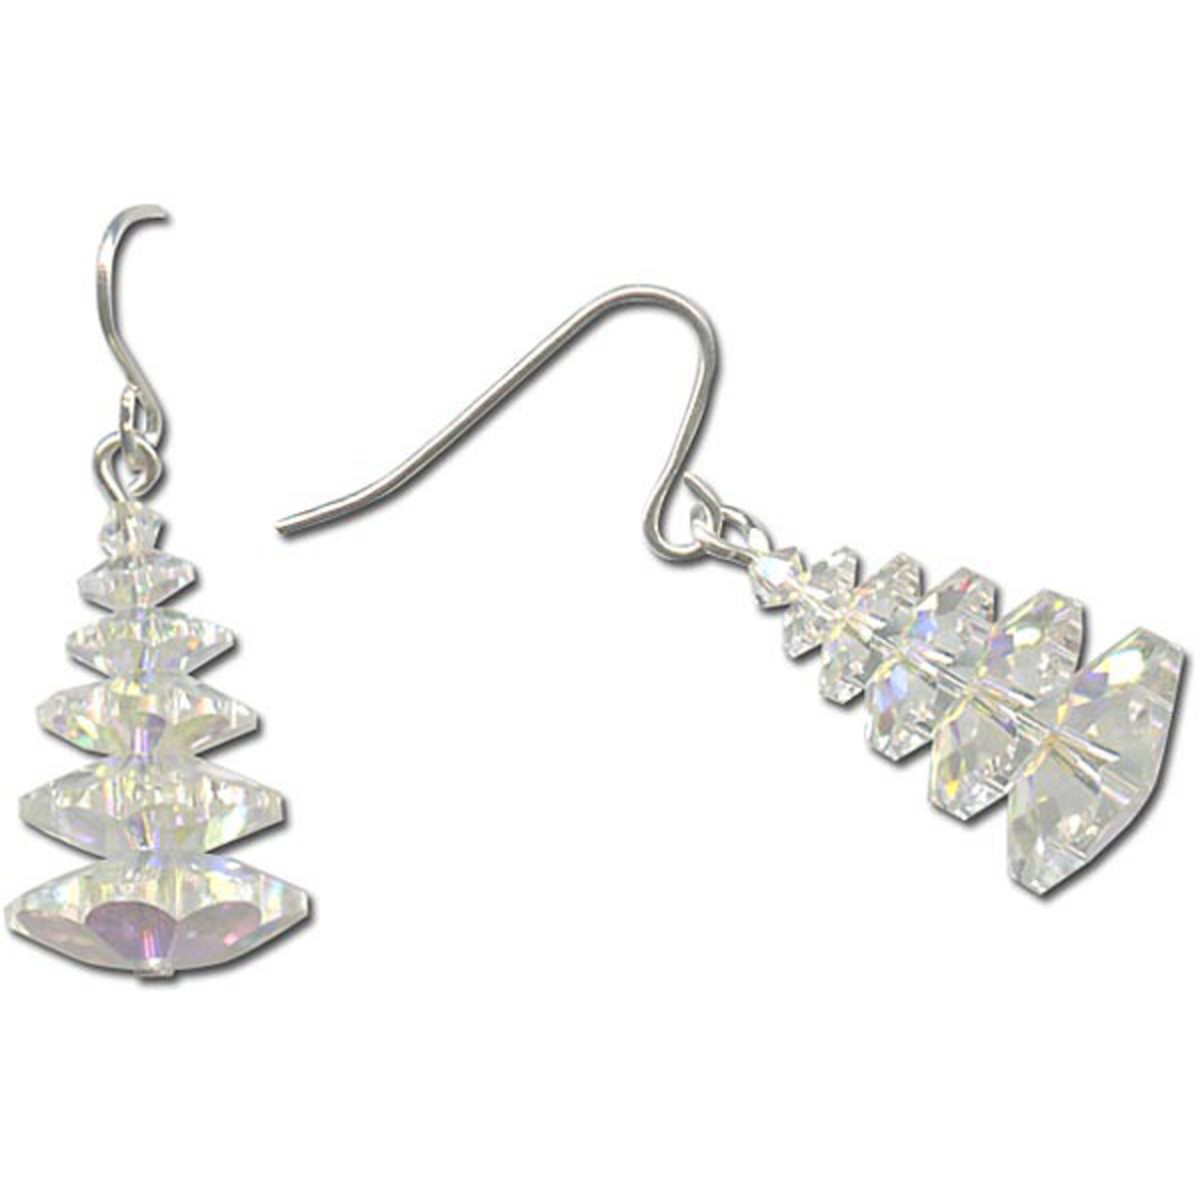
Snowy Crystal Christmas Tree Earrings Tutorial
Design by: Swarovski's Create Your Style Design Team and Rings & Things.Designer TipsFor each earring, string onto one head pin: one 12mm margarita; one 10mm margarita; one margarita 8mm; one 6mm margarita; one 3mm bicone.Turn loop on head pin.Open loop on bottom of ear wire, attach to loop formed on head pin & close loop to secure.Free Technique Sheets & How-TosBasic Jewelry-Making Technique Sheet (PDF)Blog post: Twelve Days of Christmas Jewelry Designs: Swarovski Crystal Tree Earri
…
Jan 2nd 2021
Snowman's Holiday Pearl Earrings Tutorial
Add some sparkle and shine to your holiday wardrobe. These snowman earrings are easy and quick to assemble.Created by: Rita Hutchinson.Design by: Swarovski's Create Your Style Design Team Designer Tips Add pearl beads, scarf and hat to head pin, starting with the largest (10mm) pearl bead.Make a simple loop at the top. New to jewelry-making? See Basic Jewelry-Making Technique Sheet (PDF) for instructions on making loops, and most secure way to open a jump ring (or other loop,
…
Jan 2nd 2021
Star of India Netted Christmas Ornament Tutorial
Created by: Veronica GreenwoodDesigner TipsCreate a unique, beautiful netted Christmas ornament cover with size 11 seed beads, and Swarovski crystal pearls or your choice of accent beads and drops -- free instructions, no blinkin ads, and no login required.Thread a size 12 beading needle with 2 yards of One-G, or stretched and waxed size B beading thread.String on 4 main beads, 1 accent bead (1 set) and repeat 8 times for a total of nine sets, leaving a 6"" tail.Go through all beads one more tim
…
Jan 2nd 2021
Star Light Netted Ornament Cover Tutorial
Created by: Veronica GreenwoodDesigner TipsCreate a unique, beautiful netted Christmas ornament cover with size 11 seed beads, and Swarovski crystal pearls or your choice of accent beads and drops -- free instructions, no blinkin ads, and no login required.Thread a size 12 beading needle with 2 yards of One-G, or stretched and waxed size B beading thread.String on 4 main beads, 1 accent bead (1 set) and repeat 8 times for a total of nine sets, leaving a 6"" tail.Go through all beads one more tim
…
Jan 2nd 2021
Pretty Posy Filigree Earrings Tutorial
Created by: Mollie ValenteDesigner TipsMix the adhesive according to the manufacturer's instructions.Apply masking tape to the back side of the filigrees. This will prevent the adhesive from leaking through the openings.Apply adhesive to the back side of the flat back crystal and center it on the filigree and press gently. Repeat with the second filigree and crystal.Set the pieces aside in a warm area to cure. Curing overnight is usually best.Once cured, remove the masking tape from the back sid
…
Jan 1st 2021
Pretty in Pink Bracelet Tutorial
Created by: The Swarovski Design Team Designer TipsFor best way to open and close loops, see Jump Ring Hint in Jewelry Basics 101 (PDF). Suggested Supplies1 6-pack #02-088-34-182 Swarovski 34ss Indian Pink 2088 Xirius Rose Flat-Back Crystals, No Hotfix7 dozen (use 78 pcs) #05-000-04-182 Swarovski 5000 Faceted Round Beads, 4mm - Indian Pink4 dozen (use 47 pcs) #05-000-06-182 Swarovski 5000 Faceted Round Beads, 6mm - Indian Pink6 each #41-864-12-3&nbs
…
Jan 1st 2021
Pop of Color Enamel Earrings Tutorial
Created by: Summer MelaasNote: We've had great success enameling our 24-gauge brass blanks, but for the most consistent color results, this enamel is best with copper blanks. Designer TipsTexture the top portion of the blanks with a chasing hammer or ball pein hammer.Use the smaller end of the 2-hole metal punch to punch a 1/16" hole near the top of the blanks. Be sure to center it, so the earrings hang properly.Clean the blanks with Penny Brite to remove all oils.Optional: Spray a light, even c
…
Jan 1st 2021
Petite Artemis Angel Earrings Tutorial
This project uses Swarovski crystals and TierraCast® components. Created by: Rita Hutchinson. Design by: CREATE YOUR STYLE.Designer TipsUse the puffed rondelle bead to fill the opening in the large end of the artemis bead.Add beads to head pin in same order as in photo.Make a simple loop at the top of the head pin (see Basic Jewelry-Making Technique Sheet PDF)Slightly open loop on ear wire (see Jump Ring tip in Jewelry-Making Technique sheet) to add angel. Close securely.Repeat for other earring
…
Jan 1st 2021


