Rings & Things Jewelry Blog
Enameled Orchid Eye Tutorial
Created by: Mollie Valente Make your Enamel DiskUse the dapping set to dome the copper blank. (See Rings & Things blog post: How to Dap and Dome Metal Jewelry.)Fire the concave (back side) of the copper blank with orchid enamel (counter enamel). Or you can use the enamel colors of your choice. (Follow firing and safety instructions from the Thompson Enamel Workbook or Rings & Things blog post: Torch Fired Enamels.)Clean the domed copper blank with Penny Brite.Fire the convex (front
…
Oct 25th 2021
Chainmaille-Style Earrings Tutorial
Created by: Mollie ValenteDesigner TipsThis project has step-by-step illustrated instructions in our blog: How To Make Chainmaille-Style EarringsSuggested Supplies1 ounce (use 8 pieces) #37-178-1 White Plated Jump Ring, Round, 10mm1 ounce (use 2 pieces) #37-136-1 White Plated Jump Ring, Round, 5mm1 100-pack(use 8 beads) #26-114-0 Gold Plated Brass 5x5mm Barrel Beads, Large Hole1 pair #34-563-20-SF TierraCast Silver-Filled Earring Hook Findings, Plain2 each #06-433-11-01) Swarovski 6433 Pear Cut
…
Oct 25th 2021
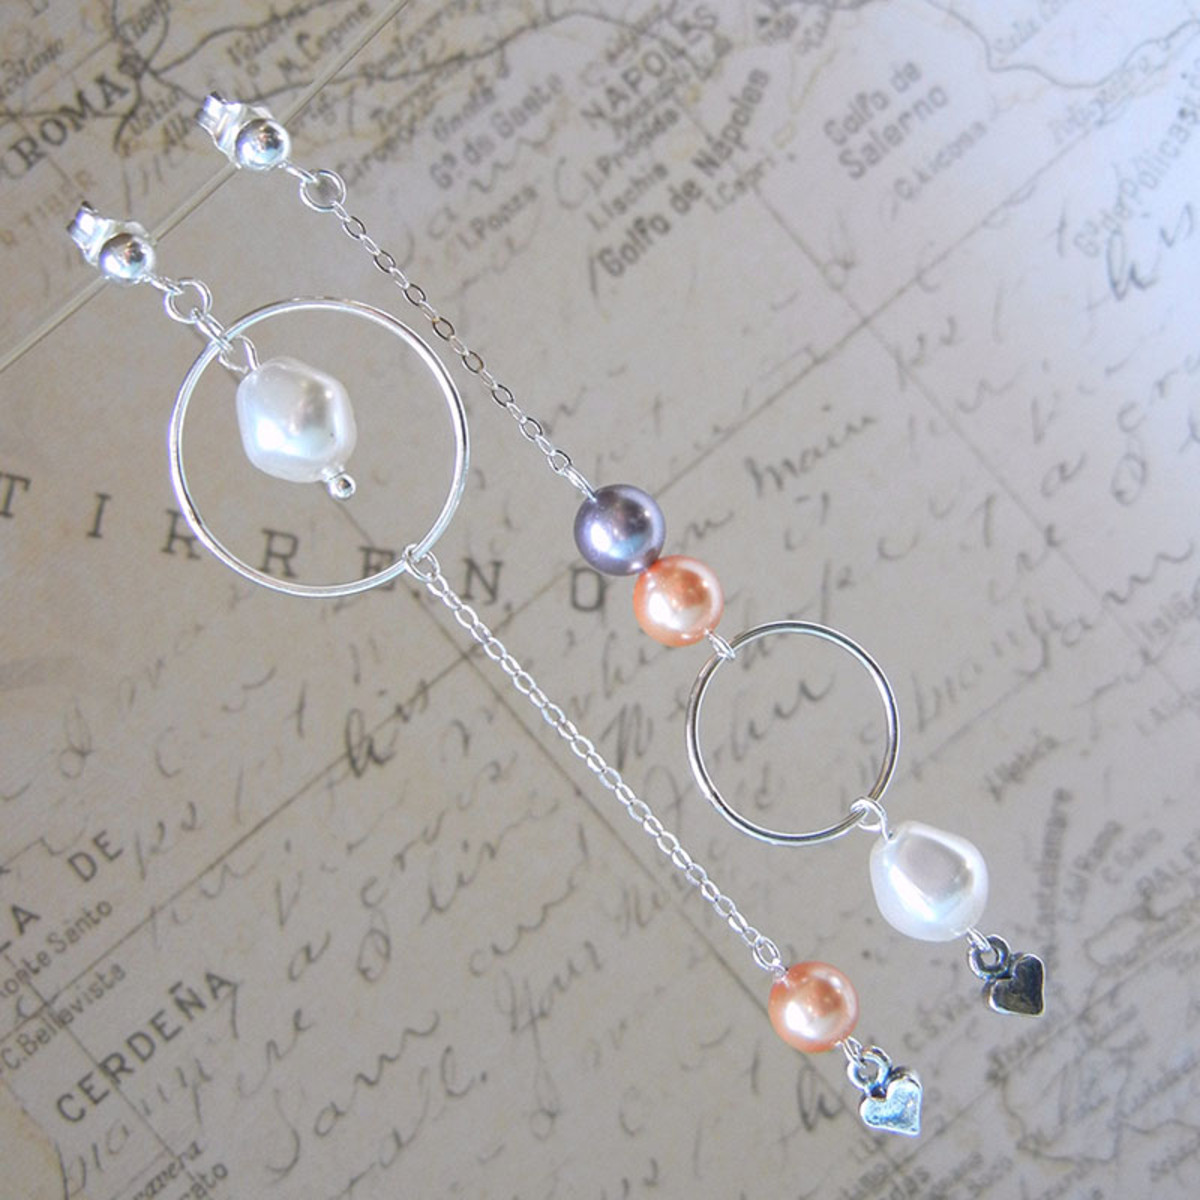
Balancing Act Asymmetrical Earrings Tutorial
Created by: Mollie ValenteDesigner Tips - Earring 1Attach a tiny heart charm to the end of an eye pin. String on a rose-peach pearl and form a simple loop on the end. Then attach to the the end link of chain. New to jewelry-making? See Jewelry Basics 101 (PDF).Cut the chain at 1-1/2 inch in length. Use a 3mm jump ring to attach the chain to the bottom of a 20mm link.String a white Baroque pearl onto a ball-end head pin and form a simple loop on the end. Use a 4mm jump ring to attach to the top o
…
Oct 25th 2021
Bejeweled Necklace Tutorial
Created by: Cindy Morris Designer TipsClose the hoop. Lash the rhinestone chain onto the hoop using Artistic Wire, wrapping around the hoop twice between each link of chain.Start and end the chain over the opening of the (now closed) hoop. Trim ends when done.The last link on each end will not lie quite flat, so tie the lark’s head knot over this spot to hide them.Make sure your cord lengths are equal before attaching cord ends and clasp.Free Technique Sheets & How-TosBasic Jewelry-Maki
…
Oct 1st 2021
Mermaid in the Moon Necklace Tutorial
The lovely glass bead used in this free necklace design goes by a number of names including mermaid beads and mystic aura beads. They've even been mistaken for moonstone gemstones! They are 2 half-spheres of frosted glass fused together with an AB layer in the center, providing a mystical shimmering effect.Created by: Janet BoyingtonDesigner TipsCut chain in the center.Cut 3"" of sterling silver wire.Make a wire-wrapped loop, attached to one end of the cut chain. For step-by-step instructions on
…
Sep 30th 2021
Modern Art Earrings Tutorial
Created by: Summer MelaasDesigner TipsStretch and wax 2 yards of thread. Add a spare seed bead (stopper bead) about 2" into the thread.Stitch an edging stitch on one side of the GF square, following the pattern.Do not cut. Exiting from the end of the edging, continue following the pattern, one fringe at a time. At the bottom of each fringe, skip over the last bead, and run your needle and thread back up the fringe (see example). Move needle and thread over to the next bead, for next fringe.Pull
…
Sep 30th 2021
Golden Sunshine Bracelet Tutorial
Created by: Janet Boyington Designer TipsCut three 10" strands of gold Beadalon stringing wire. My bracelet measures about 6.5" when competed and ready to wear. Plan accordingly for larger wrist sizes.String all three wires in a pleasing pattern, using alternating arrangements of Citrine, seed beads, Preciosa crystals and pearls. Utilize bead stoppers to keep beads in place as you design your patterns.When each strand is to your liking, crimp each end (on one side) to the decorative go
…
Sep 30th 2021
Golden Buzzer Charm Tutorial
Created by: Janet BoyingtonDesigner TipsThis 10mm charm is perfect for showcasing a 6mm stamped impression.Gold-fill is harder than sterling or pewter, but not as hard as nickel silver.Place your charm on a steel block, and use a brass hammer and design stamp of your choice. New to metal stamping? See Metal Stamping 101.Following instructions on package, apply Stamp Enamel, and remove excess.When completely dry, polish letter charm with a Sunshine polishing cloth.Use a jump ring to add charm to
…
Sep 30th 2021
Gemstone Chakra Bracelet Tutorial
Created by: Michelle HorningDesigner TipsCut a length of stretchy cord about 6" longer than you'll need for the finished bracelet, to make it easy to tie the finishing knot. Double the cord if doubled cord will fit through all your beads. Add beads in desired pattern starting with a few of the black beads:The bracelet pictured is made with twenty 8mm gemstone beads, and perfectly fits a 6" wrist.To make the same length bracelet with 6mm beads, use 26 or 27 gemstone beads.To make the same length
…
Sep 30th 2021
I Love My Cat Bracelet Tutorial
Created by: Tracy Proctor of TierraCastDesigner TipsPre-stretch cord by pulling firmly from both ends a few times.Attach small binder clip or bead stopper 2-3” from one end of stretch cord.On other end of cord string bail, *one 4mm bead and one paw bead*. Repeat * through * three times.String 32 4mm gemstones or firepolish glass beads of your choice. (Tip: Three 4mm gemstones or Czech beads equals approx. 1/2". Instructions create a 7" bracelet. Adjust bead count accordingly for desired size.)Re
…
Sep 30th 2021


