Rings & Things Jewelry Blog
TierraCast Monstera Bracelet Tutorial
Created by: TierraCastDesigner TipsPre-stretch cord. Attach center of cord to button shank with Larks-Head knot, then tie overhand knot.* String nugget spacer onto both cord ends then tie second knot using an awl and pearl knotting technique. Thread one end of cord through one 8mm faceted glass, gemstone or crystal bead, then tie both cords in overhand knot. *Keep tension tight. Repeat * to * to desired length, finishing with nugget bead.String 22-24 size 8 seed beads or 3mm disk beads to form b
…
Jan 1st 2022
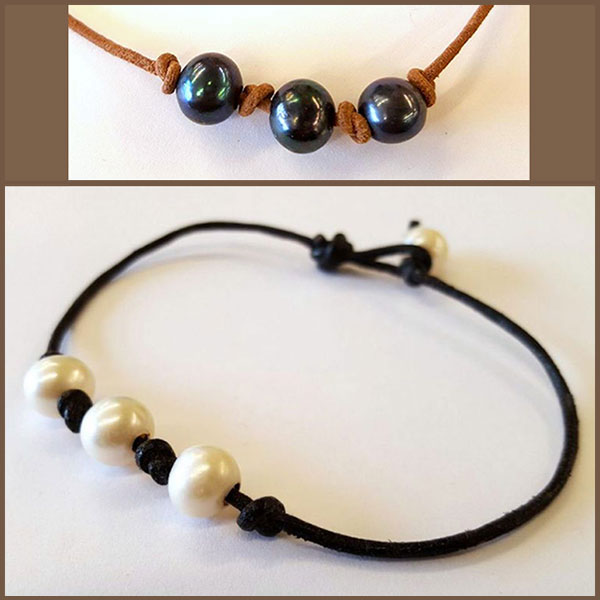
Trio of Pearls - Leather Bracelet Tutorial
Created by: Sondra Barrington Designer TipsAdd a pearl to one end of the cord, and tie a simple overhand knot on each side of the pearl. Use an awl to help pull the knots tight up against the pearl bead. This will be the "button" portion of your button/loop clasp.Add 3 pearls to the bracelet -- but don't tie any knots around them yet.Make a loop at the other end of the bracelet, just large enough to fit over the pearl "button". Secure the loop with a knot, but before tightening the knot,
…
Jan 1st 2022
Summer Rain Bracelet Tutorial
Created by: Veronica GreenwoodDesigner TipsPlace a wire guard on the round link and crimp a 10-inch piece of flex wire through the wire guard (see Jewelry Basics 101 - PDF).String one each in this order:3mm aquamarine, 2mm silver bead, 4mm aquamarine, 2mm silver bead, 3mm aquamarine, 2mm silver bead, pearl, 2mm silver bead, 3mm silk, 2mm silver bead, pearl, 2mm silver bead,3mm aquamarine, 2mm silver bead, 4mm aquamarine, 2mm silver bead, 3mm aquamarine, 2mm silver bead,pearl, 2mm silver bead, 3m
…
Jan 1st 2022
Tschinkel's Circles Bracelet Tutorial
Created by: Polly Nobbs-LaRueDesigner TipsLay out a pattern on the blank bracelet. Free-hand, or using a ruler, mark each spot using an awl or an extra-fine point marker. (The heishi beads pictured are 18mm apart.)Punch 1/16" holes in the leather, using the cutting end of the Crafted Findings riveting tool.If necessary, use the cutting end of the riveting tool to punch 1/16" holes in the center of the vinyl disk beads. (They already have holes, but the holes might need to be larger.)Use a short
…
Dec 10th 2021
Matte Satin Necklace Tutorial
Created by: Rita HutchinsonDesigner TipsStart with plenty of 26-gauge wire, and anchor wire to one side of arc connector. Add 4mm beads and extra lashes between each bead. Finish off the end with additional anchor lashing. Tighten anchor lashes with pliers.With 22-gauge wire, create a wrapped loop beaded connector to attach crescent link to chain. Be careful when tucking in the wire tails, as the 2mm beads are easy to accidentally crush with pliers.Divide chain in half and attach clasp with medi
…
Dec 4th 2021
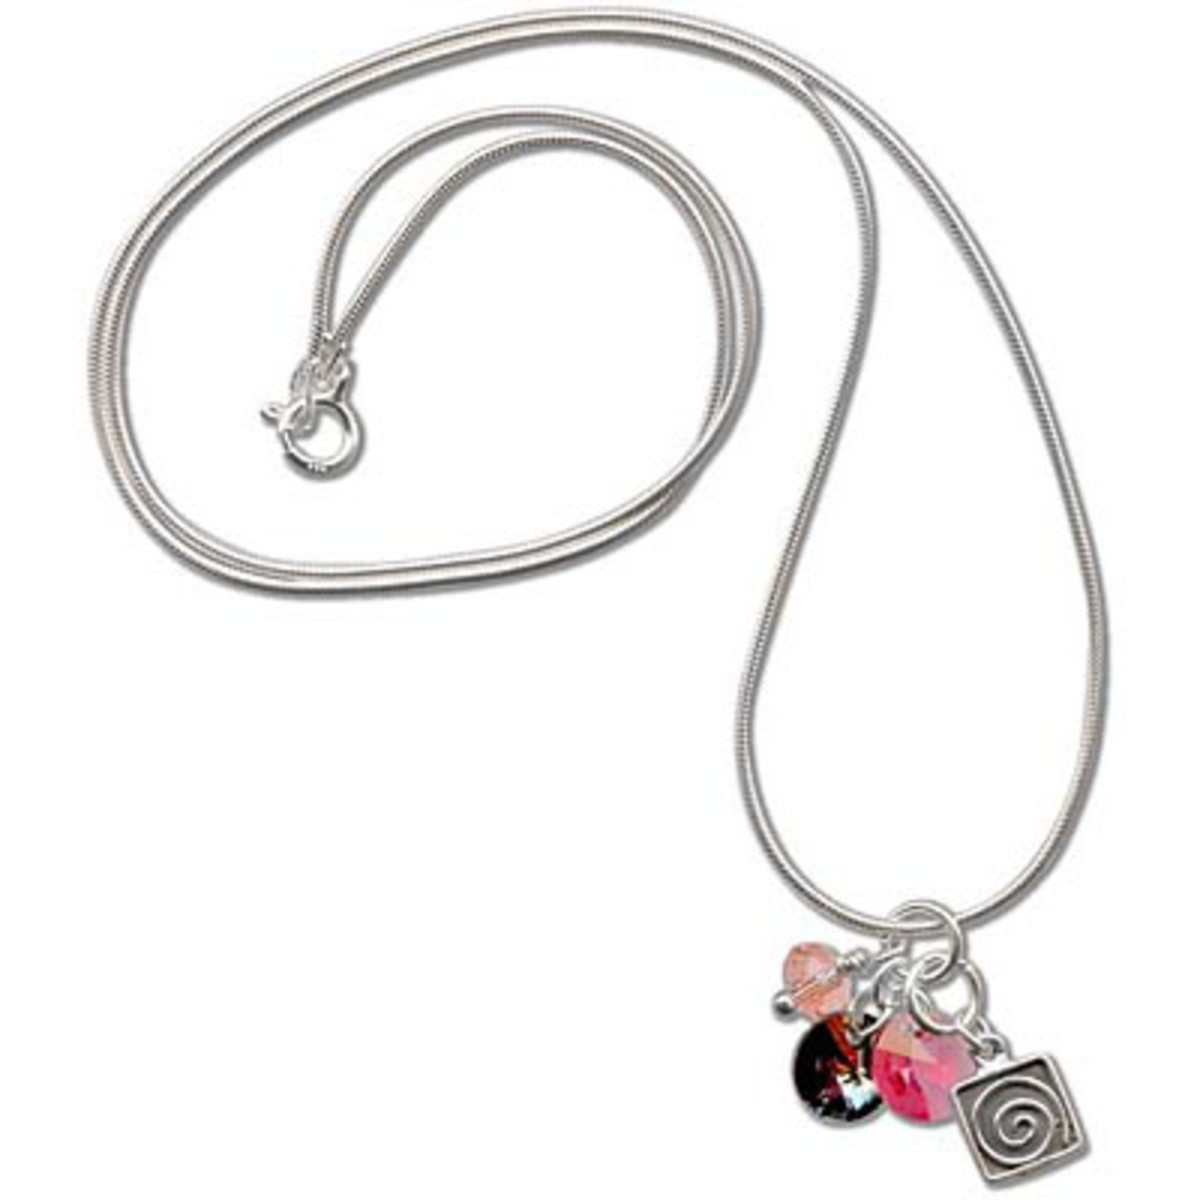
Little Spiral Necklace Tutorial
Created by: Rita HutchinsonDesigner TipsThe extra jump rings used when hanging the cluster of charms on this necklace help keep the spiral charm facing forward.For instructions on making beaded head pin loops, and the best way to open and close jump rings, see Basic Jewelry-Making Technique Sheet (PDF)Suggested Supplies1 doz [use 1] #05-040-06-409 Bead, Puffed Rondelle - Rose Peach1 ea #50-101-23-20 Chain, 20", Snake, 1mm1 ea #44-046-72 Charm, Spiral1 each #06-428-08-400 Crystal, Pendant, Rivoli
…
Dec 4th 2021
Om Mirage Choker Tutorial
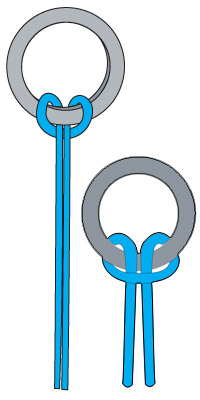
Created by: Michelle HorningDesigner TipsFor step-by-step instructions on creating macramé jewelry, see How to Macramé a Hemp Bracelet.A choker will usually fit as a double wrap bracelet on most people. Double the amount of working and anchor cord in the original (blog) tutorial for this project.When using this link, fold anchor and working cords with centers together, and attach to the link with a lark's head knot (see illustration below). The link replaces the shortest cord in the original tut
…
Dec 4th 2021
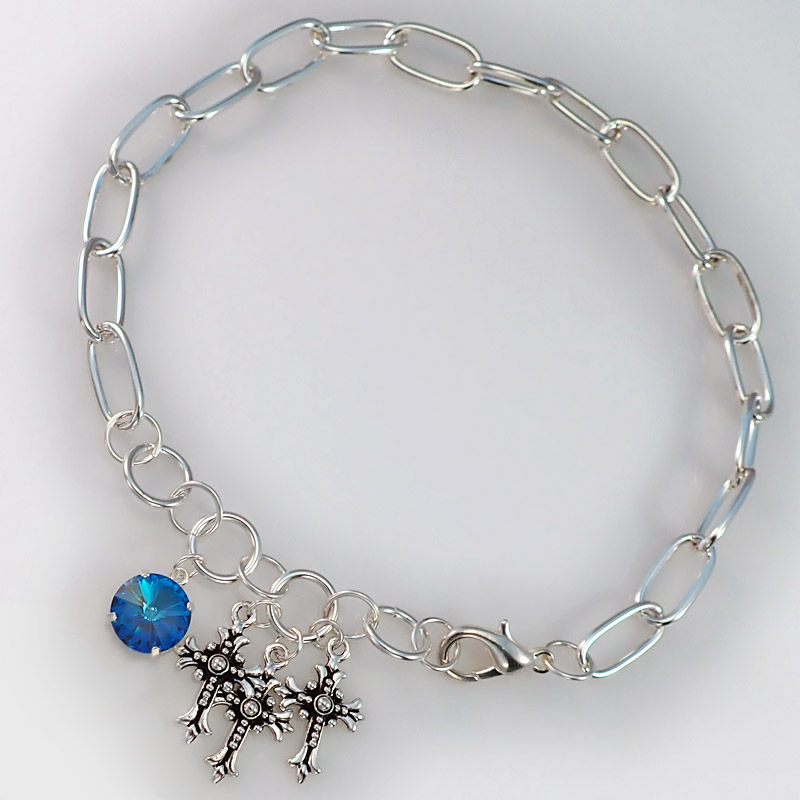
My Blue Heaven Choker Necklace Tutorial
This short 16.5" necklace can also be double-wrapped and worn as a chunky bracelet.Created by: Mollie Valente Designer TipsUse a steel burnisher to carefully smooth (burnish) the prongs down onto the rivoli stone in the bezel setting. For step-by-step instructions on setting a crystal stone in a bezel, see Blog Article: Step-by-Step: How to Set Rivoli Stones in BezelsUse a 10mm jump ring to attach the lobster clasp to one end of the drawn cable chain. For best way to open and close loo
…
Dec 4th 2021
Hexed Wire Bracelet - Tutorial
Learn a simple and sparkling way to make bangle bracelets with hex wire. No soldering or wire wrapping required!Created by: Rita HutchinsonDesigner TipsUnroll and straighten enough wire for all bracelets you plan to make. Add an extra few inches of wire, as the ends won’t be twisted, and the total length will shrink a tiny bit.Insert one end of wire into the chuck of the coiling gizmo. Hold other end firmly with pliers (or with a vise) and hold straight out from coiling tool. Turn handle on tool
…
Dec 3rd 2021
Puppy Love Pin Tutorial
Created by: Mollie ValenteDesigner TipsThe Complete Metalsmith (#62-011) provides a useful chart for selecting saw blades. Or scroll down to the comments section of our "Tips for Sawing Sheet Metal with a Jewelers Saw" blog article.Use rubber cement to adhere a paper Scottie dog pattern to the brass. Saw the design out. File the metal to shape.Repeat process with patterned brass heart.Use a soldering iron to add soft solder to the backside of the rhinestone chain and heart. Turn over, and place
…
Dec 3rd 2021


