Rings & Things Jewelry Blog
Luna Pearl Earrings Tutorial
Created by: Summer MelaasDesigner TipsPlace 1 larimar bead, 1 bead cap, and 1 faceted pearl bead on a thin ball-end pin. Wrap it to the tail of the luna moth. New to jewelry-making? See Jewelry Basics 101 (PDF).Create a chain of 4 wire-wrapped links using 1 larimar bead per link, off the tip of the wing. (Optional: Make simple wire loops using a 1-step looper.)Repeat for other side of moth.With one larimar bead, link the ends of both larimar chains to the succulent post loop, making sure both ch
…
Jan 1st 2022
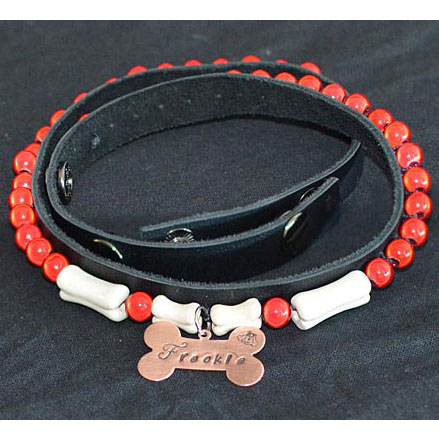
A Dog's Night Out Collar Tutorial
Created by: Valorie Nygaard-PouzarDesigner TipsWhether it be the park or the opera, your pooch will prance in style with this custom and personalized doggie necklace.Determine the total length of the collar. This project is for a medium size dog and measures 26" with 3 snaps.Lay the leather strip so that the back side is up, and lay your beads along the leather strip. Measuring from the center out, use a pen to mark where you will pierce holes in the leather for sewing on the beads.Pierce with a
…
Jan 1st 2022
Sour Patch Bracelet Tutorial
Created by: Rita Hutchinson 12mm #4470 Cushion Squares by Swarovski are nearly gone, but these settings also work with most other brands of 12mm cushion squares. Shop remaining colors while they last!Designer TipsFor step-by-step instructions on wire-wrapping loops, and best way to open and close jump rings, see Jewelry Basics 101 (PDF)Set the crystals in the bezel settings, and press prongs down smoothly over the stones using the nylon jaw pliers.Link settings together with jump rings
…
Jan 1st 2022
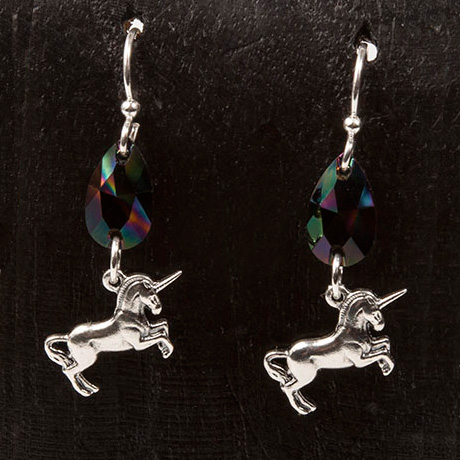
Rainbow Rider Earrings Tutorial
Created by: Rita HutchinsonDesigner TipsUse a jump ring to add the the sterling unicorn charm to the bottom hole of the 12mm crystal Rainbow Dark drop. For best way to open and close loops, see Jump Ring Hint in Jewelry Basics 101 (PDF)Open the loop on the earwire the same way you opened the jump rings, to add the top of the crystal drop.Mix and match sew-on drop colors with various charms for simple earrings!Suggested Parts1 pair #34-569-04 TierraCast Sterling Silver Earring Hook with 2mm Bead2
…
Jan 1st 2022
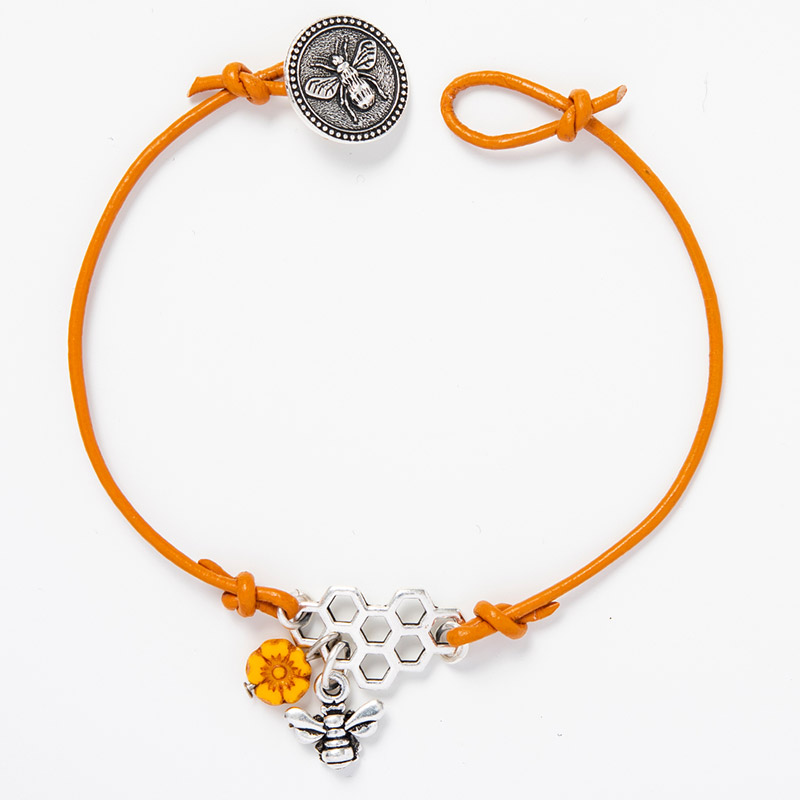
TierraCast Bee Bracelet Tutorial
Created by: TierraCastDesigner TipsCut 20" of 1.5mm cord in your choice of color and cut again into 2 pieces, one 12" and one 8".Feed one open end of each cord through each end of honeycomb link (as shown in picture), secure with knot by wrapping working end around cord and forming overhand knot, aiming tail away from loop. Secure with glue after final tightening.For left side of bracelet (button end), feed free 8" long cord end through shank of the button and tie knot.For right side of bracelet
…
Jan 1st 2022
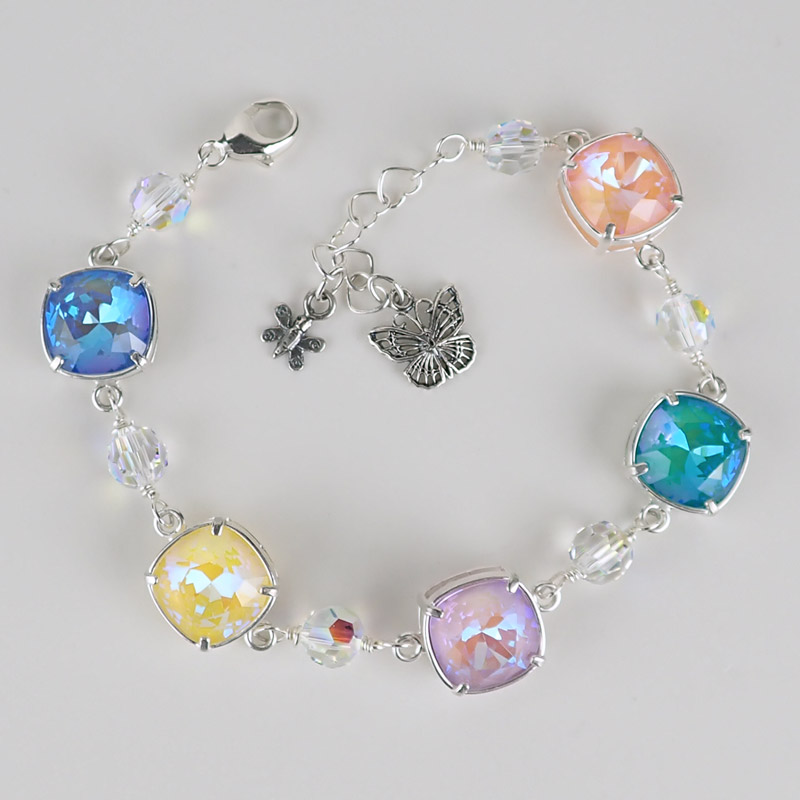
Springtime Serenade Bracelet Tutorial
Created by: Veronica Greenwood Designer TipsPlace one 10mm crystal into one bezel setting and use needle nose pliers to gently bend prongs over crystal. Repeat for all five colors.Using the 24 gauge wire and 6mm round crystal beads, link the bezel settings together (see Jewelry Basics 101 PDF).On one side add the lobster to the crystal link.On the other side add 1in of chain to the crystal link.Using the oval jump rings attach the two butterfly charms to the chain.The lobster clasp c
…
Jan 1st 2022
Tri-Tone Cuff Bracelet Tutorial
Created by: Rita Hutchinson Designer TipsUsing a pre-cut and finished bracelet blank, and precut 6" patterned wire makes this bracelet assemble in a snap!Apply pattern to copper blank with desired metal stamps.Add patina to patterned wire and bracelet blank. Rinse and dry. Highlight with sanding sponges and polishing pad.Add hole to each end of copper blank (at least 1/4" from the end). Use large side of double hole punch.Use EZ-Bender to form cuff shape with bracelet blank and with brass
…
Jan 1st 2022
Thin Blue Line Friendship Bracelet Tutorial
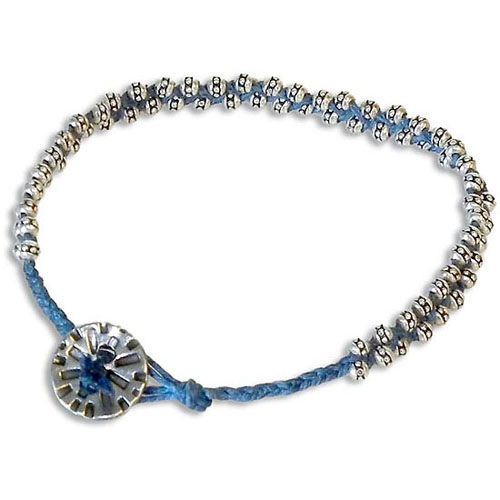
Created by: Amy MickelsonDesigner TipsCreate a loop large enough for the button to go through.A clipboard works well to anchor knotting projects. Clamp the loop under the clip.Braid a 3-strand braid with the cord for about 1" or as long as desired.String equal quantities of the beads on all 3 strands of cord. Secure each cord end with an overhand knot to keep the beads from falling off. Adding all the beads at once is easier than holding your work and trying to thread a bead on a cord as you go.
…
Jan 1st 2022
Tranquil Spangle Bracelet Tutorial
Created by: Polly Nobbs-LaRue Designer TipsDetermine desired bracelet length; add one inch. Cut a piece of cord 4 times this length. (7" bracelet + 1" = 8". 8" x 4 = 32")String the cord through the loop portion of the clasp. Center the clasp on the cord. Tie two overhand knots and check to see if your rondelles will face the right direction.String one cord through the left side of a rondelle, and the other cord through the right side. Pull tight (but not too tight). Does your bead
…
Jan 1st 2022
The Imp Bracelet Tutorial
Created by: Rita HutchinsonDesigner TipsPlan out design, and stamp words and symbols. ("I Drink and I Know Things" is a quote from Game of Thrones, and the colors used here are the colors of house Lannister.)New to metal stamping? See Metal Stamping 101Texture the blank with rounded end of chasing hammer.Apply stamp enamel per package instructions.Punch holes in bracelet with Euro Power Punch (note – The rivet length allows them to go through thicker materials; they will spin around in the cuff.
…
Jan 1st 2022


