Rings & Things Jewelry Blog
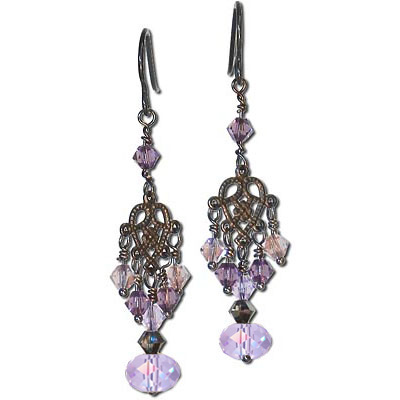
Hearts and Rain Earrings Tutorial
Created by: Polly Nobbs-LaRueDesigner TipsAdd bicone crystals to the head pins, and make wrapped loops directly onto the loops of the filigree.For the top beaded pin, cut the ball off a ball-end head and make wrapped loops at each end.Make your top loop perpendicular (90 degrees) to the bottom loop, so the earring hangs straight. If necessary, use 2 pairs of flat-nose pliers to adjust the angle after finishing the loops.Free Technique Sheets & How-TosBasic Jewelry-Making Technique Sheet (PDF
…
Jan 1st 2021
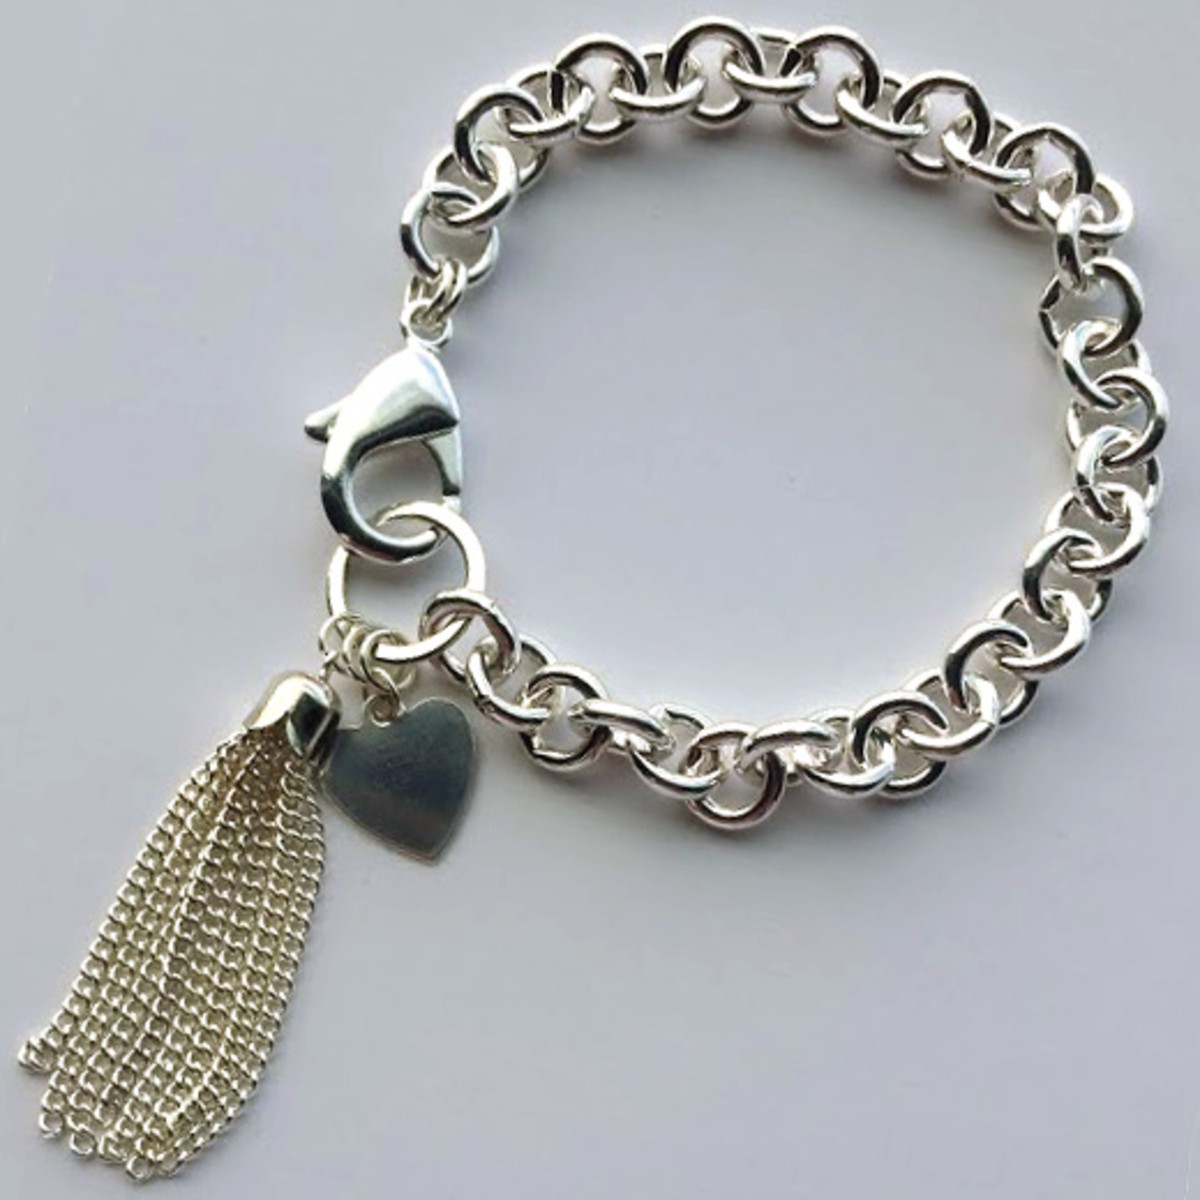
Heart Tag and Tassel Chain - Silver Bracelet Tutorial
Chain bracelets adorned with a simple heart charm continue to be popular. The sterling silver heart blank was intentionally left blank, but could easily be stamped or engraved. You can further customize this design by using different styles of chain, or tassels made of different materials! These bracelets are fun and easy to make, and make great gifts for the minimalist in your life.Created by: Sondra BarringtonDesigner TipsInstead of cutting chains, use 2 pairs of chain-nose pliers to open a fi
…
Jan 1st 2021
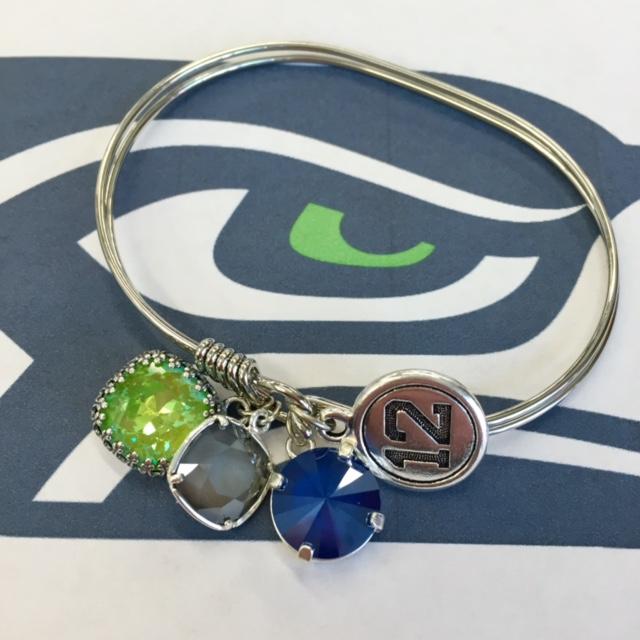
Hawks Bracelet Tutorial
Created by: Summer MelaasDesigner TipsUse nylon-jaw pliers or a burnishing tool to gently smooth the prongs and bezels down onto the stones. For step-by-step instructions, see our
…
Jan 1st 2021
Eclipse Cuff Links Tutorial
Created by: Mollie ValenteDesigner TipsClip the loop off both moon charms, file smooth, and sand with a 600 grit polishing cloth.Use a dapping block to gently dome the moon charms.Soft solder each moon charm to a round filigree. Clean with dish soap and water, and dry. (You can also substitute two-part epoxy for solder. Patina parts before gluing.)Patina each moon and polish to desired finish.Use rubbing alcohol to clean parts to be assembled and adhere with adhesive dots or two-part epoxy.Free
…
Jan 1st 2021
Easy Peasy Lariat Tutorial
Created by: Rita Hutchinson Just 3 parts total: leather cord, leather-hole pearls, and a link about the size of a quarter (around 25mm). Choose from a wide variety of link options in sterling silver and gold fill. Designer TipsDetermine finished necklace length (this piece is about 28"").Tie a double overhand knot at one end of leather. Slide all 4 pearls on the leather from the other end.Tie silver link to the other end of the leather with another double overhand knot.Settle one pear
…
Jan 1st 2021
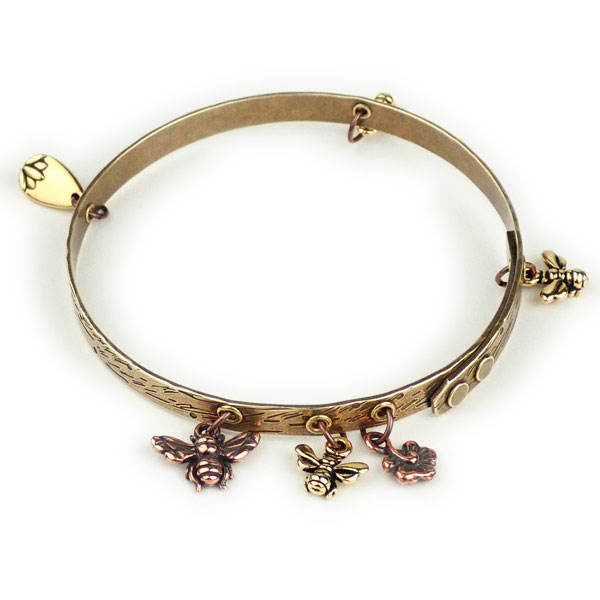
Bees and Blossoms Bangle Bracelet Tutorial
Created by: Polly Nobbs-LaRue Designer TipsOne of the things I love about this bangle bracelet, is that it's extra small, so fits me perfectly. However, that means it doesn't fit many other adults... So keep that in mind when ordering this bracelet: It's best for petite people. We also have larger plain brass bangles you can texture, punch and add eyelets to.This design uses 1 copper honeybee charm, 1 copper "small blossom" charm, 1 lotus petal charm, and 3 small small gold honeybee charm
…
Jan 1st 2021
Bee Keeper Reliquary Necklace Tutorial
Created by: Mollie ValenteDesigner TipsFor a step-by-step tutorial with images, check out the How to Create a Reliquary Pendant blog post.Cut and shape the blank: Measure and cut a brass blank 1 x 1-3/4" in size. File the blank to soften the corners.Mark and punch holes: Measure and mark the hanging holes: 3 holes, 1/8" from the top and spaced to match the holes of the triangle filigree and the wire-lashing holes; 2 holes, 1/8" from each side and 5/8" from the top. Punch holes in the marked posi
…
Jan 1st 2021
Pearl Wraparound Swarovski Necklace Tutorial
Created by: Swarovski's Create Your Style Design TeamDesigner TipsUsing one head pin, slide on one 5844 10mm elongated baroque pearl, make a simple loop and set aside. Repeat 29 more times and set aside.For step by step instructions on making simple loops, and most secure way to open and close jump rings, see Jewelry Basics 101 (PDF).Using the gold chain, take one side of the chain and beginning 3" up on the chain, attach 15 pearls from step 1, one on each ring.On the other side of the gold chai
…
Jan 1st 2021
Peaceful Thoughts Lotus Necklace Tutorial
Created by: Mollie ValenteDesigner Tips - Part 1: Prepare ComponentsDisassemble the metal mesh choker necklace and temporarily set aside the lobster clasp and metal mesh chain. For best way to open and close loops, see Jump Ring Hint in Jewelry Basics 101 (PDF).Create a 3-ring and a 4-ring section of ring & connector chain by opening and discarding end connector links. Our finished necklace has a three-ring section of chain (this is on the clasp-side of the necklace) and a four-ring section
…
Jan 1st 2021
Peace Bracelet Tutorial
Learn how to polish, color and add charms to an inexpensive brass bangle bracelet and turn it into a finished salable piece of jewelry. No stamping necessary! Created by: Polly Nobbs-LaRue Designer TipsPolish bracelet with ultrafine sanding sponge. (Or drop into a tumbler with steel shot and ShineBrite for a couple hours.)Wipe thoroughly with a soft dry cloth to remove any dust, moisture or oils.Apply Stamp Enamel to words. Allow to dry for 30 seconds.Wipe off excess with a soft clo
…
Jan 1st 2021

