
News & Information (133)
-
Solje Style Wedding Earring Tutorial(Post)
Created by: Amy MickelsonDesigner TipsUse jump rings to attach the oval charms to the loops on the filigree connector.Connect the filigree to the loop on the earring post with a 4.5mm jump ring.The fl
Icicle Lights Earrings Tutorial(Post)Created by: Rita HutchinsonDesign by: Swarovski's Create Your Style Design TeamDesigner TipsAdd a crystal teardrop bead to a head pin (narrow side towards the head of the pin), add a rhinestone wheel
Labor of Love Centerpiece(Post)Created by: Amy MickelsonDesigner TipsSize and cut an image to fit the glass tile.Use a paintbrush to apply the Inkssentials™ Glossy Accents to seal and affix the image to back of the glass tile. Once
Fit for a Queen Ring Tutorial(Post)This simple project features crystal rivoli stones and 1-time adjustable ring blanks with a bezel setting. Created by: Amy Mickelson Steps to Make These RingsWhile most colors of Swarovski crystal riv
Water's Edge Bracelet Tutorial(Post)Created by: Mollie ValenteDesigner TipsGlue the bead cappers into the holes of the focal bead and dry according to manufacturer’s directions.Use jump rings to attach chain and lobster clasp to the foc
Buzzy Bee Necklace Tutorial(Post)Created by: Kayla HeflingDesigner TipsInspired by the mood jewelry of the '60s and '70s, Mirage Beads™ are thermo-sensitive polymer beads that change color with small temperature changes.Separate the
April Love - Bracelet Tutorial(Post)Created by: Sondra Barrington How can I customize thee? Let me count the ways... Designer Tips Chain bracelets adorned with a simple heart charm continue to be popular. The sterling silver heart bla
Interchangeable Constellation Bangle Bracelet Tutorial(Post)Create sparkling constellation jewelry in an hour, using minimal supplies and Swarovski Ceralun Ceramic Epoxy Clay, Crystal Clay, or your favorite epoxy clay. This quick-change bracelet form allows yo
Rustic Arrowhead Earrings Tutorial(Post)Created by: Sondra BarringtonDesigner TipsSelect your favorite color of Gilder’s Paste and an accompanying (or contrasting) color crystal bead.Individuals with metal allergies can often wear niobium e
Aja Shamballah Bracelet Tutorial(Post)Created by: Jaci BostonDesigner TipsWhen choosing a bead, make sure the hole is large enough to accommodate the size cording you choose.Familiarize yourself with square knots.This project requires you
Dumortierite and Copper Coin Necklace Tutorial(Post)Created by: Dee MuellerDesigner TipsCreate bead connectors with the 8mm rondelles and 14mm faceted round beads.Cut eight 1" pieces of chain. With jump rings attach two pieces of chain to each of six b
Bloodstone Adjustable Macrame Bracelet Tutorial(Post)Created by: Michelle Horning Designer TipsFor step by step macramé knotting instructions, see our blog article: DIY Shamballa-Style Macrame Bracelet Tutorial.Beads can be strung onto the bottom of th
Oval Constellation Pendant Tutorial(Post)Make this constellation pendant with crystal head pins and ball-end head pins for different sizes of stars, using Swarovski Ceralun Ceramic Epoxy Clay.Created by: Sondra BarringtonDesigner TipsBegin b
Wedding Doves Necklace and Earring Tutorial(Post)Created by: Rings & Things StaffDesigner TipsThis symmetrically designed necklace has a finished length of 17". For a different length, adjust the amount of beads, bead caps and stringing cable accord
Two-Hole Rulla Wrap Bracelet Tutorial(Post)Created by: Amy MickelsonDesigner TipsUse a cloth/soft tape measure to determine the desired number of wraps and the length of bead cable or cord.Double the length of beading cord and add about 6".Cre
Custom Anniversary Bracelet Tutorial(Post)Learn how to make a leather anniversary bracelet using porcelain number beads to "spell out" a custom anniversary date (7/7/90).Created by: Polly Nobbs-LaRueDesigner TipsUse a finished leather bracele
Alpine Flower SuperDuo Earring Tutorial(Post)Created by: Amy MickelsonDesigner TipsThread needle onto comfortable length (36-48”) of bead cord and condition. Depending on the type of cording you choose, you may want to double it.Add 12 beads to
Constellation Pendulum Pendant Tutorial(Post)Make this constellation pendant with crystal head pins and ball-end head pins for different sizes of stars, using Swarovski Ceralun Ceramic Epoxy Clay.Created by: Sondra BarringtonDesigner TipsBegin b
Bejeweled Necklace Tutorial(Post)Created by: Cindy Morris Designer TipsClose the hoop. Lash the rhinestone chain onto the hoop using Artistic Wire, wrapping around the hoop twice between each link of chain.Start and end the chain ove
Blooming Lotus Earrings Tutorial(Post)Created by: Mollie Valente Designer TipsAttach the eye pin loop to the crystal pear charm (twist loop open and closed).String on beads in the following order: 3mm silver-plated heishi bead,4mm bicone
Devoted Wire-Wrapped Crystal Pendant Tutorial(Post)This project uses Swarovski crystals. Created by: Amy MickelsonDesigner TipsCut a length of wire 20" long, or longer if desired. It is better to have plenty of wire for wire-wrapping the heart pendant
Sagittarius Leather Bracelet(Post)Created by: Sondra Barrington Designer TipsCut leather flush after measuring desired length. Use a dab of glue inside one cord end. Insert leather into the cord end and gently pinch the cord ends toge
Happy Octopus Bangle Bracelet Tutorial(Post)Created by: Mollie Valente Designer TipsFor a step-by-step tutorial with images for this project, see the blog post: How to Make an Expandable Wire Bangle Bracelet.Use heavy-duty cutters to cut a
Paisley Palette Pin Tutorial(Post)Created by: Polly Nobbs-LaRue Designer TipsFor best placement of the holes, make a template: Trace the outline of the paisley on a piece of paper (a Post-it® works great!), then use a pencil to sketch
Low Tide Asymmetrical Earrings Tutorial(Post)Created by: Mollie Valente Designer Tips: Earring 1String a pear-shaped pearl and a 3mm corrugated bead onto a head pin. Form a wrapped loop. (See Jewelry Basics 101 PDF).Twist open the Vintaj roped-c
Reason to Wrap Earrings Tutorial(Post)Created by: Valorie Nygaard-PouzarDesigner TipsSelect your beads and arrange a nice pattern around the earring hoop.Wrap wire a few times around the hoop, add a bead, wrap 3 times, add another bead, w
Amethyst Cascade Earring Tutorial(Post)Necklace ends can be used for things other than securing multistrand necklaces. This project uses necklace ends as a design element in cascading chain earrings.Amethyst is February's birthstone, makin
Scrap Chain Tassel Earring Tutorial(Post)Created by: Amy Mickelson Designer TipsIf you buy spools of chain for various projects, you inevitably end up with scrap pieces. These left overs are too short for necklaces or maybe too fine a styl
Spiders and Skulls Jewelry Set Tutorial(Post)Created by: Liz GrafDesigner Tips - For Necklace:String crystals, skull beads, and beads on beading cable. Finish each end with a crimp tube and wire protector.Attach spider charms with jump rings to
Blue Pin Stripe Lashed Memory Wire Bracelet Tutorial(Post)This project uses durable, springy memory wire as the base, and 26-gauge dark blue Artistic Wire as an accent. Created by: Amy MickelsonDesigner TipsUse heavy-duty cutters to cut memory wire.Lashing t
Holiday Lights Necklace Tutorial(Post)This sparkling "Christmas light" project is a fun, festive winter design to create with Swarovski crystal teardrop beads in colors of your choice.Created by: Rings & Things Staff Designer TipsAdd a cr
Sunset Ombre Earrings Tutorial(Post)This earring project uses Kato PolyClay™ to create a pretty ombre effect that's easy to add to ear wires.Created by: Tiffany White Designer TipsUsing a craft blade, cut each of 3 colors of polymer cla
Sunset Ombre Necklace Tutorial(Post)This necklace project uses Kato PolyClay™ to create a pretty ombre effect that's easy to display on cable chain, or another jewelry chain of your choice.Created by: Tiffany White Designer Tips Using a
Products (0)
- Product
- Qty in Cart
- Quantity
- Price
- Subtotal
Featured Products


TOHO Amiet Beading Thread, Burgundy (20 Meters/22 Yards)


TOHO Glass Seed Bead, Size 8, 3mm, Transparent Rainbow Frosted Amethyst (Tube)


The BeadSmith Jewelry Pliers, 1-Step Looper, 2.25mm (Each)


Magnet, Round, 18mm (35 Pieces)

Leather Cuff Bracelet, 1" - Denim (Each)


Leather Wrap Bracelet, 1/2" - Natural (Each)
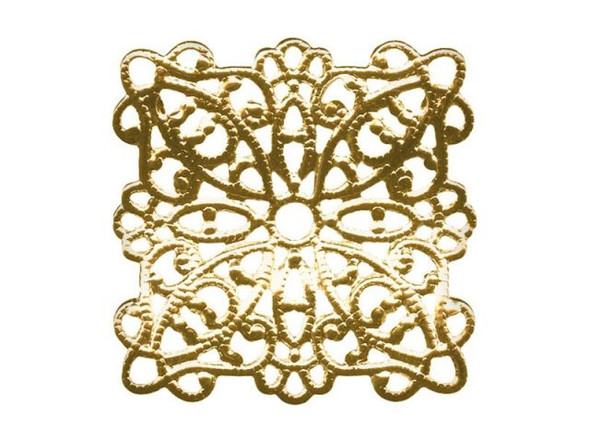
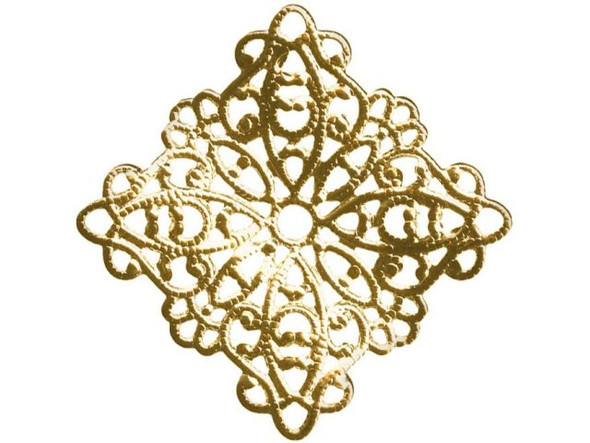
22mm Raw Brass Wavy Square Filigree


Raw Brass Small Oval Filigree with 4 Loops

Antiqued Copper Plated Hair Pin, 15mm Flat Pad (12 Pieces)
