News & Information (35)
-
Baptized by Fire Bracelet Tutorial(Post)
Created by: Lindsey GreenDesigner TipsMix and match the crosses in any way you would like! No pattern is required.Adjust the length of the leather pieces and number of jump rings to change the size o ...
Labor of Love Centerpiece(Post)Created by: Amy MickelsonDesigner TipsSize and cut an image to fit the glass tile.Use a paintbrush to apply the Inkssentials™ Glossy Accents to seal and affix the image to back of the glass tile. Onc ...
Not-So-Shiny Bangle Bracelet(Post)Created by: Polly Nobbs-LaRueDesigner TipsUse heavy-duty flush cutters to cut approximately 1 loop from the spool of 12-gauge antiqued copper wire. Make sure both ends are cut flat (flush) so they fi ...
Mermaid in the Moon Necklace Tutorial(Post)The lovely glass bead used in this free necklace design goes by a number of names including mermaid beads and mystic aura beads. They've even been mistaken for moonstone gemstones! They are 2 half-sp ...
Rose Quartz Healing Necklace Tutorial(Post)Created by: Tiffany WhiteDesigner TipsCut 12" of wire to wrap the gemstone donut.Center the wire on the donut and wrap each side 2 times.Pinch the two wires flush together with chain-nose pliers.Use ...
Ladylike Lariat Necklace Tutorial(Post)Created by: Rita HutchinsonDesigner TipsFreshwater pearls often have small holes. If the hole is too small, use a thinner headpin, or ream the opening with a battery operated bead reamer (#69-058).Fo ...
Silken Bouquet Bracelet Tutorial(Post)Created by: Rita HutchinsonDesigner TipsDetermine desired length of finished bracelet.Subtract 1 1/4" from total desired length for connector piece.Keeping toggle clasp parts attached, remove center ...
Brass Arrow Earrings Tutorial(Post)Created by: Mollie ValenteDesigner TipsCut the wire in half and form an "eye" loop on one end of each wire.Flatten the loop by striking with a chasing hammer on a steel block.Add the following beads ...
Delightfully Dotty Enameled Necklace Tutorial(Post)Created by: Rita HutchinsonDesigner TipsCut copper sheet to size or use a premade copper blank. If you have cut your own blank, punch hole in appropriate location and file edges to remove roughness.C ...
Pennant Pendant Necklace Tutorial(Post)Created by: Rita HutchinsonDesigner TipsUse texture plates from the tool kit to create designs on each torch-fired metal clay pennant. Patina each with liver of sulfur.Center one of the pennants on t ...
Stars-in-Jars Earrings Tutorial(Post)Designer TipsFill the tiny glass jars with candy sprinkles in colors of your choice. Local team colors in fun shapes are often available in the baking aisle! This design uses bright green and blue fo ...
Fly Bee! Bracelet Tutorial(Post)Created by: Polly Nobbs-LaRueDesigner TipsPunch 1/16" holes in the bracelet where you want to place the rivets.Run the first rivet through the leather, place a washer on it, and use a fine-point Shar ...
Go West Necklace Tutorial(Post)Created by: Mollie ValenteDesigner TipsMaking the Pendant:Cut the handle loop of the heart charm and file smooth.Mark hole locations with a Sharpie®, and use the hole punch to make two 1/16th-inch ha ...
It's Good to Be King Tie Bar Tutorial(Post)Created by: Mollie ValenteDesigner TipsCut the copper strip to about 2" in length. Use a texture hammer or pattern stamp to apply a random pattern. File the corners and sides until smooth.Soft solder ...
Namaste Chakra Choker / Double Wrap Bracelet Tutorial(Post)Created by: Michelle HorningDesigner TipsFor step-by-step instructions on how to macramé a bracelet (or choker), see our blog article: How to Macrame a Hemp Bracelet.A choker will usually fit as a do ...
Sun Tea Enameled Pendant Necklace Tutorial(Post)Created by: Rita HutchinsonDesigner TipsClean the blank with Penny Brite per package instructions. Rinse thoroughly and avoid touching further.Spray klyr fire onto blank, and sift on a base coat of w ...
Jewel of the Nile - Necklace Tutorial(Post)Created by: Summer Melaas and Veronica GreenwoodDesigner TipsCut 4" from the center of the 20" chain.Cut the 4" piece in half so you have two 2" pieces.Use a jump ring to add the pear crystal to the ...
Swarovski Crystal Candy Corn Earrings Tutorial(Post)Created by: The Swarovski Crystal design teamDesigner TipsCut wire into two equal pieces 18" long.Load onto one piece of wire: 13 Swarovski XILION Beads in Sunflower. Moving 6 beads off to one side, ...
Baroque Beauty Necklace Tutorial(Post)Designer TipsUsing one eye pin, slide on one 6mm 5328 bicone bead and make a simple loop. Repeat 30 more times and set aside. New to making jewelry? See Jewelry Basics 101 (PDF).Using an eye pin ...
Cute as a Button Necklace Tutorial(Post)Created by: Mollie Valente Designer TipsCenter the button on the pendant finding and mark the hole locations with a Sharpie® pen. Punch holes in the pendant finding.Tie the button onto the pendant fi ...
Sweet Skull Pendant Tutorial(Post)Created by: Rita HutchinsonDesigner TipsUsing ball-end head pins, make 8 beaded loop dangles in flowery colors. Use one metal rondelle on each side of the crystal bead for fuller dangles. Wrapped loo ...
Pearl and Tassel Charm Leather Bracelet Tutorial(Post)Created by: Sondra Barrington Designer TipsThe ring connector is the focal of this bracelet. For a more free-flowing design, attach charms to the leather cording.Wire-wrap a pearl bead with a la ...
Riveting 101(Post)Learn the basics of riveting, including how to distinguish various types of rivets and how to set different rivets. Riveting is a classic, durable and popular way to create cold connections in jewelr ...
Tri-Tone Cuff Bracelet Tutorial(Post)Created by: Rita Hutchinson Designer TipsUsing a pre-cut and finished bracelet blank, and precut 6" patterned wire makes this bracelet assemble in a snap!Apply pattern to copper blank with des ...
Circles in the Sand Necklace Tutorial(Post)This is a lovely summery design with secure wire-wrapped links, and can also double as November birthstone jewelry (citrines) or June (pearls).Created by: Veronica Greenwood Designer TipsU ...
Good Thoughts Barrette Tutorial(Post)Created by: Polly Nobbs-LaRue Designer TipsThe original alligator clip used for this barrette is no longer available, but our new French-style barrette backs are more secure (hold better in hair) and ...
The View Necklace Tutorial(Post)Created by: Cindy MorrisDesigner TipsStamp front piece first (I used the "l" to make diagonal lines on the window frame). Flatten. Patina with Win-Ox™ and clean with steel wool.Clean back piece with ...
Bee Keeper Reliquary Necklace Tutorial(Post)Created by: Mollie ValenteDesigner TipsFor a step-by-step tutorial with images, check out the How to Create a Reliquary Pendant blog post.Cut and shape the blank: Measure and cut a brass blank 1 x 1- ...
Pawrific Enamel Necklace Tutorial(Post)Created by: Summer MelaasDesigner TipsPunch a hole in the top corners of your copper blank. File any sharp bits.Clean your blank very well with warm water and Penny Brite.Cut your 22 ga bare copper w ...
Costa Rica Sunset Bracelet Tutorial(Post)This style of jewelry has a variety of names, including "hand chain" and "pirate bracelet". Whatever the name, we think you'll love the colors!Created by: Veronica GreenwoodDesigner TipsCut 2 feet of ...
Night Reflections Enamel Earrings Tutorial(Post)Created by: Summer MelaasDesigner TipsUse the smaller end of the 2-hole metal punch to punch a 1/16" hole near the top of the blanks. Be sure to center it, so the earrings hang properly.Clean the bla ...
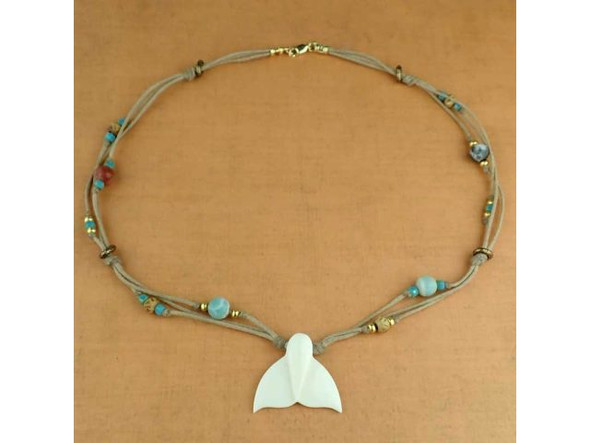
Sand Dollar Leather Bracelet Tutorial(Post)This stylishly simple bracelet looks great worn alone, or with other bangles or leather bracelets. Created by: Sondra Barrington Designer TipsCut leather flush after measuring. Use a dab ...
Pop of Color Enamel Earrings Tutorial(Post)Created by: Summer MelaasNote: We've had great success enameling our 24-gauge brass blanks, but for the most consistent color results, this enamel is best with copper blanks. Designer TipsTexture the ...
Dark Skies Enameled Pendant Tutorial(Post)Created by: Rita HutchinsonDesigner TipsUse dapping block to shape blank.After dapping, punch 1/16" hole using the smaller (silver) side of a EuroTool "helicopter" punch.Clean blank with penny brite ...
Avocado Dorado Cuff Bracelet Tutorial(Post)Created by: Polly Nobbs-LaRueDesigner TipsSolder Brass Ninja Star* to Copper Disk:If the copper or brass shapes are bent, straighten them with a steel block and nylon or rawhide mallet. (Solder doesn ...
Products (0)
- Product
- Qty in Cart
- Quantity
- Price
- Subtotal
Featured Products
")
")
TOHO Amiet Beading Thread, Burgundy (20 Meters/22 Yards)
")
")
TOHO Glass Seed Bead, Size 8, 3mm, Transparent Rainbow Frosted Amethyst (Tube)
")
")
One-G TOHO Nylon Beading Thread, 50 yards, Black (Each)
")
")
The BeadSmith Jewelry Pliers, 1-Step Looper, 2.25mm (Each)
")
")
Magnet, Round, 18mm (35 Pieces)
")
")
14kt Gold-Filled Lobster Clasp, 10mm (Each)
")
Leather Cuff Bracelet, 1" - Denim (Each)
")
")
Leather Wrap Bracelet, 1/2" - Natural (Each)
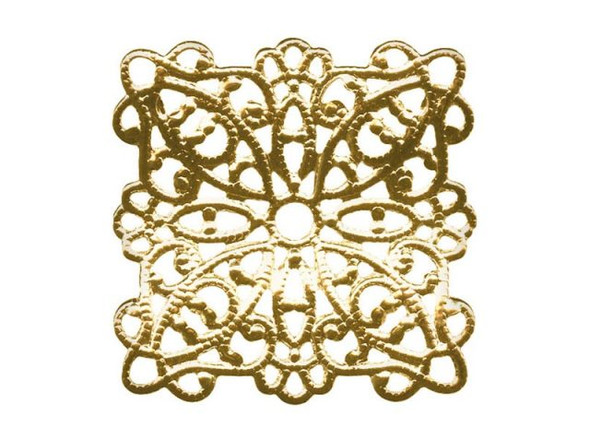
22mm Raw Brass Wavy Square Filigree
")
")
Raw Brass Small Oval Filigree with 4 Loops
")
Antiqued Copper Plated Hair Pin, 15mm Flat Pad (12 Pieces)
")