
News & Information (575)
-
Herbaceous Polymer Ring Tutorial(Post)
Created by: Jaci Boston Designer Tips Wash your hands thoroughly before handling the clay, since polymer clay tends to pick up any dirt and dander that may be hiding.Use a pasta machine to condition a
Red Light / Green Light Enamel Earrings(Post)Your Choice: They're balloons, streetlights or lollipops! Created by: Summer Melaas and Polly Nobbs-LaRue Designer TipsPunch a 1/16" hole in each blank, directly opposite the existing loop or hole.
Baroque Beauty Pearl Necklace Tutorial(Post)Modified from a design created by Swarovski's Create Your Style Design Team Designer TipsUsing beading wire, slip on one crimp bead and one end of the Maker's Toggle, and crimp to close. Add crimp co
Carnival Queen Earrings Tutorial(Post)Created by: Summer MelaasDesigner TipsPlace 10mm cushion square stone into setting, and use nylon-jaw or chain-nose pliers to gently flatten the prongs onto the stone. See tips in our blog, for best w
Edwardian Lime Skull Bracelet Tutorial(Post)Created by: Toni Plastino Designer TipsString beads in desired pattern, and tie a square knot or surgeon's knot (see technique sheet). Pull tight, trim most of the excess, and (if possible) tuck the
Crescent Moon Hoop Earrings Tutorial(Post)Created by: Mollie ValenteDesigner TipsPlan your crystal bead pattern. My pattern has 8 crystal beads per earring and goes from dark to light, creating a subtle blue ombre.Use a cup bur tool to soften
Trio of Pearls - Leather Bracelet Tutorial(Post)Created by: Sondra Barrington Designer TipsAdd a pearl to one end of the cord, and tie a simple overhand knot on each side of the pearl. Use an awl to help pull the knots tight up against the pearl
Fade To Black Crystal Pendant Tutorial(Post)Created by: Rita HutchinsonDesigner Tips Arrange stones from lightest to darkest.Set first rivoli in top setting, pressing the bezel into place to hold the stone firm. Bending the bezel where the seco
All Black and White Earrings Tutorial(Post)Created by: Rita HutchinsonDesigner TipsCut chain to a length of 8 links. Attach one end to earwire for ease in handling.Create dangles with crystal beads and round metal beads, and wire wrap directly
Baptized by Fire Bracelet Tutorial(Post)Created by: Lindsey GreenDesigner TipsMix and match the crosses in any way you would like! No pattern is required.Adjust the length of the leather pieces and number of jump rings to change the size of
Graveyard Sweater Guard Tutorial(Post)Created by: Liz Graf Designer TipsMeasure the 3.9mm chain, and cut one 4" piece, and one 5" piece.Measure the 4.5mm chain, and cut a 6" piece.Attach the chains to the sweater guards with large jump
Fit for a Queen Ring Tutorial(Post)This simple project features crystal rivoli stones and 1-time adjustable ring blanks with a bezel setting. Created by: Amy Mickelson Steps to Make These RingsWhile most colors of Swarovski crystal riv
Golden Buzzer Charm Tutorial(Post)Created by: Janet BoyingtonDesigner TipsThis 10mm charm is perfect for showcasing a 6mm stamped impression.Gold-fill is harder than sterling or pewter, but not as hard as nickel silver.Place your char
Celebrations Day of the Dead Tutorial(Post)Celebrations Day of the Dead bracelet depicts the musical side of this holiday. The beautiful TierraCast musical charms nicely offset the Swarovski Crystal Mystic Black pearls.Created by: Swarovski's
Copper & Purple Love - Bracelet Tutorial(Post)Created by: Polly Nobbs-LaRueDesigner Tips Set link on leather bracelet, and use a sharp pencil, or fine-point non-smudging marker, to make a dot at each spot to punch.Rotate leather hole punch to sm
Sweet and Sour Engraved Bracelet Tutorial(Post)Edged cuff bracelets also work great for leather, fabric, beaded designs and more!Created by: Rita HutchinsonDesigner TipsStamp or sketch design on aluminum sheet if desired.Follow marked (or freehand
4th of July Earrings Tutorial(Post)Created by: Polly Nobbs-LaRueDesigner TipsCenter a stone in a setting and gently squeeze prongs in (with your fingers or pliers) working from opposite sides to keep the stone centered. Once the prongs
Sari Fishtail Bracelet Tutorial(Post)Created by: Rita Hutchinson Designer TipsUsing files and sanding sponges, refine the ends of the cuff bracelet until it is smooth and comfortable to wear. Adjust shape by hand as desired, to fit you
Sunrise Centerline Bracelet Tutorial(Post)No fancy beading techniques or knots required -- If you can string beads with a needle and thread, you can create lovely designs with these bracelets!Created by: Veronica GreenwoodDesigner TipsStretch
Earth Day Hemp Macrame Bracelet Tutorial(Post)One 8" strand of 8mm large-hole gemstone beads is enough to make 3 bracelets just like this. In case dumortierite is out of stock, more gemstone ideas are linked below.Created by: Michelle HorningDesi
Smokey Macrame Adjustable Bracelet Tutorial(Post)Created by: Michelle HorningDesigner TipsFor step by step macramé knotting instructions, see our blog article: DIY Shamballa-Style Macrame Bracelet Tutorial.Beads can be strung onto the bottom of the
Red Hot Love Bracelet Tutorial(Post)Take our inexpensive rough-looking raw brass bracelet, and learn how easy it is to add color and a high shine! Created by: Rita HutchinsonDesigner TipsRemove age patina and minor blemishes from the ba
Bead Curtain Earrings Tutorial(Post)Learn to make unusual chain fringe earrings with a dash of crystal. FREE Jewelry Tutorials. No blinkin ads. No login required. Created by: Rita Hutchinson Designer TipsThe bead pod just barely fits th
Astral Love Resin Necklace Tutorial(Post)Created by: Rita HutchinsonDesigner TipsSee instruction page for making no-solder bezels.Cut paper to match bezel wire shape.Seal paper and adhere to inside of bezel.Mix a small batch of resin and pou
Boho Barbie Earrings Tutorial(Post)Created by: Laurel NewnhamDesigner TipsCut wire into two 16" lengths, one for each earring. Trim excess as needed.Hold wire tightly to create loops that are closer together.Experiment with the positio
Blushing Bride Bracelet Tutorial(Post)Delicate-looking filigree bead caps give this memory-wire bracelet the crowning touch. Created by: Rita Hutchinson Designer TipsAdd bead caps to each end of (2) 8mm fine rocks tubes and string each on
Cognitive Resonance Pendant Tutorial(Post)Created by: Polly Nobbs-LaRue Designer TipsWhen scouring yard sales and 2nd-hand stores for old watches, try to pick up a wide variety of brands and eras, for the best variety of gears. Or look for bu
Good Fortune Necklace Tutorial(Post)Created by: Mollie ValenteDesigner TipsAssemble the bead-adorned pendant:Fold the 18" piece of waxed cotton cord in half. String the cord ends through the Dragon Coin Pendant loop, then form a Lark's
Flores de Muertos Bracelet Tutorial(Post)Created by: Rita HutchinsonDesigner TipsUse 4 of each color crystal to create 28 wrapped loop crystal dangles.This finished length is 8.5". Use larger or smaller jump rings to adjust the length.Free T
Aqua Love Necklace Tutorial(Post)Created by: Cindy MorrisDesigner TipsString necklace and finish ends following directions in Beading Cable How-To Sheet below. Use Wire Guardians for a professional finish at the ends of your beading
Dirty Money Clip Tutorial(Post)Created by: Rita HutchinsonDesigner TipsClean both parts with alcohol and allow to dry. Apply flux to key points on the back of the scarab, and then apply small dots of solder to these points using so
Milky Way Cuff Links Tutorial(Post)Created by: Rita HutchinsonDesigner TipsCut the images to size.Seal with packing tape and cut out.Adhere to bottle cap with Hypo Cement.Apply UV resin following package instructions.Attach cuff link f
Shining Stars Lashed Earrings Tutorial(Post)Created by: Mollie Valente Designer Tips For a version of this project with step-by-step images, check out Mollie's How to make Lashed Kidney Wire Earrings blog post.Choose two matching rivoli stones
Adjustable Necklace Extenders Tutorial(Post)Created by: Mollie ValenteDesigner TipsFor instructions with step-by-step photos, please see our blog article: How to Make an Adjustable Necklace Extender.Suggested Supplies1 foot (use 4") #40-011-001
Star of India Netted Christmas Ornament Tutorial(Post)Created by: Veronica GreenwoodDesigner TipsCreate a unique, beautiful netted Christmas ornament cover with size 11 seed beads, and Swarovski crystal pearls or your choice of accent beads and drops --
Pleasant Dream Etched Barrette Tutorial(Post)Created by: Rita Hutchinson Designer TipsCut your metal sheet to desired size and use a file to round the corners and smooth all edges.Clean with Penny Brite® Copper Cleaner and scrubby until water s
The Grass is Always Greener Ring Tutorial(Post)Created by: Mollie ValenteDesigner TipsCut the glass to fit the bezel and wet sand to smooth the edges.Clean the glass and ring with rubbing alcohol and glue with two-part epoxy.Place the ring on a le
Purple Pillow Ring Tutorial(Post)Created by: Rita Hutchinson Designer TipsUse the ring as a template to cut the image or decorative paper to the correct size.Seal front and back of the image with a waterproof barrier before applying
Trisha Earrings Tutorial(Post)If you've never set faceted stones before, tube settings are a great way to get started.Created by: Rita HutchinsonDesigner TipsGolden Topaz is November's birthstone, and sparkling 4mm CZs are availab
Interchangeable Constellation Bangle Bracelet Tutorial(Post)Create sparkling constellation jewelry in an hour, using minimal supplies and Swarovski Ceralun Ceramic Epoxy Clay, Crystal Clay, or your favorite epoxy clay. This quick-change bracelet form allows yo
Brass Arrow Earrings Tutorial(Post)Created by: Mollie ValenteDesigner TipsCut the wire in half and form an "eye" loop on one end of each wire.Flatten the loop by striking with a chasing hammer on a steel block.Add the following beads t
Adjustable Anchor Bracelet Tutorial(Post)Created by: Veronica GreenwoodDesigner TipsCut two 18" pieces of leather.Fold one strand in half. Make a larks-head knot by feeding both ends through the loop on the anchor charm, then back through th
Captured Aventurine Bracelet Tutorial(Post)Created by: Polly Nobbs-LaRueDesigner TipsUnspool approximately 20" of copper wire. Pull it smooth with flat nylon-jaw pliers.Trim the end neatly (flush) with flush cutters.Coil the wire around a 14-2
River Blossom Bracelet Tutorial(Post)Create this project using large-hole gemstone beads of your choice, 1mm cotton or leather cord, and your favorite button as the clasp.Created by: Rita HutchinsonDesigner TipsCut cording and fold in ha
Aquamarine Ocean Earrings Tutorial(Post)Created by: Sondra Barrington Designer TipsKeep gold-filled and gold-plated findings separate, and mark your supplies well!Use chain-nose pliers to turn the loop on ear wire 90-degrees so it faces sid
Northern Copperhead Earrings Tutorial(Post)Created by: Polly Nobbs-LaRueDesigner TipsUnspool approximately 20" of copper wire. Pull it smooth with flat nylon-jaw pliers.Trim the end neatly (flush) with flush cutters.Make 6 equal sized coils us
Buzzy Bee Necklace Tutorial(Post)Created by: Kayla HeflingDesigner TipsInspired by the mood jewelry of the '60s and '70s, Mirage Beads™ are thermo-sensitive polymer beads that change color with small temperature changes.Separate the
Amethyst Cascade Earring Tutorial(Post)Necklace ends can be used for things other than securing multistrand necklaces. This project uses necklace ends as a design element in cascading chain earrings.Amethyst is February's birthstone, makin
Red, White and Blue Sterling Bracelet Tutorial(Post)Created by: Polly Nobbs-LaRueDesigner TipsCenter a stone in a setting and gently squeeze prongs in (with your hands or pliers) working from opposite sides to keep the stone centered. Once the prongs a
Go Zags - March Madness Bracelet(Post)Created by: Summer Melaas Designer TipsStamp the tag with 3mm letter stamps. For longer team names, use a larger tag or smaller set of stamps. See Metal Stamping 101 for detailed stamping instructio
Products (0)
- Product
- Qty in Cart
- Quantity
- Price
- Subtotal
Featured Products


TOHO Amiet Beading Thread, Burgundy (20 Meters/22 Yards)


TOHO Glass Seed Bead, Size 8, 3mm, Transparent Rainbow Frosted Amethyst (Tube)


The BeadSmith Jewelry Pliers, 1-Step Looper, 2.25mm (Each)


Magnet, Round, 18mm (35 Pieces)

Leather Cuff Bracelet, 1" - Denim (Each)


Leather Wrap Bracelet, 1/2" - Natural (Each)
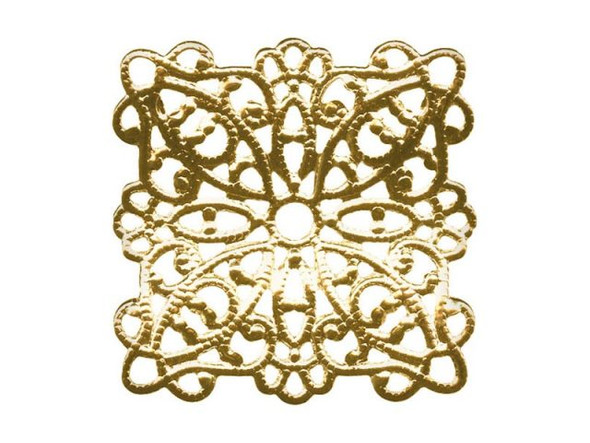
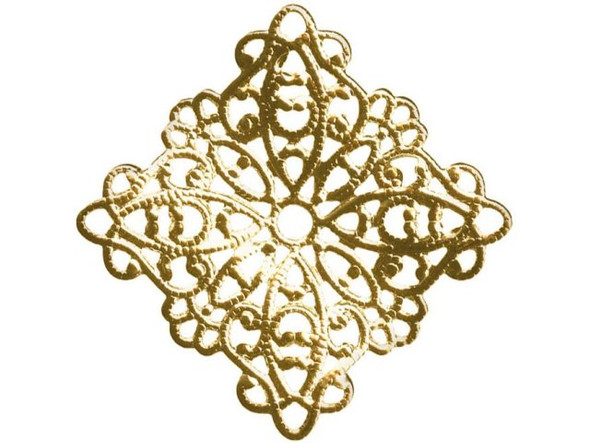
22mm Raw Brass Wavy Square Filigree


Raw Brass Small Oval Filigree with 4 Loops

Antiqued Copper Plated Hair Pin, 15mm Flat Pad (12 Pieces)
