
News & Information (77)
-
Chakra Khan Ear Threaders Tutorial(Post)
Created by: Veronica Greenwood Designer TipsCut a piece of wire and make a wrapped loop on one end. Attach your loop to your ear thread. Add one purple (amethyst) bead to the wire and finish your loop
Pearl and Tassel Madness Earrings Tutorial(Post)Created by: Janet BoyingtonDesigner TipsCut six 2" lengths of chain.Cut 5" of Artistic wireMake a loop with round nose pliers, slide 3 lengths of chain onto the loop, wire wrap that end. For step-by-s
Moonlit Walk Ear Threads Tutorial(Post)Created by: Veronica GreenwoodDesigner TipsThis design uses some of the palest sunstone beads on the mixed strand, but the color choices are up to you!Put one sunstone bead on your head pin. Using a w
Ava's Big Day Bridal Set Tutorial(Post)Created by: Valorie Nygaard-Pouzar Designer Tips Determine placement of the stamped letters on metal charm, or paper.Carefully stamp the blank.Antique the charm so the impressions are more pronounc
Boho Barbie Earrings Tutorial(Post)Created by: Laurel NewnhamDesigner TipsCut wire into two 16" lengths, one for each earring. Trim excess as needed.Hold wire tightly to create loops that are closer together.Experiment with the positio
Cumulus Threader Earrings Tutorial(Post)Created by: Mollie Valente Designer TipsTwist a jump ring to open it extra wide.Loop the jump ring around a single pearl in the pearl ball bead.Attach the loop of an ear thread to the jump ring.Twist
Shining Stars Lashed Earrings Tutorial(Post)Created by: Mollie Valente Designer Tips For a version of this project with step-by-step images, check out Mollie's How to make Lashed Kidney Wire Earrings blog post.Choose two matching rivoli stones
Tuli Tribal Necklace Tutorial(Post)Created by: Joe HentgesDesigner TipsThe hole size for these handmade pendants can be variable.Use a drill to enlarge the hole to accommodate a 13-gauge jump ring.Darken the bone inside the enlarged ho
Snowman's Holiday Pearl Earrings Tutorial(Post)Add some sparkle and shine to your holiday wardrobe. These snowman earrings are easy and quick to assemble.Created by: Rita Hutchinson.Design by: Swarovski's Create Your Style Design Team Designer Tip
Promise Pin Tutorial(Post)Created by: Mollie Valente Designer TipsUse 26-gauge wire to lash the beads to the pin back.Cut the chain into two pieces: 5-1/2" and 6-1/2" in length.Use 6mm jump rings to attach the chain to the pin
Goodnight Moon Pins Tutorial(Post)Created by: Polly Nobbs-LaRue Designer TipsCut loops off the moon charms and file smooth.For one pin, antique the brass components and bar pin with Win-Ox™ before assembling. Allow the parts to dry. P
Snowy Crystal Christmas Tree Earrings Tutorial(Post)Design by: Swarovski's Create Your Style Design Team and Rings & Things.Designer TipsFor each earring, string onto one head pin: one 12mm margarita; one 10mm margarita; one margarita 8mm; one 6mm marg
Sour Patch Bracelet Tutorial(Post)Created by: Rita Hutchinson 12mm #4470 Cushion Squares by Swarovski are nearly gone, but these settings also work with most other brands of 12mm cushion squares. Shop remaining colors while they last!
TierraCast Succulent Tassel Earrings Tutorial(Post)Created by: TierraCastDesigner TipsMeasure 48" of 1mm cotton cord and cut into 2, 24" pieces. Wrap around fingers 5 times and tuck top of wrap into cord end. Secure with glue or crimping.Twist each ov
Arrow - Etched Copper Bracelet Tutorial(Post)Created by: Summer MelaasDesigner TipsOptional: Punch a hole in the corner of the blank, following instructions in hole-punch below. After completing bracelet, dangle a charm or beaded dangle of your
Sand Dollar Leather Bracelet Tutorial(Post)This stylishly simple bracelet looks great worn alone, or with other bangles or leather bracelets. Created by: Sondra Barrington Designer TipsCut leather flush after measuring. Use a dab of glue in
TierraCast Monstera Trio Bracelet Tutorial(Post)Created by: TierraCastDesigner TipsCut cord into 3 12" pieces. String one button onto each cord, then string 3 hole bars and barrel beads. Position as desired, then lightly crimp barrel beads in place
Sandra Leather Bracelet Tutorial(Post)Created by: Rita Hutchinson Designer TipsSqueeze out a few drops of patina (or your favorite metallic acrylic paint) on the craft sheet. Apply patina to the edges of the cuff, and then dry-brush pat
Northern Copperhead Earrings Tutorial(Post)Created by: Polly Nobbs-LaRueDesigner TipsUnspool approximately 20" of copper wire. Pull it smooth with flat nylon-jaw pliers.Trim the end neatly (flush) with flush cutters.Make 6 equal sized coils us
Pieces of the Sky Cuff Bracelet Tutorial(Post)Created by: Mollie ValenteDesigner TipsTwist open a 4mm jump ring, string it through the crystal link hole, and twist securely closed. Repeat with the opposite side of the crystal link. For best way t
Sonya Snow Skater Necklace Tutorial(Post)Created by: Amy Mickelson Designer TipsCut the metal sheet to the desired size. File the edges smooth and punch holes in corners and on the bottom. Sand the surfaces and clean.Place inked rubber sta
Wavy Gravy Necklace Tutorial(Post)Created by: Polly Nobbs-LaRueDesigner TipsThis simply strung repeating pattern necklace has a finished length of 18"". The wavy disk beads give the design extra dimension and texture.For step-by-step
Memory Journal Necklace Tutorial(Post)Created by: Sondra BarringtonDesigner TipsSee the Create a Hinged Metal Memory Journal blog post for a step-by-step tutorial with images.Texturize or etch* various metal pieces for the journal and pat
Never Enough Pendant Necklace Tutorial(Post)Created by: Cindy MorrisDesigner TipsClean the glass pieces.Cut images, phrases and paper to fit the glass slide. Glue images and words to the paper.Sandwich paper between the glass pieces and careful
Patriotic Drops Earrings Tutorial(Post)Created by: Amy ScaliseDesigner TipsUse the 1-Step Looper to create 36 (12 of each color) crystal pearl dangles.Cut two 1" pieces of chain and attach approximately 2 dangles per link directly onto the
Candara Bracelet Tutorial(Post)Created by: Polly Nobbs-LaRue Designer Tips Unspool approximately 26" of copper wire. Pull it smooth with flat nylon-jaw pliers.Trim the end neatly (flush) with flush cutters.Use ring-bending plier
Frippery Soldered Frame Pendant Necklace Tutorial(Post)Created by: Cindy MorrisDesigner TipsChoose 2 pieces of glass from the package and clean.NOTE: this design was created with 1.25" square glass, which is no longer available. 1" and 22mm replacements a
Go West Necklace Tutorial(Post)Created by: Mollie ValenteDesigner TipsMaking the Pendant:Cut the handle loop of the heart charm and file smooth.Mark hole locations with a Sharpie®, and use the hole punch to make two 1/16th-inch han
Captured Aventurine Bracelet Tutorial(Post)Created by: Polly Nobbs-LaRueDesigner TipsUnspool approximately 20" of copper wire. Pull it smooth with flat nylon-jaw pliers.Trim the end neatly (flush) with flush cutters.Coil the wire around a 14-2
Interchangeable Constellation Bangle Bracelet Tutorial(Post)Create sparkling constellation jewelry in an hour, using minimal supplies and Swarovski Ceralun Ceramic Epoxy Clay, Crystal Clay, or your favorite epoxy clay. This quick-change bracelet form allows yo
Icicle Lights Earrings Tutorial(Post)Created by: Rita HutchinsonDesign by: Swarovski's Create Your Style Design TeamDesigner TipsAdd a crystal teardrop bead to a head pin (narrow side towards the head of the pin), add a rhinestone wheel
The North Star Necklace Tutorial(Post)Created by: Mollie ValenteDesigner TipsCreate a bail using a 5/16" x 3" piece of 24-gauge copper sheet: Cut, file, stamp, punch and ream the holes a bit larger. Use bail-making pliers to bend the stam
April Love - Bracelet Tutorial(Post)Created by: Sondra Barrington How can I customize thee? Let me count the ways... Designer Tips Chain bracelets adorned with a simple heart charm continue to be popular. The sterling silver heart bla
Autumn Waterfall Earrings Tutorial(Post)Created by: Polly Nobbs-LaRue Designer Tips3 sunny shades of orange crystal bicones cascade in a warm ombre waterfall, from Vintaj hammered brass rings.Make wire-wrapped loops using ball-end head pi
Pawrific Enamel Necklace Tutorial(Post)Created by: Summer MelaasDesigner TipsPunch a hole in the top corners of your copper blank. File any sharp bits.Clean your blank very well with warm water and Penny Brite.Cut your 22 ga bare copper wi
Graveyard Sweater Guard Tutorial(Post)Created by: Liz Graf Designer TipsMeasure the 3.9mm chain, and cut one 4" piece, and one 5" piece.Measure the 4.5mm chain, and cut a 6" piece.Attach the chains to the sweater guards with large jump
Winter in Bermuda Bracelet Tutorial(Post)Created by: Amy MickelsonDesigner TipsRoughen the pads on the disk and loop bracelet with sandpaper or a sanding sponge. This increases the surface texture to help the glue adhere.If desired, plan you
Oval Constellation Pendant Tutorial(Post)Make this constellation pendant with crystal head pins and ball-end head pins for different sizes of stars, using Swarovski Ceralun Ceramic Epoxy Clay.Created by: Sondra BarringtonDesigner TipsBegin b
Water's Edge Bracelet Tutorial(Post)Created by: Mollie ValenteDesigner TipsGlue the bead cappers into the holes of the focal bead and dry according to manufacturer’s directions.Use jump rings to attach chain and lobster clasp to the foc
Bejeweled Necklace Tutorial(Post)Created by: Cindy Morris Designer TipsClose the hoop. Lash the rhinestone chain onto the hoop using Artistic Wire, wrapping around the hoop twice between each link of chain.Start and end the chain ove
Dumortierite and Copper Coin Necklace Tutorial(Post)Created by: Dee MuellerDesigner TipsCreate bead connectors with the 8mm rondelles and 14mm faceted round beads.Cut eight 1" pieces of chain. With jump rings attach two pieces of chain to each of six b
Blooming Lotus Earrings Tutorial(Post)Created by: Mollie Valente Designer TipsAttach the eye pin loop to the crystal pear charm (twist loop open and closed).String on beads in the following order: 3mm silver-plated heishi bead,4mm bicone
Fit for a Queen Ring Tutorial(Post)This simple project features crystal rivoli stones and 1-time adjustable ring blanks with a bezel setting. Created by: Amy Mickelson Steps to Make These RingsWhile most colors of Swarovski crystal riv
Reason to Wrap Earrings Tutorial(Post)Created by: Valorie Nygaard-PouzarDesigner TipsSelect your beads and arrange a nice pattern around the earring hoop.Wrap wire a few times around the hoop, add a bead, wrap 3 times, add another bead, w
Custom Anniversary Bracelet Tutorial(Post)Learn how to make a leather anniversary bracelet using porcelain number beads to "spell out" a custom anniversary date (7/7/90).Created by: Polly Nobbs-LaRueDesigner TipsUse a finished leather bracele
Blue Pin Stripe Lashed Memory Wire Bracelet Tutorial(Post)This project uses durable, springy memory wire as the base, and 26-gauge dark blue Artistic Wire as an accent. Created by: Amy MickelsonDesigner TipsUse heavy-duty cutters to cut memory wire.Lashing t
Scrap Chain Tassel Earring Tutorial(Post)Created by: Amy Mickelson Designer TipsIf you buy spools of chain for various projects, you inevitably end up with scrap pieces. These left overs are too short for necklaces or maybe too fine a styl
Sunset Ombre Earrings Tutorial(Post)This earring project uses Kato PolyClay™ to create a pretty ombre effect that's easy to add to ear wires.Created by: Tiffany White Designer TipsUsing a craft blade, cut each of 3 colors of polymer cla
Spiders and Skulls Jewelry Set Tutorial(Post)Created by: Liz GrafDesigner Tips - For Necklace:String crystals, skull beads, and beads on beading cable. Finish each end with a crimp tube and wire protector.Attach spider charms with jump rings to
Sunset Ombre Necklace Tutorial(Post)This necklace project uses Kato PolyClay™ to create a pretty ombre effect that's easy to display on cable chain, or another jewelry chain of your choice.Created by: Tiffany White Designer Tips Using a
Products (0)
- Product
- Qty in Cart
- Quantity
- Price
- Subtotal
Featured Products


TOHO Amiet Beading Thread, Burgundy (20 Meters/22 Yards)


TOHO Glass Seed Bead, Size 8, 3mm, Transparent Rainbow Frosted Amethyst (Tube)


The BeadSmith Jewelry Pliers, 1-Step Looper, 2.25mm (Each)


Magnet, Round, 18mm (35 Pieces)

Leather Cuff Bracelet, 1" - Denim (Each)


Leather Wrap Bracelet, 1/2" - Natural (Each)
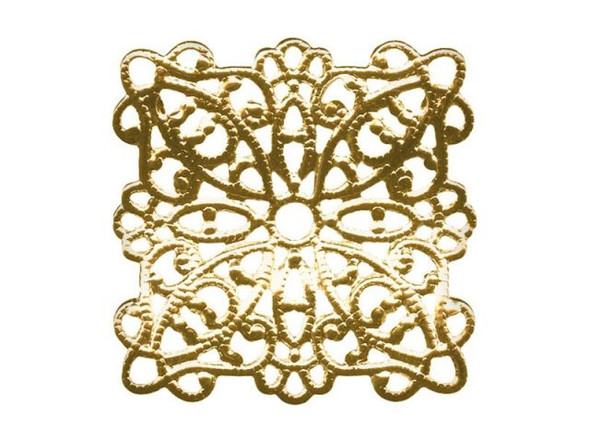
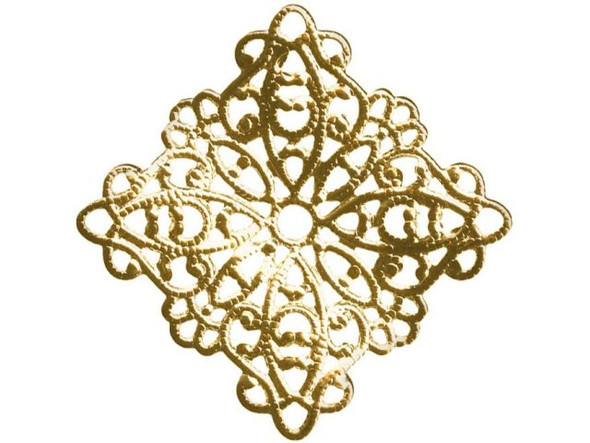
22mm Raw Brass Wavy Square Filigree


Raw Brass Small Oval Filigree with 4 Loops

Antiqued Copper Plated Hair Pin, 15mm Flat Pad (12 Pieces)
