
Suggestions:
Categories
News & Information (81)
-
Champagne Wishes and Mermaid Dreams Earrings Tutorial(Post)
Created by: Veronica Greenwood Designer TipsCut 6 inches of wire and make a small wrapped loop on one end. Make a small loop so the size 11 seeds do not go through.New to jewelry-making? For step-by-s
Carnival Queen Earrings Tutorial(Post)Created by: Summer MelaasDesigner TipsPlace 10mm cushion square stone into setting, and use nylon-jaw or chain-nose pliers to gently flatten the prongs onto the stone. See tips in our blog, for best w
Geared Ring Tutorial(Post)Created by: Polly Nobbs-LaRue Designer TipsCut a strip of 20-gauge sheet 2.75" long. Smooth and straighten with a nylon hammer.Optional: Texture or stamp (see "How to Make a Metal-Stamped Charm" tech
Dulce Vida Crystal Bracelet Tutorial(Post)Created by: Polly Nobbs-LaRueDisclaimer: I can't take credit for this design -- I made it at TierraCast's Tucson 2019 Event, copied 93.6% from one of their examples. I love how many variations are pos
Pieces of the Sky Cuff Bracelet Tutorial(Post)Created by: Mollie ValenteDesigner TipsTwist open a 4mm jump ring, string it through the crystal link hole, and twist securely closed. Repeat with the opposite side of the crystal link. For best way t
Sandra Leather Bracelet Tutorial(Post)Created by: Rita Hutchinson Designer TipsSqueeze out a few drops of patina (or your favorite metallic acrylic paint) on the craft sheet. Apply patina to the edges of the cuff, and then dry-brush pat
Northern Copperhead Earrings Tutorial(Post)Created by: Polly Nobbs-LaRueDesigner TipsUnspool approximately 20" of copper wire. Pull it smooth with flat nylon-jaw pliers.Trim the end neatly (flush) with flush cutters.Make 6 equal sized coils us
Golden Halos Earrings Tutorial(Post)Due to the popularity of 10mm cushion square settings, we've included links to alternate styles below in case the primary setting used in the Golden Halos earrings is temporarily unavailable. Created
Sour Patch Bracelet Tutorial(Post)Created by: Rita Hutchinson 12mm #4470 Cushion Squares by Swarovski are nearly gone, but these settings also work with most other brands of 12mm cushion squares. Shop remaining colors while they last!
Together Cause Bracelet Tutorial(Post)Created by: Rita HutchinsonDesigner TipsString a bead cap, pastel pink pearl bead, and another bead cap onto the ball-end head pin and make a large wire-wrapped loop. Make the loop large enough, so th
April Love - Bracelet Tutorial(Post)Created by: Sondra Barrington How can I customize thee? Let me count the ways... Designer Tips Chain bracelets adorned with a simple heart charm continue to be popular. The sterling silver heart bla
Arrow - Etched Copper Bracelet Tutorial(Post)Created by: Summer MelaasDesigner TipsOptional: Punch a hole in the corner of the blank, following instructions in hole-punch below. After completing bracelet, dangle a charm or beaded dangle of your
Cardio Amour Wire Necklace Tutorial(Post)Created by: Mollie Valente Designer TipsFor illustrated step-by-step instructions for this necklace, please see the full Heartbeat Necklace Tutorial in our blog.Suggested Supplies 1 each #05-741-08-1
Hawks Bracelet Tutorial(Post)Created by: Summer MelaasDesigner TipsUse nylon-jaw pliers or a burnishing tool to gently smooth the prongs and bezels down onto the stones. For step-by-step instructions, see our Use a 6mm jump ring
Candara Bracelet Tutorial(Post)Created by: Polly Nobbs-LaRue Designer Tips Unspool approximately 26" of copper wire. Pull it smooth with flat nylon-jaw pliers.Trim the end neatly (flush) with flush cutters.Use ring-bending plier
Hearts Across the States Keychain Tutorial(Post)Created by: Janet BoyingtonDesigner TipsStamp hearts in desired locations on USA blank, and then use the "." (period) from the punctuation set to connect the hearts. (New to metal stamping? See Metal
Purple and Gold Bracelet Tutorial(Post)Created by: The R&T Showroom Team Designer TipsStamp the tag with 3mm letter stamps. For longer team names, use a larger tag or smaller set of stamps. See Metal Stamping 101 for detailed stamping in
DIY Lotus Paisley Bracelet(Post)Created by: Sondra BarringtonDesigner TipsSet the cushion square crystal stone in the setting. Keeping the stone centered, use your fingers, a burnishing tool, or flat nylon-jaw pliers to gently bend
Aurora Sprinkles Earrings Tutorial(Post)Created by: Rita Hutchinson Designer TipsCut bezel strip to size (one 8-12" piece) and flatten/ work harden with nylon hammer.Add texture to both sides of bezel strip with texture stamping hammer an
Triple the Fun Bracelet Tutorial(Post)Created by: Swarovski's Create Your Style Design TeamDesigner TipsUsing alcohol wipes, clean both Palace Crimp Ends on the inside.Using the black suede lace, make a double overhand knot in the center.
Pumpkin on the Vine Earrings Tutorial(Post)Created by: Mollie ValenteDesigner TipsMake 2 matching spiral head pins. Follow the steps from the Rings & Things blog post "How to Make Spiral Head Pins.Add the following beads to a spiral head pin:
12th Man Earrings Tutorial(Post)Create a pair of sparkling earrings for your favorite football fan! These take just 5 minutes, and a few basic jewelry tools. No glue required, either!This pair of earrings features a "12" charm, but
Go Zags - March Madness Bracelet(Post)Created by: Summer Melaas Designer TipsStamp the tag with 3mm letter stamps. For longer team names, use a larger tag or smaller set of stamps. See Metal Stamping 101 for detailed stamping instructio
Pleasant Dream Etched Barrette Tutorial(Post)Created by: Rita Hutchinson Designer TipsCut your metal sheet to desired size and use a file to round the corners and smooth all edges.Clean with Penny Brite® Copper Cleaner and scrubby until water s
Patterned Wire Earrings Tutorial(Post)Created by: Polly Nobbs-LaRue Designer TipsMeasure, mark and cut patterned wire to desired length.File ends smooth with slightly rounded corners, so the wire pieces match the curve of the disks.Use
Captured Aventurine Bracelet Tutorial(Post)Created by: Polly Nobbs-LaRueDesigner TipsUnspool approximately 20" of copper wire. Pull it smooth with flat nylon-jaw pliers.Trim the end neatly (flush) with flush cutters.Coil the wire around a 14-2
Shining Stars Lashed Earrings Tutorial(Post)Created by: Mollie Valente Designer Tips For a version of this project with step-by-step images, check out Mollie's How to make Lashed Kidney Wire Earrings blog post.Choose two matching rivoli stones
On the Bias Corrugated Metal Earring Tutorial(Post)Created by: Mollie ValenteDesigner TipsCorrugate the metal blanks by feeding them through the Tube-Wringer® on the diagonal. Squeeze the hand grip to maintain even pressure while turning the turn key.
Autumn Waterfall Earrings Tutorial(Post)Created by: Polly Nobbs-LaRue Designer Tips3 sunny shades of orange crystal bicones cascade in a warm ombre waterfall, from Vintaj hammered brass rings.Make wire-wrapped loops using ball-end head pi
Delightfully Dotty Enameled Necklace Tutorial(Post)Created by: Rita HutchinsonDesigner TipsCut copper sheet to size or use a premade copper blank. If you have cut your own blank, punch hole in appropriate location and file edges to remove roughness.Cr
Modern Art Earrings Tutorial(Post)Created by: Summer MelaasDesigner TipsStretch and wax 2 yards of thread. Add a spare seed bead (stopper bead) about 2" into the thread.Stitch an edging stitch on one side of the GF square, following t
Bubble Wand - Necklace Tutorial(Post)Created by: Mollie ValenteDesigner TipsCut a 10" piece of wire.To straighten and harden the wire, run the length of the wire through the nylon pliers.Use the ring mandrel to form a "bubble" loop (ours
DIY Adjustable Bangle Bracelet Tutorial(Post)This style of bracelet is a great one-size-fits-all design. OK, so technically the same bracelet size won't fit both a petite 6-year-old and a Samoan warrior, but odds are that you can determine one o
Sundance Bolo Tie Necklace Tutorial(Post)Created by: Mollie ValenteDesigner TipsFor step-by-step illustrated instructions to make the Sundance Bolo Tie Necklace, see our blog post: How to Make a Silk Ribbon and Cameo Bolo Tie NecklaceHelpful
Soar With Me Cuff Bracelet Tutorial(Post)Created by: Valorie Nygaard-PouzarDesigner TipsPatina, seal and use bracelet-bending pliers to apply a gentle curve to the metal sparrow before riveting it to the leather.For hints on applying Vintaj
Havasu Falls Earrings Tutorial(Post)You can play around with the length of fringe on these earrings inspired by the Grand Canyon. Make them as short or as long as you would like them! My earrings in total length are just over 6". My lon
Samba Scarlet Smile Bracelet Tutorial(Post)Created by: Polly Nobbs-LaRue Designer TipsLinks Updated!Use a nylon hammer to gently flatten the rock & roll oval link before stamping the plain side.Stamp a practice pattern on paper to make sure yo
Paisley Palette Pin Tutorial(Post)Created by: Polly Nobbs-LaRue Designer TipsFor best placement of the holes, make a template: Trace the outline of the paisley on a piece of paper (a Post-it® works great!), then use a pencil to sketch
Sacred Curling Stone Bracelet Tutorial(Post)Created by: Amy MickelsonDesigner TipsUse 6 wavy disks with the dapping set, to create domed bead caps to fit the rotund trade beads. Flatten the rest with a nylon hammer to create 12mm brass heishi.S
Sand Dollar Leather Bracelet Tutorial(Post)This stylishly simple bracelet looks great worn alone, or with other bangles or leather bracelets. Created by: Sondra Barrington Designer TipsCut leather flush after measuring. Use a dab of glue in
Cities in Bloom Bracelet Tutorial(Post)Created by: Polly Nobbs-LaRueDesigner TipsUse a permanent marker to draw a few clouds in the sky, and tufts of grass on the ground. (After etching, I thought my tufts of grass looked more like a citys
Briolette and Vine Earrings Tutorial(Post)Created by: Cindy MorrisDesigner TipsAdd a bead cap, 6mm aventurine gemstone bead, and another bead cap to the eye pin, and make a simple loop. New to jewelry-making? See Basic Jewelry-Making Techniqu
Avocado Dorado Cuff Bracelet Tutorial(Post)Created by: Polly Nobbs-LaRueDesigner TipsSolder Brass Ninja Star* to Copper Disk:If the copper or brass shapes are bent, straighten them with a steel block and nylon or rawhide mallet. (Solder doesn'
Gentle Souls Bracelet 2 Tutorial(Post)As a graceful nod to the free-spirited Bohemian trend, we created a set of beautiful bracelets in softly muted hues: smoky quartz, warm gold, smoked topaz, antique brass, rose gold amber and iridescen
Candy Corn All Dressed Up - Earrings Tutorial(Post)Created by: Janet BoyingtonThese earrings were inspired by the Swarovski crystal candy corn earrings. Janet used a decreasing brick stitch to create the candy corn. Designer TipsBegin with the bottom
Wire Jewelry 101(Post)Jewelry making wire gives you endless choices in creativity! Still, it's easier to get started once you know a few basic tips and terms that will help you determine what type of wire to use for your j
Fold-Formed Earrings Tutorial(Post)Created by: Polly Nobbs-LaRueDesigner TipsJewelry Lab: 52 Experiments, Investigations and Explorations in Metal has a great tutorial on fold forming. Plus of course, Charles Lewton-Brain's book Foldfo
Fresh Pots Bracelet Tutorial(Post)Created by: Jaci BostonDesigner TipsUse silhouettes of multiple teapots and teacups to make this design. No two are alike.Use rubber cement to glue the paper images to the metal.Saw vertically at all
Choosing Clasps & Finishing Methods(Post)Are you asking yourself "What clasp should I use for my bead stringing, wire lashing, kumihimo, multi-strand, chunky chain, awesome creation?" There are 100's of options, and the "correct" answer is
Jewelry-Making Materials(Post)We strive to provide you with clear, honest information, in a complicated and ever-changing world of jewelry-making materials.Our products are made of over 500 different materials (various semi-precio
Products (8)
- Product
- Qty in Cart
- Quantity
- Price
- Subtotal
-


Artistic Wire Wire Straightener (Each)
Artistic Wire$8.49The Artistic Wire Wire Straightener is a must-have tool for every jewelry maker. Designed to remove bends, kinks, and curves from wire, it ensures your jewelry projects look smooth and professional... -


Leverback Ear Wire with Loop and 12mm Cushion Stone Setting - Antiqued Silver Plate (pair)
JBB$6.00Use nylon-jaw pliers and/or a burnishing tool to securely set stone into these settings.See Related Products links (below) for similar items and additional jewelry-making supplies that are often used... -


3x9mm Foldover Jewelry Crimp - Gunmetal Plated (gross)
$23.14#41-254 and 41-255 have a small prong to help hold cord more securely. Push the cord down on the prong before you glue your cord.To avoid scratching the finish, use nylon-jaw pliers or chain-nose... -

3x9mm Foldover Jewelry Crimp - Antiqued Brass Plated (gross)
$23.14#41-254 and 41-255 have a small prong to help hold cord more securely. Push the cord down on the prong before you glue your cord.To avoid scratching the finish, use nylon-jaw pliers or chain-nose... -

3x9mm Foldover Jewelry Crimp - Silver Plated (gross)
$23.14#41-254 and 41-255 have a small prong to help hold cord more securely. Push the cord down on the prong before you glue your cord.To avoid scratching the finish, use nylon-jaw pliers or chain-nose... -

3x9mm Foldover Jewelry Crimp - White Plated (gross)
$23.14#41-254 and 41-255 have a small prong to help hold cord more securely. Push the cord down on the prong before you glue your cord.To avoid scratching the finish, use nylon-jaw pliers or chain-nose... -

3x9mm Foldover Jewelry Crimp - Antiqued Copper Plated (gross)
$23.14#41-254 and 41-255 have a small prong to help hold cord more securely. Push the cord down on the prong before you glue your cord.To avoid scratching the finish, use nylon-jaw pliers or chain-nose... -


JUMPLOCK Jump Rings, Round 6mm 18 Gauge, Gold-Filled (10 Pieces)
The Beadsmith$27.90Introducing the must-have accessory for every jewelry maker - JUMPLOCK Jump Rings! These round 6mm 18 gauge gold-filled rings are not your average jump rings - they're engineered to secure your...
Featured Products


TOHO Amiet Beading Thread, Burgundy (20 Meters/22 Yards)


TOHO Glass Seed Bead, Size 8, 3mm, Transparent Rainbow Frosted Amethyst (Tube)


The BeadSmith Jewelry Pliers, 1-Step Looper, 2.25mm (Each)


Magnet, Round, 18mm (35 Pieces)

Leather Cuff Bracelet, 1" - Denim (Each)


Leather Wrap Bracelet, 1/2" - Natural (Each)
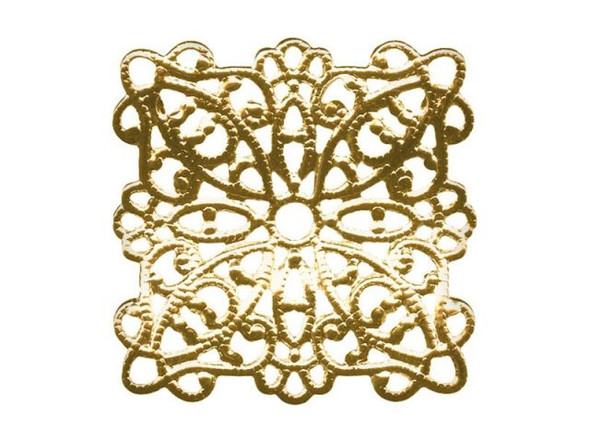
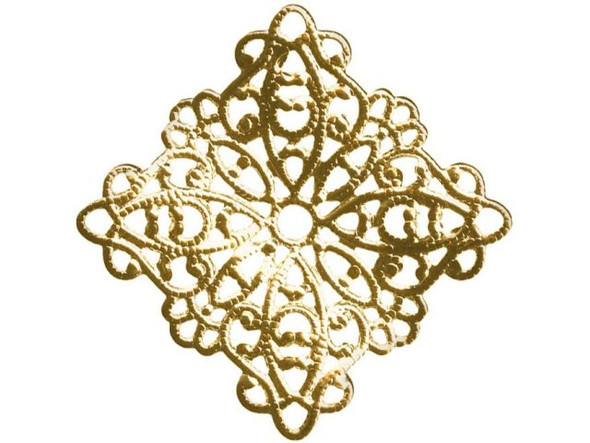
22mm Raw Brass Wavy Square Filigree


Raw Brass Small Oval Filigree with 4 Loops

Antiqued Copper Plated Hair Pin, 15mm Flat Pad (12 Pieces)
