Suggestions:
Categories
News & Information (158)
-
Jump Ring Hint(Post)
When you open and close jump rings, twist ends instead of "ovaling" them.This keeps their round shape better, which makes them easier to close neatly and securely.Many people find it easier to grip j ...
Carnival Queen Earrings Tutorial(Post)Created by: Summer MelaasDesigner TipsPlace 10mm cushion square stone into setting, and use nylon-jaw or chain-nose pliers to gently flatten the prongs onto the stone. See tips in our blog, for best ...
Winter is Coming - Post Earrings Tutorial(Post)Created by: Mollie ValenteDesigner TipsAttach the pinch bail to the top of the snowflake crystal. Align the bail prongs and the crystal hanging holes, then pinch together. Once attached, you can use ...
Hearts and Rain Earrings Tutorial(Post)Created by: Polly Nobbs-LaRueDesigner TipsAdd bicone crystals to the head pins, and make wrapped loops directly onto the loops of the filigree.For the top beaded pin, cut the ball off a ball-end head ...
Spiral Skull Earrings Tutorial(Post)Use memory wire to create your own ear wires!Created by: Rita HutchinsonDesigner TipsUse heavy-duty flush cutters to cut 2 equal lengths of memory wire.Form a loop at one end using sturdy round-nose ...
Cardio Amour Wire Necklace Tutorial(Post)Created by: Mollie Valente Designer TipsFor illustrated step-by-step instructions for this necklace, please see the full Heartbeat Necklace Tutorial in our blog.Suggested Supplies 1 ea ...
Pieces of the Sky Cuff Bracelet Tutorial(Post)Created by: Mollie ValenteDesigner TipsTwist open a 4mm jump ring, string it through the crystal link hole, and twist securely closed. Repeat with the opposite side of the crystal link. For best way ...
Crimping 101(Post)Using crimp beads to finish a necklace or bracelet: 1. String a crimp bead onto the beading cord or wire cable, then string the clasp. 2. Bend the cable back through the crimp bead. 3. Tighten the lo ...
Aventurine Spiral Clip-on Earrings Tutorial(Post)Created by: Polly Nobbs-LaRueDesigner TipsAdd desired beads to eye pin, and use one-step looper (or wire cutters and round-nose pliers) to make a simple loop at the other end.When creating your new l ...
Polynesian Sunset Earrings Tutorial(Post)Created by: Rita Hutchinson Designer TipsFor step by step instructions on making loops, see: Jewelry Basics 101 (PDF).String beads in random pattern in varying 3 to 5" lengths on beading ...
Stella, A Night on the Town Earrings Tutorial(Post)Created by: Polly Nobbs-LaRue Designer TipsString desired pattern of spikes onto the Vintaj® Creative Hoop.Gently bend hoop so the holes are aligned tightly together.Select a medium-sized jump ...
Sandra Leather Bracelet Tutorial(Post)Created by: Rita Hutchinson Designer TipsSqueeze out a few drops of patina (or your favorite metallic acrylic paint) on the craft sheet. Apply patina to the edges of the cuff, and then dry-bru ...
Springtime Blues Earrings Tutorial(Post)Created by: Rita HutchinsonDesigner TipsApply a dab of Loctite gel to Swarovski Setting and place rivoli stone inside. Place on a level surface to dry (if you can find a flat Styrofoam remnant, press ...
Mixed Metal Bracelet/Necklace(Post)Designed by: Guest Designer Deb Floros Suggested Supplies 1 #40-415-01-4 Gold Plated Curb Chain Bracelet with Toggle, 7.5" (12 Pieces) 1 #40-412-8 Copper Plated Curb Chain Bracelet, Large ...
Grey Days Earrings(Post)Created by: Rita HutchinsonDesigner TipsPlace Cushion Stone in Setting, pressing the bezel into place to hold the stone firm. Bend the prongs down from alternate sides to keep the stone centered. Use ...
Pumpkin on the Vine Earrings Tutorial(Post)Created by: Mollie ValenteDesigner TipsMake 2 matching spiral head pins. Follow the steps from the Rings & Things blog post "How to Make Spiral Head Pins.Add the following beads to a spiral head ...
Ultra Simple Blue Rivoli Earrings Tutorial(Post)These sparkling earrings use only 3 components, and 2 common pairs of jewelry pliers (available individually or in a kit). Ultra Blue AB is a vivid blue coating added to a Swarovski rivoli crystal. 1 ...
Tribal Fan Earrings Tutorial(Post)Created by: Polly Nobbs-LaRueDesigner TipsDecide which direction to face the (reversible) ethnic fan connectors and charms, and lay out all pieces. Use a medium-large jump ring (approx. 7mm), attach ...
Drops of Light - Pearl Earrings Tutorial(Post)Created by: Mollie ValenteDesigner TipsFor step-by-step pictorial instructions on making this pair of earrings, see Mollie's blog article: ...
June Baby Earrings Tutorial(Post)Created by: Rita HutchinsonThis might be the easiest pair of earrings you ever make!Designer TipsPlace the CZs face down on the rubber block. Center the post prongs over the stone. Push down straight ...
Silver and Bright Necklace(Post)Created by: Guest Designer Deb FlorosSuggested Supplies1 #56-216-36-3 Instant Pendant with Screw-On Cone - Silver Color (pack)1 #26-114-3 Silver Plated Metal Beads, 5x5mm Barrel, Large Hole (100 Piec ...
With Grace Earrings Tutorial(Post)Created by: Mollie ValenteDesigner TipsUse a steel burnisher to carefully set the cushion stone in the bezel setting.For illustrated step-by-step instructions, see How to Set Rivoli Stones in Bezels ...
Adjustable Anchor Bracelet Tutorial(Post)Created by: Veronica GreenwoodDesigner TipsCut two 18" pieces of leather.Fold one strand in half. Make a larks-head knot by feeding both ends through the loop on the anchor charm, then back through t ...
Vintner Earrings Tutorial(Post)Vintaj findings are designed to be alterable ... here's a fine example!Created by: Rita HutchinsonDesigner TipsSlightly flatten the dome of the Vintaj bead cap. Bend 3 of the "legs" around the sides ...
Tassel and Sparkle - Simple Charm Bracelet Tutorial(Post)Chain bracelets adorned with a simple charm continue to be popular. You can customize this design by using a different colored Swarovski rivoli stone, different styles of chain, or tassels made of di ...
Show Some Love Charm Bracelet(Post)Created by: Guest Designer Deb FlorosSuggested Supplies 1 #40-412-7 Antiqued Copper Plated Curb Chain Bracelet, Large Link (12 Pieces)1 #R16S-T01B Nunn Design Antique Copper-Plated Primitive Drop He ...
Twilight Tide Pool Bracelet Tutorial(Post)Created by: Polly Nobbs-LaRueDesigner Tips Memory wire is steel, and unkind to most jewelry tools. Use heavy-duty flush cutters to cut the desired length: Most memory wire bracelets are 3-5 coils. Th ...
Silver Sea Urchin Bracelet Tutorial(Post)Created by: Polly Nobbs-LaRue Designer Tips Memory wire is steel, and unkind to most jewelry tools.Use heavy-duty flush cutters to cut the desired length: Most memory wire bracelets are 3-5 ...
Red, White and Blue Sparklers Bracelet Tutorial(Post)Need a little patriotic sparkle? This sweet bracelet is a brilliant red, white and blue sparkler for your wrist on Independence Day or any time of year. Bonus: it's easy to swap out the charms for ot ...
April Love - Bracelet Tutorial(Post)Created by: Sondra Barrington How can I customize thee? Let me count the ways... Designer Tips Chain bracelets adorned with a simple heart charm continue to be popular. The sterling silve ...
Random Scraps Bib Necklace Tutorial(Post)Created by: Valorie Nygaard-PouzarDesigner TipsUse whatever random scraps of chain you have handy, to create this quick and trendy layered chain bib-style necklace.Determine how long you want the lon ...
Celebrations Day of the Dead Tutorial(Post)Celebrations Day of the Dead bracelet depicts the musical side of this holiday. The beautiful TierraCast musical charms nicely offset the Swarovski Crystal Mystic Black pearls.Created by: Swarovski's ...
Just Peachy Leather Necklace Tutorial(Post)Created by: Bridget AustinDesigner TipsSee the Jewelry Basics 101 PDF for hints and instructions on how to open and close jump rings.The cord ends and barrel beads are all crimped, no glue required!S ...
Sunshine Squared Necklace Tutorial(Post)Created by: Bridget AustinDesigner TipsNo jump rings are needed; all you need are the links from the chain, to combine the sew-on stones and clasp.See the Jewelry Basics 101 (PDF) for instructions on ...
Diamonds and Lace Filigree Earrings Tutorial(Post)Created by: Mollie ValenteDesigner TipsMix the adhesive according to the manufacturer's instructions.Apply masking tape to the back side of the filigrees. This will prevent the adhesive from leaking ...
Autumn Waterfall Earrings Tutorial(Post)Created by: Polly Nobbs-LaRue Designer Tips3 sunny shades of orange crystal bicones cascade in a warm ombre waterfall, from Vintaj hammered brass rings.Make wire-wrapped loops using ball-end h ...
Embellished Mixed Metal Dog Tag Necklace (Post)Created by: Guest Designer Deb FlorosSuggested Supplies 2 #40-080-01-32-9 Gunmetal Plated Steel Ball Chain, 3.2mm By The FOOT (foot)1 #40-803-6 Antiqued Brass Plated Ball Chain Clasp, 3.2mm (100 Pie ...
Hydrangea Blossom Earrings Tutorial(Post)Created by: Mollie ValenteDesigner TipsTwist a jump ring to open it extra wide.Loop the jump ring around a single pearl in the pearl ball bead.Attach the loop of a French hook ear wire to the jump ri ...
Pretty Posy Filigree Earrings Tutorial(Post)Created by: Mollie ValenteDesigner TipsMix the adhesive according to the manufacturer's instructions.Apply masking tape to the back side of the filigrees. This will prevent the adhesive from leaking ...
Lady-Leg Etched Earrings Tutorial(Post)These fun etched copper earrings were cut out with shears (a jeweler's saw would also work great) and then the resist was hand-drawn with Sharpie, in the patterns of toes and thigh-high stockings.Cre ...
Simple Elegance Earrings Tutorial(Post)Created by: Summer Melaas Designer TipsOpen loop at bottom of ear wire. For best way to open and close loops, see Jump Ring Hint in Jewelry Basics 101 (PDF),Slide one connector onto the ear wi ...
Emerald City Garden Earrings Tutorial(Post)Created by: Mollie ValenteDesigner TipsFor illustrated step-by-step instructions for making this pair of earrings, and links to additional sweet-and-simple designs, see our blog article: The 15-Minut ...
Together Cause Bracelet Tutorial(Post)Created by: Rita HutchinsonDesigner TipsString a bead cap, pastel pink pearl bead, and another bead cap onto the ball-end head pin and make a large wire-wrapped loop. Make the loop large enough, so t ...
Twisted, Not Tangled, Necklace Tutorial(Post)Created by: Rita HutchinsonDesigner TipsThis 24.5"" necklace uses 26 twisty bar connectors. Adjust the finished length of the piece by adding or subtracting connectors.Connect all components together ...
Shining Stars Lashed Earrings Tutorial(Post)Created by: Mollie Valente Designer Tips For a version of this project with step-by-step images, check out Mollie's How to make Lashed Kidney Wire Earrings blog post.Choose two matchin ...
Sour Patch Bracelet Tutorial(Post)Created by: Rita Hutchinson 12mm #4470 Cushion Squares by Swarovski are nearly gone, but these settings also work with most other brands of 12mm cushion squares. Shop remaining colors while they ...
Blushing Bride Bracelet Tutorial(Post)Delicate-looking filigree bead caps give this memory-wire bracelet the crowning touch. Created by: Rita Hutchinson Designer TipsAdd bead caps to each end of (2) 8mm fine rocks tubes and str ...
Tahitian DeLite Earrings Tutorial(Post)Created by: Polly Nobbs-LaRueDesigner TipsCarefully set prongs over the stones using flat-nose pliers. (Nylon jaw pliers can help prevent chipping or scratching.) For step-by-step instructions, see l ...
DIY Lotus Paisley Bracelet(Post)Created by: Sondra BarringtonDesigner TipsSet the cushion square crystal stone in the setting. Keeping the stone centered, use your fingers, a burnishing tool, or flat nylon-jaw pliers to gently bend ...
Sweet and Sour Engraved Bracelet Tutorial(Post)Edged cuff bracelets also work great for leather, fabric, beaded designs and more!Created by: Rita HutchinsonDesigner TipsStamp or sketch design on aluminum sheet if desired.Follow marked (or freehan ...
Titanium Octagon Key Ring Tutorial(Post)Created by: Polly Nobbs-LaRueDesigner TipsThese flat-wire octagonal titanium key rings have a nice look and feel, and the octagon Swarovski Strass crystal continues the geometry. (If you it's crazy t ...
Lotus Mom - Birthstone Bracelet Tutorial(Post)Make this fast, easy Lotus MOM bracelet for Mother's Day, or any time you need a last-minute jewelry project that says: "We Love You, Mom!" Created by: Rings & Things Staff Designer ...
Mehandi Coil Bracelet Tutorial(Post)Created by: Rita HutchinsonDesigner TipsUse shears to cut flat wire. Texture as desired with texturing hammer or metal stamps.Create coil by wrapping at an angle around large barrel of bail making pl ...
Men's Cross Bracelet Tutorial(Post)Created by: Valorie Nygaard-PouzarDesigner TipsCut the leather at an angle to assist in fitting two ends through the hole of the cross connector. For a better grip on the end of the leather, consider ...
Emerald Isle Earrings Tutorial(Post)These elegant Emerald earrings are perfect for a May birthday!Created by: Summer MelaasDesigner Tips Add a 3mm bicone, 4mm rondelle, 18mm emerald cut rectangle, and a final 4mm rondelle bead to a hea ...
Northern Copperhead Earrings Tutorial(Post)Created by: Polly Nobbs-LaRueDesigner TipsUnspool approximately 20" of copper wire. Pull it smooth with flat nylon-jaw pliers.Trim the end neatly (flush) with flush cutters.Make 6 equal sized coils u ...
5 Minute Rings Tutorial(Post)Created by: Polly Nobbs-LaRueDesigner TipsCut a 20-gauge or 24-gauge 0.25" (wide) strip of copper, brass or sterling sheet approximately 2.75" long.Smooth and straighten with a nylon hammer.Optional: ...
September Sky Earrings Tutorial(Post)Sapphire and sterling silver are a perfect combination. This September birthstone pairing features mini-sized Swarovski crystal briolette pendants, small sterling-silver crescent-moon connector charm ...
Hammerfall Earrings Tutorial(Post)Designer Tips These earrings are easy to assemble, yet put on a great show.Use 10mm jump rings to connect each link, and another 10mm jump ring to attach the dagger bead to the smallest link. Fo ...
Infinite Path Earrings Tutorial(Post)Created by: Kameron FoxDesigner TipsThese earrings and matching bracelet were created using the step by step instructions on page 92 ofBeautiful Wire Jewelry for Beaders: Creative Wirework Projects f ...
Infinite Path Bracelet Tutorial(Post)Created by: Kameron FoxDesigner TipsThese earrings and matching bracelet were created using the step by step instructions on page 92 of Beautiful Wire Jewelry for Beaders: Creative Wirework Projects ...
Fireblossom Earrings Tutorial(Post)Created by: Rita Hutchinson Designer Tips Determine desired loop lengths and cut leather. For these earring, I cut 2 pieces at about 5" and 2 pieces at about 3".String large-hole gemstone on ...
Hibiscus Flower Earrings(Post)Created by: PRESTIGE CrystalSuggested Supplies1 #34-962 Argentium Silver French Hook Earring Wires, Plain (pair)1 #37-722-3 Silver Plated Eye Pin, 2", Standard (Pack)2 #49-947-11-WB TierraCast Interm ...
Matte Satin Necklace Tutorial(Post)Created by: Rita HutchinsonDesigner TipsStart with plenty of 26-gauge wire, and anchor wire to one side of arc connector. Add 4mm beads and extra lashes between each bead. Finish off the end with add ...
Tangerine Ring Tutorial(Post)Created by: Veronica GreenwoodDesigner TipsPlace the 12mm rivoli in the bezel setting.Using the nylon-jaw pliers, gently push the prongs down over the crystal, starting with the top left prong, next ...
Simply Springy 2-Hole Bracelet(Post)Designed by: Guest Designer Deb Floros Suggested Supplies 1 #61-840-50-01 Beadalon Cord, WildFire, 0.006", 0.15mm, 50yd - Frost (50 yard) 1 #20-928-1831 Miyuki Delica 11/0 Beads - Galvanized Silver ...
Patterned Wire Earrings Tutorial(Post)Created by: Polly Nobbs-LaRue Designer TipsMeasure, mark and cut patterned wire to desired length.File ends smooth with slightly rounded corners, so the wire pieces match the curve of the disk ...
Dapped Love Earrings Tutorial(Post)Designer TipsStamp "Love" or desired word or pattern on 19mm brass disk, and antique it using Novacan. (See Metal Stamping 101)Punch a hole near the top of both disks using the 1/16" side of the 2-ho ...
Cumulus Threader Earrings Tutorial(Post)Created by: Mollie Valente Designer TipsTwist a jump ring to open it extra wide.Loop the jump ring around a single pearl in the pearl ball bead.Attach the loop of an ear thread to the jump ring.Twist ...
Golden Halos Earrings Tutorial(Post)Due to the popularity of 10mm cushion square settings, we've included links to alternate styles below in case the primary setting used in the Golden Halos earrings is temporarily unavailable. C ...
Natali Earrings Tutorial(Post)Created by: Summer MelaasNatali is a simple, sweet pair of earrings featuring lotus flower beads from TierraCast, as well as matching antiqued brass spike charms and Niobium ear wires. Add a subtle f ...
Snowy Crystal Christmas Tree Earrings Tutorial(Post)Design by: Swarovski's Create Your Style Design Team and Rings & Things.Designer TipsFor each earring, string onto one head pin: one 12mm margarita; one 10mm margarita; one margarita 8mm; one 6mm ...
Astral Love Resin Necklace Tutorial(Post)Created by: Rita HutchinsonDesigner TipsSee instruction page for making no-solder bezels.Cut paper to match bezel wire shape.Seal paper and adhere to inside of bezel.Mix a small batch of resin and po ...
Icicle Lights Earrings Tutorial(Post)Created by: Rita HutchinsonDesign by: Swarovski's Create Your Style Design TeamDesigner TipsAdd a crystal teardrop bead to a head pin (narrow side towards the head of the pin), add a rhinestone wheel ...
Happy Octopus Bangle Bracelet Tutorial(Post)Created by: Mollie Valente Designer TipsFor a step-by-step tutorial with images for this project, see the blog post: How to Make an Expandable Wire Bangle Bracelet.Use heavy-duty cutter ...
Tethered - Lanyard Tutorial(Post)The key to making masculine jewelry is using masculine supplies and keeping it simple. Combine strong leather or waxed cotton cord with bone beads, metal beads, or glass trade beads and then add a bo ...
January Birthstone Fidget Bracelet(Post)Created by: Guest Designer Deb FlorosSuggested Supplies 2 #1-625-9011/s Faceted Crow Beads 6 x 4mm (2.5mm hole) : Garnet (25pcs)1 #20-111-329 TOHO Glass Seed Bead, Size 11, 2.1mm, Gold-Lustered Afri ...
Wavy Gravy Necklace Tutorial(Post)Created by: Polly Nobbs-LaRueDesigner TipsThis simply strung repeating pattern necklace has a finished length of 18"". The wavy disk beads give the design extra dimension and texture.For step-by-step ...
Cute as a Button Necklace Tutorial(Post)Created by: Mollie Valente Designer TipsCenter the button on the pendant finding and mark the hole locations with a Sharpie® pen. Punch holes in the pendant finding.Tie the button onto the pendant fi ...
Egyptian Sun Earring Tutorial(Post)Learn how to make earrings that shine like the sun, with beautiful Swarovski crystal scarab beads and crystal Sahara suns!Created by: Summer MelaasDesigner Tips Gold-fill items keep their shine for a ...
Classic Crystal Christmas Trees Earrings Tutorial(Post)Created by: Rita HutchinsonDesigner TipsFor complete step-by-step directions, visit our Blog post: Twelve Days of Christmas Jewelry Designs: Swarovski Crystal Tree EarringsFree Technique Sheets & ...
TierraCast Luna Moth Earrings Tutorial(Post)Created by: TierraCastDesigner TipsCut a 6" piece of fine beading wire. String one hex spacer and a size 1 crimp bead onto both ends, forming a 1/4" loop at the center of the wire (this will be the t ...
Petite Artemis Angel Earrings Tutorial(Post)This project uses Swarovski crystals and TierraCast® components. Created by: Rita Hutchinson. Design by: CREATE YOUR STYLE.Designer TipsUse the puffed rondelle bead to fill the opening in the large e ...
Pearl and Tassel Charm Leather Bracelet Tutorial(Post)Created by: Sondra Barrington Designer TipsThe ring connector is the focal of this bracelet. For a more free-flowing design, attach charms to the leather cording.Wire-wrap a pearl bead with a la ...
Lotus Drop Earring Tutorial(Post)Created by: Summer MelaasDesigner TipsCut approx. 2" of wire and make a simple loop or wire-wrapped loop at one end, but add the lotus flower charm before closing loop. Add 2 glass O beads, a crystal ...
College Days Charm Bracelet Tutorial(Post)Created by: Rita HutchinsonDesigner TipsGlue crystal rivolis into settings. Create divots in a piece of scrap Styrofoam, to allow settings to dry flat.Create wrapped loops (or simple loops) with the ...
Geared Ring Tutorial(Post)Created by: Polly Nobbs-LaRue Designer TipsCut a strip of 20-gauge sheet 2.75" long. Smooth and straighten with a nylon hammer.Optional: Texture or stamp (see "How to Make a Metal-Stamped ...
Tamed Urchin Ring Tutorial(Post)Created by: Rita HutchinsonDesigner TipsCenter the stone in the ring setting and gently squeeze in prongs (with your hands or pliers) working from opposite sides to keep the stone centered. Once the ...
Pretty in Pink Bracelet Tutorial(Post)Created by: The Swarovski Design Team Designer TipsFor best way to open and close loops, see Jump Ring Hint in Jewelry Basics 101 (PDF). Suggested Supplies1 6-pack #02-088-34-182 ...
Geometric Rainbow Gold Earrings Tutorial(Post)Quick tutorial on professional techniques for making a simple geometric pair of earrings with a half-ball drop-post, Swarovski crystal rainbow dark teardrop, and TierraCast gold plated dagger charm.
Elegant Brass Drops Tutorial(Post)Designer TipsCut the wire into two 1" pieces. Make a simple loop, slide on one 6mm bicone bead, and make a simple loop. For step-by-step instructions on making loops, and the best way to open and sec ...
Feathered Fabulous Dangly Earrings(Post)Created by: Guest Designer Deb FlorosSuggested Supplies1 #44-153-9 17x25mm Gunmetal Triangle Filigree (12 Pieces)6 #44-940-81-GM TierraCast Black Gunmetal Plated Small Feather Charm (Each)1 #34-061-1 ...
DIY Adjustable Bangle Bracelet Tutorial(Post)This style of bracelet is a great one-size-fits-all design. OK, so technically the same bracelet size won't fit both a petite 6-year-old and a Samoan warrior, but odds are that you can determine one ...
Ladylike Lariat Necklace Tutorial(Post)Created by: Rita HutchinsonDesigner TipsFreshwater pearls often have small holes. If the hole is too small, use a thinner headpin, or ream the opening with a battery operated bead reamer (#69-058).Fo ...
Exotic Statement Necklace (Post)Designed by: Guest Designer Deb Floros Suggested Supplies 1 #88-400-003-5 58x50mm Pewter Connector, Large U-Shape Link - Antiqued Silver Plated (Each) 1 #21-883-052 Natural Agate Gemstone Beads, Rou ...
Chainmaille-Style Earrings Tutorial(Post)Created by: Mollie ValenteDesigner TipsThis project has step-by-step illustrated instructions in our blog: How To Make Chainmaille-Style EarringsSuggested Supplies1 ounce (use 8 pieces) #37-178-1 Whi ...
Hexed Wire Bracelet - Tutorial(Post)Learn a simple and sparkling way to make bangle bracelets with hex wire. No soldering or wire wrapping required!Created by: Rita HutchinsonDesigner TipsUnroll and straighten enough wire for all brace ...
Garden Gate Earrings Tutorial(Post)Created by: Mollie ValenteDesigner TipsFor step-by-step illustrated instructions for making this pair of earrings, see our Swarovski Dome Round Stone blog article.Suggested Supplies2 each #01-400-12- ...
Rough Around The Edges Hoop Earrings Tutorial(Post)A drawplate is excellent for hardening soft wire without making it brittle, so custom ear wires and handmade hoops are springy and keep their shape.Created by: Rita HutchinsonDesigner TipsCut a lengt ...
Tough Girl Rhinestone Chain and Leather Bracelet Tutorial(Post)Created by: Rita Hutchinson Designer Tips Measure your rhinestone chain pieces to the same length for best results.Use an awl to pierce holes in the leather, and sew the chain to the cuf ...
Products (20)
- Product
- Qty in Cart
- Quantity
- Price
- Subtotal
-


The Beadsmith Jeweller's Micro Pliers Chain Nose Flat Nose
The Beadsmith$6.69Transform your DIY jewelry-making game with The Beadsmith Jeweller's Micro Pliers. These chain nose and flat nose pliers are the must-have crafting tool for every jewelry maker. The precision and... -


The Beadsmith Jewelry Micro Pliers Duckbill Flat Nose
The Beadsmith$7.69Get ready to take your DIY jewelry-making skills to the next level with The Beadsmith Jewelry Micro Pliers Duckbill Flat Nose! These expertly crafted micro pliers are your secret weapon for flawless... -


The Beadsmith Wire Looper Multi-step Ring Looping Plier 13, 16, 20mm
The Beadsmith$16.15Looking to take your DIY jewelry efforts up a notch? Say hello to The Beadsmith Wire Looper Multi-step Ring Looping Plier. Perfect for precision wire looping and finishing, these pliers make... -
")
JBB Findings Silver Plated Crimp End with Loop, 1.5mm I.D. (10 Pieces)
JBB$3.08Crimp ends with loops are designed to be flattened. (Do not attempt to round them after flattening, like you would with crimp beads and crimping pliers.) Depending on their size (length) and your... -
")
Gold Plated Crimp Tube With Loop, 1.3mm I.D. (72 pcs)
$13.04Crimp ends with loops are designed to be flattened. (Do not attempt to round them after flattening, like you would with crimp beads and crimping pliers.) Depending on their size (length) and your... -
")
Sterling Silver Crimp Tube with Loop, 0.9mm (Each)
$1.89Crimp ends with loops are designed to be flattened. (Do not attempt to round them after flattening, like you would with crimp beads and crimping pliers.) Depending on their size (length) and your... -
")
")
3x9mm Foldover Jewelry Crimp - Gunmetal Plated (gross)
$23.14#41-254 and 41-255 have a small prong to help hold cord more securely. Push the cord down on the prong before you glue your cord.To avoid scratching the finish, use nylon-jaw pliers or chain-nose... -
")
3x9mm Foldover Jewelry Crimp - White Plated (gross)
$23.14#41-254 and 41-255 have a small prong to help hold cord more securely. Push the cord down on the prong before you glue your cord.To avoid scratching the finish, use nylon-jaw pliers or chain-nose... -
")
3x9mm Foldover Jewelry Crimp - Antiqued Brass Plated (gross)
$23.14#41-254 and 41-255 have a small prong to help hold cord more securely. Push the cord down on the prong before you glue your cord.To avoid scratching the finish, use nylon-jaw pliers or chain-nose... -
")
3x9mm Foldover Jewelry Crimp - Antiqued Copper Plated (gross)
$23.14#41-254 and 41-255 have a small prong to help hold cord more securely. Push the cord down on the prong before you glue your cord.To avoid scratching the finish, use nylon-jaw pliers or chain-nose... -
")
3x9mm Foldover Jewelry Crimp - Silver Plated (gross)
$23.14#41-254 and 41-255 have a small prong to help hold cord more securely. Push the cord down on the prong before you glue your cord.To avoid scratching the finish, use nylon-jaw pliers or chain-nose... -
")
")
Silver Plated Earring Hoop Component, Manipulating, 1" (72 pcs)
$11.15How to Use Manipulating HoopsMake wine glass charms or hoop earrings by stringing beads and charms directly onto the hoop and bending up the round wire end with round-nose or narrow flat-nose pliers... -
")
")
White Plated Earring Hoop Component, Manipulating, 1" (72 pcs)
$16.35How to Use Manipulating HoopsMake wine glass charms or hoop earrings by stringing beads and charms directly onto the hoop and bending up the round wire end with round-nose or narrow flat-nose pliers... -
")
Gunmetal Coil End, 3x8mm, 1.7mm I.D. (gross)
$3.14To Use: Double the end of your cord. (Optional: Add a dab of glue.) Twist the cord slightly as you push it all the way into the coil end. Since cord width varies, so does the ease of this... -
")
White Plated Coil End, 3x8mm, 1.7mm I.D. (gross)
$2.74To Use: Double the end of your cord. (Optional: Add a dab of glue.) Twist the cord slightly as you push it all the way into the coil end. Since cord width varies, so does the ease of this... -
")
Silver Plated Coil End, 3x8mm, 1.7mm I.D. (gross)
$3.14To Use: Double the end of your cord. (Optional: Add a dab of glue.) Twist the cord slightly as you push it all the way into the coil end. Since cord width varies, so does the ease of this... -
")
Gunmetal Coil End, 4mm (gross)
$6.49To Use: Double the end of your cord. (Optional: Add a dab of glue.) Twist the cord slightly as you push it all the way into the coil end. Since cord width varies, so does the ease of this... -
")
Antiqued Brass Plated Coil End, 4mm (gross)
$6.49To Use: Double the end of your cord. (Optional: Add a dab of glue.) Twist the cord slightly as you push it all the way into the coil end. Since cord width varies, so does the ease of this... -
")
Gold Plated Coil End, 3x8mm, 1.7mm I.D. (gross)
$5.17To Use: Double the end of your cord. (Optional: Add a dab of glue.) Twist the cord slightly as you push it all the way into the coil end. Since cord width varies, so does the ease of this... -
")
Gold Plated Coil End, 4mm (gross)
$9.00To Use: Double the end of your cord. (Optional: Add a dab of glue.) Twist the cord slightly as you push it all the way into the coil end. Since cord width varies, so does the ease of this...
Featured Products
")
")
TOHO Amiet Beading Thread, Burgundy (20 Meters/22 Yards)
")
")
TOHO Glass Seed Bead, Size 8, 3mm, Transparent Rainbow Frosted Amethyst (Tube)
")
")
The BeadSmith Jewelry Pliers, 1-Step Looper, 2.25mm (Each)
")
")
Magnet, Round, 18mm (35 Pieces)
")
")
14kt Gold-Filled Lobster Clasp, 10mm (Each)
")
Leather Cuff Bracelet, 1" - Denim (Each)
")
")
Leather Wrap Bracelet, 1/2" - Natural (Each)
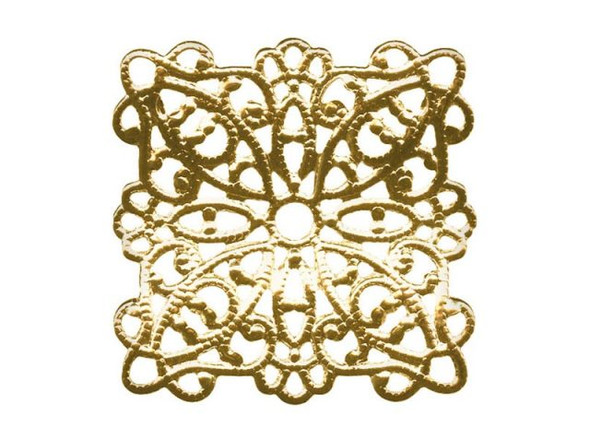
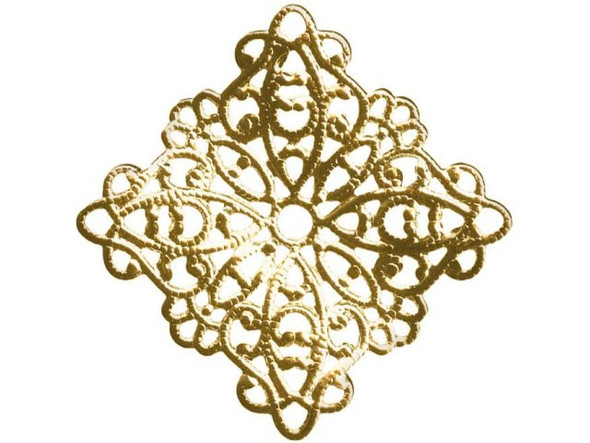
22mm Raw Brass Wavy Square Filigree
")
")
Raw Brass Small Oval Filigree with 4 Loops
")
Antiqued Copper Plated Hair Pin, 15mm Flat Pad (12 Pieces)
")